Toilet Flush Valve Replacement: A DIY Guide
We may receive a commission on purchases made from links.
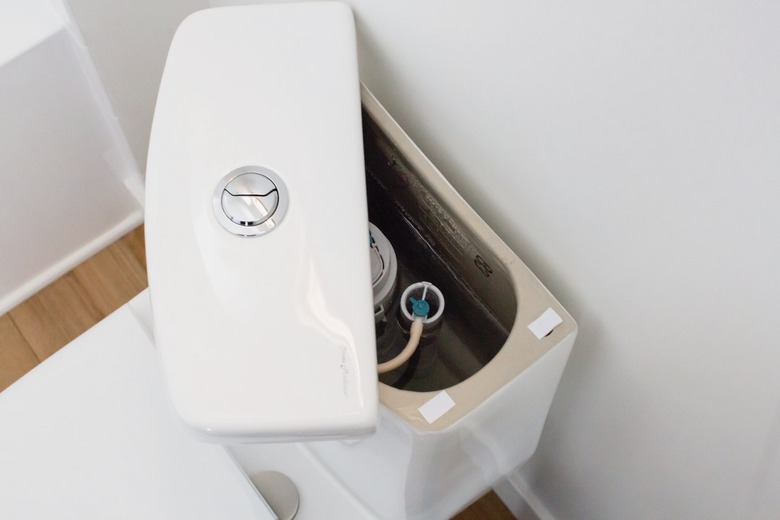
The flush valve, which is found at the bottom of your toilet tank, serves to open and close the water flow down into the tank at the start and end of each flush cycle. Toilet flush valve replacement isn't the most common repair homeowners will make, but it's likely that at some point over the life of the toilet, you may need to replace this component.
The flush valve is a large plastic or brass fitting with an attached toilet flapper that seats into the flush valve opening. The flush valve unit includes a tall overflow tube that serves to prevent water from overflowing the tank if the fill valve fails to shut off properly. Problems can occur when the smooth surface of the flush valve becomes corroded or covered with mineral scale, which prevents the flapper from sealing tightly. Less commonly, the flush valve can crack, which usually leads to more serious leakage from the toilet tank.
Replacing a Flush Valve
Replacing a Flush Valve
Toilet flush valve replacement generally takes a couple of hours of work, but it's not a difficult repair. Toilet flush valve replacement is well within the skills of most DIYers, and it's rarely necessary to call in a plumber for this work.
Flush valves generally come as kits that include all the necessary parts, including the flush valve and overflow tube, flapper, spud washer, tank bolts and tank bolt washers. It's generally best to replace all these parts while servicing the toilet rather than reusing any of the old parts. The new flush valve may use a somewhat different design than the old valve. For example, it may use a canister design rather than a standard flapper to seal the opening. There's nothing wrong with this provided that the new flush valve fits the toilet.
If you have a dual-flush toilet that gives you an option of two levels of flush volume, make sure to buy a replacement flush valve specified for your toilet. These flush valves use a special design, so make sure to buy a replacement that is an exact match.
Things Needed
-
Penetrating oil (if needed)
-
New flush valve with overflow tube
-
Bucket and sponge
-
Screwdriver
-
Socket wrench
-
Tongue-and-groove pliers
-
Hacksaw (if needed)
-
Torpedo level
How to Replace a Toilet Flush Valve
1. Shut Off the Water
Turn off the fixture shutoff valve, located on the water supply pipe where the supply tube brings water to the toilet fill valve. Flush the toilet and then sponge out the remaining water from the tank. Disconnect the fill valve by loosening the coupling nut that holds the water supply tube to the tailpiece on the fill valve.
From inside the toilet tank, disconnect the chain that connects the toilet handle lift rod to the flapper valve or flush cylinder.
 Sanford Creative
2. Remove the Toilet Tank
Unscrew the nuts threaded onto the bolts holding the toilet tank to the bowl. You may need to hold the heads of the bolts steady with a screwdriver inserted down through the top of the tank as you unscrew the nuts on the bottom of the tank using a socket wrench. If these nuts are frozen because of rust or corrosion, spray penetrating oil on the threads to loosen the nuts.
When the nuts are removed from the tank bolts, carefully lift the toilet tank off the toilet bowl and set it on a flat surface.
3. Remove the Old Flush Valve
Remove the large, soft gasket from the tailpiece of the flush valve. Using tongue-and-groove pliers (or a specialty spud wrench), unscrew the large spud nut that is threaded onto the tailpiece of the flush valve. Carefully extract the flush valve from inside the tank.
4. Install the New Flush Valve
Following the manufacturer's instructions, insert the new flush valve into the toilet tank. Make sure to install all seals or washers that are included with the flush valve kit. Loosely thread the spud nut onto the flush valve's tailpiece.
Look inside the tank and check the height of the overflow tube to make sure it is at least 1 inch below the hole where the flush handle is mounted in the tank. If the overflow tube is too long, some manufacturers, such as Fluidmaster, recommend that you cut off the overflow tube using a hacksaw. Other flush valves have an adjustable-height overflow tube.
Position the flush valve so it is aligned correctly in the tank with the overflow tube facing to the back or side and then tighten down the spud nut securely. You may need to hold the flush valve steady with your hand while tightening the nut to prevent it from rotating.
Next, place the soft spud washer or gasket over the flush valve tailpiece and the spud nut with the beveled side facing away from the tank.
 Hunker in Partnership With Acme Real Estate
5. Reattach the Toilet Tank
Carefully position the toilet tank on the toilet bowl so the spud washer fits inside the flush opening. Insert the new tank bolts (with washers fitted just under the bolt heads) down through the mounting holes in the tank and then thread the mounting nuts onto the bolts.
From the bottom of the tank, securely tighten the mounting nuts onto the tank bolts. The washers beneath the heads of the tank bolts should compress slightly but take care not to overtighten the nuts because it's possible to crack the bottom of the tank by overtightening. If necessary, use a torpedo level to make sure the tank is sitting level on the toilet bowl.
6. Reconnect the Lift Chain and Fill Valve
From inside the tank, connect the lift chain from the handle rod to the flapper or flush valve cylinder. Some flush valve kits include a new lift chain; follow the manufacturer's instructions for installation. Then, reconnect the water supply tube to the tailpiece on the fill valve and tighten the coupling nut with pliers.
7. Test the Toilet
Turn on the water, allow the tank to fill and then check the bottom of the toilet for leaks around the tank bolts and around the coupling nut on the fill valve. If you notice any leaking, tighten the fittings slightly until the leaking stops.
Flush the toilet to test its operation. Some adjustments to the lift chain may be necessary. If the toilet runs with the fill valve failing to shut off at the end of the flush cycle, it may mean that water is continuing to leak down through the flush valve. This often means that the flapper needs some small adjustment or that the tank bolts need to be tightened further to compress the tank down against the toilet bowl. Take care not to overtighten and crack the bowl.