Turning An Old Dresser Into A Bathroom Vanity
As described in Kitchen & Bath Design News, a driving trend in bathroom design is the desire for unusual sinks, especially vessel and farmhouse sinks. A perfect match is to use an old dresser or other piece of vintage furniture as the bathroom vanity for these unique sinks. Side-board tables, library card catalogs or even some end tables can make good choices for a bathroom vanity. This type of sink-vanity pairing can work especially well for bathrooms with a rustic or farmhouse design theme, where a unique, eclectic bathroom vanity is a perfect fit.
You have several choices to make when planning a DIY bathroom remodel using a piece of old furniture as the vanity.
Type of Sink for a Dresser Vanity
Type of Sink for a Dresser Vanity
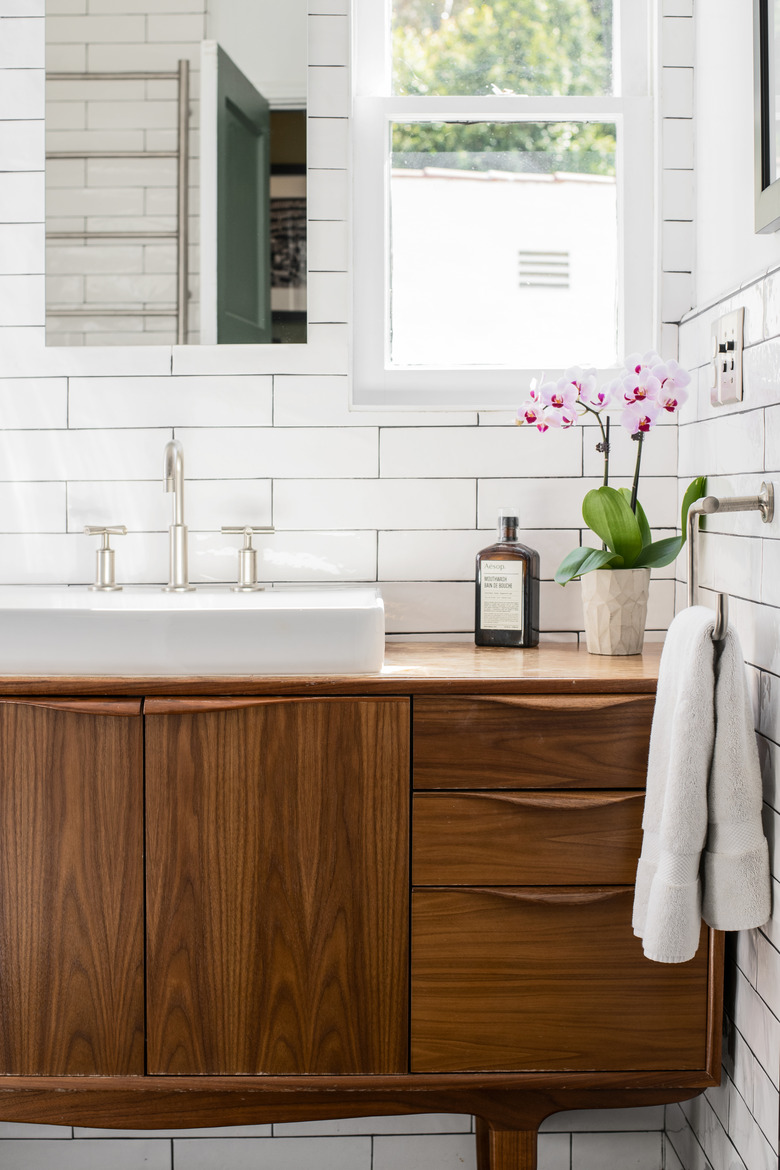
The bathroom sink can be recessed into a cutout in the dresser top and fitted with a drop-in sink in the same fashion as is usually done with standard vanity cabinets, or you can use a vessel sink — a more decorative fixture that rests on the dresser top. Here, a small hole is cut in the dresser top that is just large enough to accommodate the sink's drain opening.
Another option is using an integrated sink/countertop unit, an increasingly popular and easy option. In an integrated sink, the bowl is already built into a countertop unit. Once considered a little low budget, today's integrated sinks are often built into high-end quartz countertops. If you are using this kind of sink, the dresser top is either first removed or a large opening is cut to make space for the countertop's sink bowl.
Finally, there are farmhouse sinks for bathrooms. Old dressers require a substantial amount of alteration to make them suitable to hold a farmhouse sink. The front of the dresser must be cut away to make room for the front apron of the sink. For this reason, it's rather unusual to use an old dresser as the vanity with these types of sinks.
 Stephen Paul
Single-Bowl vs. Double-Bowl Sinks
Single-Bowl vs. Double-Bowl Sinks
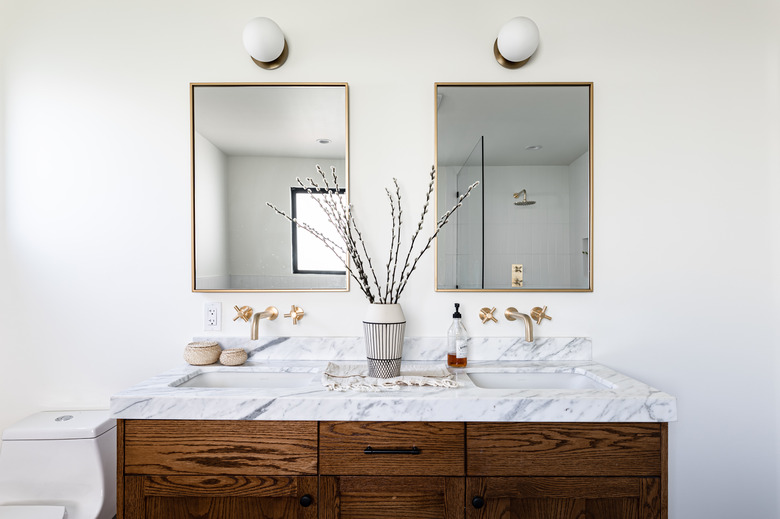
As is the case when you are using standard commercial vanity cabinets, you have the same decision when converting a dresser: Do you want one sink or two? You can use a smaller dresser and install a single sink bowl or use a longer dresser and install two sink bowls side by side. This is somewhat unusual when converting an old dresser, as many vintage pieces aren't long enough. However, if you have a particularly long dresser, then double sinks may be a possibility. Most designers say that a dresser needs to be at least 6 feet long to adequately contain two sink bowls, although a shorter dresser may be able to handle two vessel sinks.
Another option is to design your bathroom to include two single sinks, each fitted into its own small dresser. This requires a bathroom with plenty of space, but it can create a truly unique look.
Hidden Plumbing vs. Exposed Plumbing
Most standard cabinet vanities have doors that enclose the front of the vanity, which hides the drain and faucet connections. With old dressers and some other furniture pieces, the plumbing can be fairly easily hidden by the piece's cabinet doors or drawer fronts. However, with many other pieces of furniture, such as side-board tables or end tables used as vanities, the plumbing fittings are left exposed.
With this type of installation, the plumbing fittings are chosen for their appearance — chromed copper or brass drain fittings rather than plastic, for example, and steel mesh supply tubes rather than plastic tubes running to the faucet tailpieces. Remember that most dressers and many other furniture pieces will require some carpentry alterations in order to hide the plumbing. With dressers, shortening the drawers or eliminating the drawer box on the top drawer is the most common alteration.
 Nicole Mason
Existing Dresser Top or Added Countertop
Existing Dresser Top or Added Countertop
If the dresser top is in good condition, you can use it as the countertop surface for your vanity. Wood is usually not a recommended material for a countertop in wet locations, so if you decide to simply use the dresser top as the countertop, the surface will need to be refinished to make it as waterproof as possible. Most essential is that the surface gets a good, thick coat of a quality waterproof varnish, such as marine-grade polyurethane.
Often, the better solution is to place a purchased countertop over the existing dresser top. Solid-surface material, genuine granite, synthetic stone (quartz) or even a high-end, custom-built laminate countertop can work well with an old dresser. If you are using an add-on countertop, the old dresser top can first be removed so that the new countertop rests on the side walls of the dresser, or the new countertop can be laid directly over the old dresser top.
Choosing an Old Dresser for a Bathroom Vanity
Choosing an Old Dresser for a Bathroom Vanity
When evaluating an old dresser for its suitability as a bathroom vanity, size and structural integrity are the key considerations for your DIY project. The closer your dresser matches the design standards for a standard vanity cabinet, the easier it will be to integrate into your bathroom design.
Standard vanity cabinets are usually about 21 inches deep. With a 1-inch countertop overhang, this means the vanity stands out from the wall about 22 inches. Most dressers are about 18 to 20 inches deep, which is why this is the piece most often converted to a bathroom vanity. In practice, any furniture piece that is 18 to 24 inches deep can work well as a bathroom vanity.
The standard height for a bathroom vanity is 32 to 34 inches (measured from the floor to the top surface of the countertop). However, taller 36-inch-high vanities that put the working surface at roughly the same height as kitchen cabinets are becoming more popular. Standard dressers are usually about 30 inches tall, making them quite suitable for use as vanities. If you want a taller bathroom countertop, you will need to select a taller dresser, or you might be able to raise the dresser using blocking.
The length/width of a standard bathroom vanity varies from 24 to 72 inches in 2-inch increments, although even narrower vanities are available for very cramped spaces. Dressers have similar dimensions, ranging from 24 to 74 inches. For a basic drop-in sink, a dresser at least 24 inches wide is needed, but most designers suggest that a 42-inch-wide single vanity is the perfect size. Vessel sinks may come in unique sizes that may be a better fit for a narrower dresser.
Not every dresser is suitable for installing double sink bowls. As summarized by the International Code Council, the International Plumbing Code (Section 405.3.1) indicates that you must have 15 inches from the center of the first bowl to an end wall or countertop as well as 30 inches from the center of the bowl to the center of the next bowl. In practice, 6 feet (72 inches) is really the minimum width necessary to allow for two sink bowls to provide the necessary clearance.
If the faucet will be attached to the dresser top or countertop rather than to the sink, make sure there is sufficient space between the wall and the faucet handles. Check faucet manufacturers for these specifications. Alternatively, you can use a wall-mount faucet that is installed onto the wall behind the vanity.
 Sanford Creative
How to Convert a Dresser into a Bathroom Vanity
1. Evaluate the Dresser
The old dresser should be in good enough shape to serve its function. Look for a piece that is structurally sturdy and that has a solid top. The dresser should also have a back panel or top rail that can be firmly anchored to the wall.
2. Choose a Sink and Faucet
How you adapt the dresser will depend on the type of sink and faucet you choose. With drop-in sinks, you will need to cut a rather large hole in the dresser top into which the sink will sit recessed into the dresser. Vessel sinks usually require only a smaller hole to fit the bowl's drain opening.
If the faucet will be mounted on the dresser top, you will also be cutting holes in the dresser top to hold the fixture. If you are installing an integrated sink/countertop, you may be removing the entire dresser top and setting the fixture in place over the dresser carcass. With farmhouse sinks, the faucet is usually mounted onto the wall behind the sink.
3. Make Necessary Repairs and Alterations
Most old dressers will require structural repairs and alterations. This usually involves basic repairs to fix any loose joints as well as more complex alterations. Furniture pieces that have open legs, like end tables, may require only that you cut holes in the top. However, old dressers nearly always require additional work, which can include the following:
- Cutting off the legs to shorten the dresser to a height that makes it work as a bathroom vanity. In some cases, you might be adding blocking to raise the dresser.
- Removing the dresser back (or cutting one or more holes) to provide space for the drain pipes and water lines.
- Modifying the top drawer to hold the sink basin and drain fitting. Sometimes, you can simply cut a large hole in the bottom of the top drawer where the sink and drain lines will fit. More often, the best practice is to remove this drawer entirely, salvaging the drawer front as a "false drawer," which is screwed permanently in place.
- Shortening the lower drawers to provide space for plumbing pipes to run behind them. To do this, the drawers are rebuilt one by one, with the sides and bottom shortened so that the drawers have space behind them.
- Reconfiguring the top drawer to allow space for the apron on a farmhouse sink. This can involve some fairly complex cabinetry work that may be best handled by a finish carpenter.
Finally, it is generally best to do whatever refinishing or painting is needed before installation. It's much easier to do this while the dresser is not yet installed.
4. Prepare the Countertop
Prior to installing the dresser/vanity, you'll need to prepare the countertop to accept the sink and faucet. In cases where the existing dresser top will serve as the countertop, this usually involves sanding, staining and varnishing the dresser top. Remember that vanity tops are subject to a lot of water, so wood surfaces will need to be very well sealed with application of several layers of marine-grade polyurethane varnish.
If you plan to add a separate countertop surface, you will have two options: remove the old dresser top completely so that the new countertop rests directly on the dresser walls or place the new countertop directly onto the dresser top.
Countertop preparation concludes with cutting whatever holes are necessary to accept the sink and faucet. If the faucet is attached to the sink, you'll be cutting just a single hole for the sink to fit. For a faucet mounted to the countertop, you'll cut an additional hole (or holes) for the faucet components. These holes are generally cut with a jigsaw and/or a drill and hole saw following the manufacturer's templates.
5. Install the Dresser/Vanity
With the necessary prep work done, the converted vanity can be set in place and anchored to the wall with long screws driven through the back of the dresser and into wall studs. Before attaching, make sure the vanity sits level. If necessary, you can shim under the bottom to level it.
 Brandon Stanley
6. Install the Sink
With the vanity in place, all that remains is the basic plumbing work. How this is done will depend on the type of sink you are installing.
- With a drop-in sink, you generally run a bead of caulk around the sink cutout and then lower the sink in place. After the plumbing pipe connections are made, another bead of caulk is run around the lip of the sink to seal the rim where it touches the countertop.
- With a vessel sink, the drain tailpiece of the sink is inserted into the countertop opening using whatever gaskets are supplied by the sink manufacturer. The bowl is carefully leveled and then a large mounting nut is threaded onto the drain tailpiece from below to hold the bowl in place.
- With integrated sink/countertops, the entire unit is simply lowered onto the vanity cabinet. Many integrated sinks are so heavy that no attachment to the cabinet is necessary; other units may have brackets.
7. Install the Faucet
With many sinks, the faucet is mounted onto the rear flange of the sink behind the basin. If the faucet is mounted onto the countertop, the faucet body is inserted through holes cut into the countertop and then secured in place with mounting nuts threaded onto the sink tailpieces from below. With this type of sink, some plumbers like to attach the faucet to the sink before lowering the sink into place.
8. Make Plumbing Connections
The final step is to make the plumbing connections for the water pipes and the drain lines. The hot and cold water supply lines are attached to the faucet tailpieces with flexible supply tubes running to shut-off valves on the water supply stubouts. The sink's drain tailpiece is joined to the branch drain via a drain trap kit.