How To Install Kitchen Lights
We may receive a commission on purchases made from links.
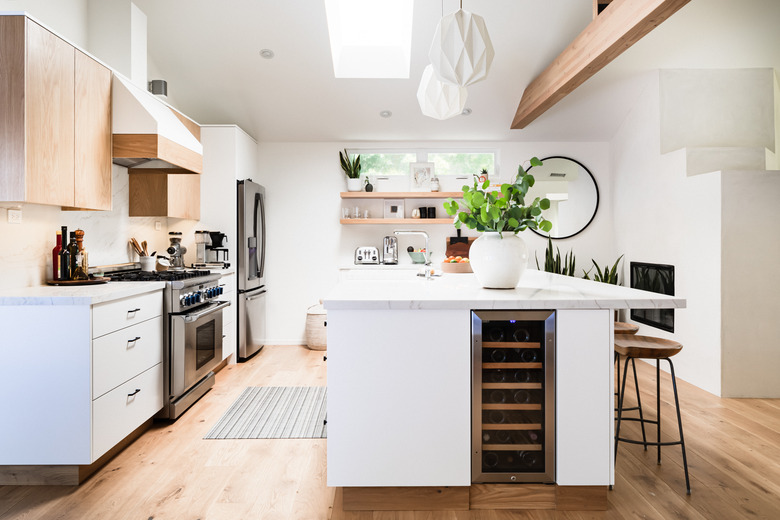
Learning how to install kitchen lights is really no different than installing them in any other part of the house, although kitchens usually have more fixtures than other rooms and often include several different types of light fixtures. In a kitchen, it's more likely that the lights will be installed in groups controlled by the same wall switch.
Kitchen lighting also differs from the rest of the house since the National Fire Protection Association, publishers of the National Electrical Code, stipulates that a kitchen be served by at least one dedicated lighting circuit that serves nothing but the light fixtures. This is different from requirements for elsewhere in the house, where light fixtures and electrical outlets often share the same circuits.
Basic Wiring for Light Fixtures
Basic Wiring for Light Fixtures
When you install kitchen lights, circuit wiring can be a little confusing since the arrangement of wires in the electrical boxes varies depending on how the wall switches and light fixtures are located along the circuit. In the very simplest type of configuration, power from the source runs first through a wall switch and then to a single light fixture.
This type of basic circuit arrangement is very easy to understand, and even DIY beginners can usually do the wiring. It can get more complicated if the switch falls after the light fixture — a configuration known as a switch loop. It gets even more complicated if the light fixture is controlled from two or three different locations using three-way or four-way wall switches.
The best strategy is to obtain a reputable source for lighting circuit diagrams, such as those offered by Electrical 101, and follow the appropriate diagram as you run the cables and make wire connections to install kitchen lights. Through long experience, a professional electrician knows dozens of different ways that a lighting ciruit can be arranged, which is why DIYers are best advised to leave this work to pros unless they are very experienced and knowledgeable.
When trying to understand the wiring diagrams for a lighting circuit, remember that wall switches always control the hot wires, not the neutral wires. In more complicated layouts, the hot current may pass through the light fixture box and onward to the switch via one hot wire in the cable and then loop back to deliver power to the light fixture through a second hot wire. To be competent at wiring, you must understand how the hot current flows from the service panel, through the switch and to the light fixture.
The general process for installing lighting circuits follows a typical sequence:
- Before any work that involves installation of new circuits or extension of existing circuits, the electrician or homeowner must apply for a building permit. There will be a small fee involved, and the permit will stipulate that the work must be inspected at least once and more likely twice. It is critical that all permit requirements be followed. Usually, permits and inspections are not required if the remodel involves just replacing existing light fixtures.
- As work begins, the electrician first installs plastic or metal electrical boxes wherever a wall switch or light fixture will be located. These boxes must be solidly anchored to framing following code guidelines. This work is always done before wall surfaces are finished. With any form of ceiling-mounted light fixture, it is critical that the electrical boxes are mounted securely to hold the fixture.
- The electrician then runs the appropriate electrical cables between the electrical boxes and to the main service panel. For the most simple light fixture configuration where a ceiling light is controlled by a single wall switch, this means running a two-wire grounded cable from the service panel to the switch box and from the switch box to the light fixture box. In more complicated configurations, it may mean running three-wire cables for portions of the circuit. All cables must be anchored to framing members and secured to the electrical boxes following the local code.
- After this "rough-in" work is completed, the city building inspector visits the work site to review the installation. NEVER overlook this step, as stiff fines are possible if you fail to follow inspection requirements.
- After the drywall is installed to close up the walls and ceiling, the light fixtures are connected to the circuit wires. With some light fixtures, this will mean connecting the hot wires, neutral wires and bare copper grounding wires to the fixture with screw terminals, but many light fixtures have color-coded wire leads that are joined to the circuit wires with wire connectors. In situations where wall switches control multiple light fixtures, the hot wire connections are usually made with "pigtail" wires that deliver current to each light fixture while also allowing the current to pass through to downstream fixtures.
- Next, the wall switches are installed. With most switch types, this means attaching the hot circuit wires to screw terminals on the switch. The white neutral circuit wires typically aren't attached to the switch but are simply joined together so the neutral pathway passes through the box. However, some electronic switches (such as "smart" switches) require a neutral connection. The bare copper grounding wires are attached to the green grounding screw on the switch using a grounding pigtail. Some types of switches, especially dimmer switches and timer switches, are connected with wire leads rather than screw terminals.
- The last step is to connect the lighting circuit to its circuit breaker at the main circuit breaker box. This is generally a job for an electrician, though very skilled DIYers can do this work.
 Stephen Paul
Installing Ceiling-Mounted Lights
Installing Ceiling-Mounted Lights
The general process for installing any ceiling-mounted light fixture follows the same general wiring process but with the following variations:
- With lightweight light fixtures, a round plastic or metal box can be nailed directly to the side of a ceiling joist. Make sure the box is attached at a depth that will allow the finished drywall to be flush with the face of the box.
- With the light fixture box in place, open one knock-out in the side or back of the box for each cable that will enter. Thread the cable into the box and strip away the outer sheathing so that no more than 3/4 inch of vinyl sheathing extends into the box. Secure each cable by tightening the cable clamp.
- When all the switch boxes, light fixture boxes and cables are in place, the inspector arrives to review the rough-in work.
- Next, the light fixtures themselves are installed. This involves holding the light fixture in place and attaching the white neutral circuit wires to the white wire lead on the light fixture, the black (hot) circuit wires to the black wire lead and the bare copper grounding wire directly to the green wire lead or green grounding screw on the light fixture. Professional electricians often make all these connections to the light fixture with short pigtail wires connected to the circuit wires.
- With circuit wires connected, tuck the wires carefully into the box and then position the light fixture in place and secure it to the box with the mounting screws that come with the fixture.
 Sanford Creative
Installing Pendant Lights
Installing Pendant Lights
Pendant lights are small, hanging light fixtures that are usually suspended from a lamp cord that feeds down through a cover plate attached to the electrical box in the ceiling. The installation is similar to that for any ceiling-mounted light fixture except that in this case, the lights are usually installed in groups. This requires that each fixture has its own ceiling box, which is linked with electrical cables that allow the entire bank of fixtures to be controlled by the same wall switch.
- After the ceiling boxes are installed and the cables inserted, attach a mounting strap or bracket to each of the boxes. This bracket is generally provided with the light fixture.
- Adjust the length of the light fixture cord so that the fixture will hang at the desired height and then feed the cord through the opening in the cover plate. Tighten the set screw to hold the cord in place.
- Strip the wire leads on the cord and then attach them to the circuit wires inside the ceiling box using wire connectors. The bare copper grounding wire from the fixture is generally attached to the green grounding screw on the box's mounting strap, the neutral fixture wire is connected to the white neutral circuit wire and the hot lead from the fixture is attached to the black circuit wires.
- Attach the fixture's coverplate to the ceiling box using the mounting screws included with the fixture.
- Install the light-fixture shade.
Variations for chandeliers and ceiling fans: Chandeliers and ceiling fans are installed in a manner similar to pendant lights. These can be very heavy fixtures, so you must make sure the electrical box is sturdy enough to hold the weight. This may involve using a braced metal box that is solidly anchored to ceiling joists. A ceiling fan must be installed with an electrical box rated for ceiling fans. Chandeliers are usually suspended by means of a metal strap threaded with a sturdy metal nipple that holds the suspension chain for the light fixture. A metal coverplate then covers the ceiling box after the wire connections are made. A similar setup is used for ceiling fans.
Variations for recessed canister lights: With recessed lights, no ceiling box is required since the fixture is a self-contained housing that includes a built-in wire connection box. After the light fixture housing is attached between ceiling joists, the circuit cables are fed into the wire connection box and connected to the light fixture's wire leads. Like pendant lights, recessed lights are often installed as a row of fixtures, which requires that they all be linked by cables so that the entire bank of lights can be controlled by the same wall switch.
Variations for track lights: Although track lights have separate heads, each track generally requires only a single ceiling box, which is connected in the same manner as a flush-mounted ceiling fixture. Once installed, the entire track is energized, which allows you to connect the lighting heads in whatever arrangement you want.
Installing Undercabinet Accent Lights
Installing Undercabinet Accent Lights
One of the most popular lighting projects for a kitchen remodel is to add under-cabinet or in-cabinet accent lighting. These can include puck light discs or ropes or bars of LED lights. Although accent lighting can be hard-wired into a new lighting circuit, it can also be added as a retrofit project by using a convenient plug-in kit. These kits generally include a number of lights, a power source that plugs into a standard outlet and lengths of thin wire used to link the power source to the lights.
You can also mix and match different types of lights to create a sophisticated overall accent lighting scheme. This will be easiest if you use lights within the same product family made by the same manufacturer. Some kits even include a convenient remote control for operating them.
- Lay out the lights along the countertop, spaced as recommended by the manufacturer. With lighting pucks, it's generally recommended that you install them near the front edge of the wall cabinet's bottom surface. The components should be fairly hidden so that all you see is the illumination, not the hardware.
- Find a location for the plug-in power source. The best location is the underside of the cabinet or inside a cabinet near a wall outlet. For example, you can mount the power supply inside a base cabinet near the outlet that powers the garbage disposal.
- Drill whatever holes are necessary to route the power source's cord to the outlet. This can involve drilling a small hole in the wall near the bottom of the wall cabinet or perhaps in the cabinet itself. You may also need to drill some small holes to route the small wires that link the light pucks.
- Mount the base plates for puck lights along the underside of the wall cabinet in the desired locations. Attach the light pucks and power supply to the cabinets and then plug in the wires linking the pucks to the power supply.
- Secure the wires to the underside of the cabinets using the staples provided with the lighting kit. Try to keep the wires hidden from sight as much as possible.
- Plug the power supply into the wall outlet and test the operation of the lights.