How To Install A DIY Laminate Countertop
We may receive a commission on purchases made from links.
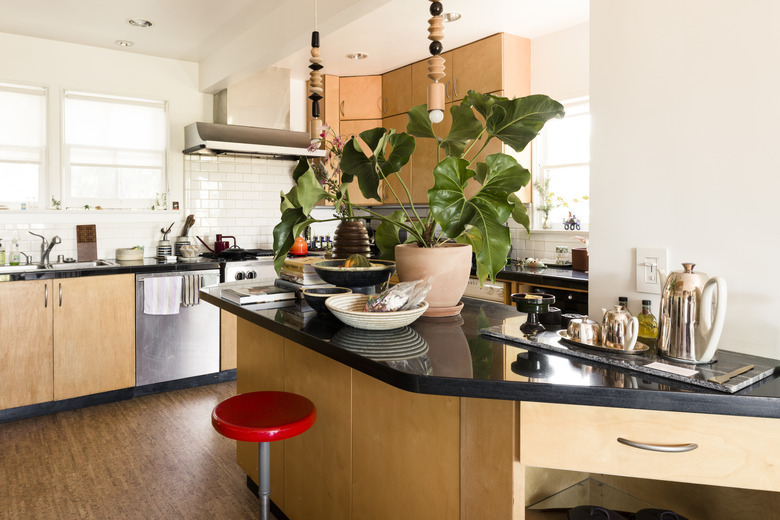
Laminate countertops have come full circle. Regarded as a modern innovation in the 1940s, they began to feel tired and old fashioned by the 1970s. Today, however, laminates are viewed as a good option for many situations. Mid-century modern home decor is a perfect fit for plastic laminate countertops, and they are perfect wherever you want to economize, such as in a guest bathroom or recreation room bar or kitchenette.
As noted by the National Kitchen and Bath Association, laminate countertops typically cost $24 to $50 per linear foot, which is much cheaper than all other materials other than ceramic tile. By comparison, granite countertops can cost upward of $150 per linear foot. Moreover, laminates are available in so many colors and patterns that there are more decor options than with almost any other countertop material.
Buying Plastic Laminate
Buying Plastic Laminate
Plastic laminates are sold in sheets ranging from 30 to 48 inches wide and 8- or 12-foot lengths, and literally hundreds of patterns and colors are available from specialty suppliers. Laminates are one of the least-expensive countertop options, especially if you build your own countertop by cutting and gluing pieces of laminate to a core of particleboard or medium-density fiberboard (MDF).
Building your own laminate countertop is a somewhat-tricky DIY project, but if you are patient and have good skills, you can create a countertop that is both unique and extremely affordable.
Anatomy of a DIY Laminate Countertop
Anatomy of a DIY Laminate
Countertop
A custom-made laminate countertop consists of a core made from 3/4-inch or 5/8-inch MDF, doubled in thickness around the edges with additional strips of the core material. Pieces of plastic laminate are then cut to fit the top and edges and are glued in place with contact cement. The edges are trimmed flush with a router.
 jodiejohnson/iStock/GettyImages
A backsplash piece is created using the same process and is glued and screwed in place along the back edge of the countertop. Once the countertop is attached to the top of the base cabinets, holes or cutouts are made for sinks and other fixtures.
Things Needed
-
5/8-inch-thick or 3/4-inch-thick MDF or particleboard
-
Wood glue
-
1 1/4-inch drywall screws
-
Wood filler
-
Plastic laminate
-
Contact cement
-
Scrap-wood strips
-
Clean cloth
-
Mineral spirits
-
Silicone caulk
-
2-inch drywall screws
-
Tape measure
-
Metal straightedge
-
Framing square
-
Pencil
-
Sawhorses or workbench
-
Circular saw or table saw
-
Screw gun
-
C-clamps
-
Putty knife
-
Belt sander
-
Laminate scoring tool or utility knife
-
Paint roller and short-napped roller cover
-
Paint tray
-
J-roller
-
Router with flush-cutting and bevel-cutting bits
-
Fine-tooth file
-
Bar clamps
-
Caulk gun
How to Build a Laminate Countertop
1. Determine the Size of the Countertop
Measure the length and depth of the floor cabinets along the top edges. Add 1 to 2 inches of overhang on the front and sides. Also determine the length and height of your backsplash; 4 to 6 inches is typical.
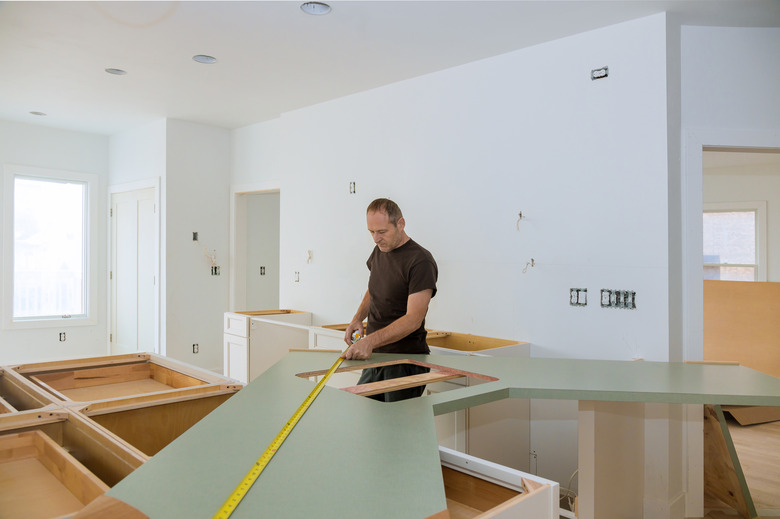
2. Cut the Countertop Core
Using a long straightedge and a framing square, outline pieces for the countertop core and backsplash score on a sheet of MDF. Also outline 3-inch-wide strips to create an edge buildup around the front, back and sides of the countertop. If your countertop will have seams, as is the case with L-shaped countertops, also mark a 3-inch-wide strip to reinforce the seam.
Cut out the pieces for the countertop and backsplash core and for the edge buildup strips using a table saw or circular saw. A table saw will give the best results, but a circular saw works fine if you guide the saw by clamping a straightedge to guide the foot of the saw.
3. Add the Built-Up Edges
Use wood glue and 1 1/4-inch drywall screws to apply 3-inch-wide edge buildup strips to the bottom face of the countertop core flush with the outside edges. If the countertop will be L-shaped, also reinforce the seam with a strip of particleboard glued and screwed over the length of the seam on the bottom side. (This seam can also be reinforced with dowels if you choose.) Using a putty knife, fill any voids along the edge of the countertop with wood filler. Allow the filler to dry completely and then sand it smooth with a belt sander.
4. Cut Laminate for the Countertop
Measure and cut pieces of laminate for the countertop face and the front and side edges, adding 1/2 inch to provide a trimming margin. Use a pencil and straightedge to mark perfectly straight cutting lines and then score along these lines with a laminate scoring tool or a sharp utility knife. Guide the knife using a metal straightedge clamped to the laminate. Snap the laminate along the scored line by carefully folding it upward.
5. Apply Laminate Edge Strips
Begin applying the laminate with the pieces for the front and side edges. Use a paint roller with a short-nap roller cover to apply two thin coats of contact cement to the edges of the MDF and one coat to the back face of the laminate edge strips. Let the contact cement dry as directed by the manufacturer.
 photovs/iStock/GettyImages
Carefully position the laminate strips against the front and side edges of the countertop. The contact cement will instantly bond together, so be careful as you apply the strips. The strips should overhang slightly at the top and along the sides. Use a J-roller to press the laminate strips so they bond firmly to the MDF.
Use a router with a flush-cutting bit to trim the overhanging laminate precisely flush with the top surface of the MDF. Make sure to hold the router firmly so it does not wobble as you trim.
6. Apply the Laminate Top
Test fit the top piece of laminate, making sure that it overhangs the MDF core by a small amount on the front and sides. Cut 3/4-inch x 3-foot-long strips of scrap wood, which will be used to suspend the laminate over the core as you adhere it.
Apply two thin coats of contact cement to the top of the MDF and one coat of contact cement to the back side of the laminate. Allow it to dry according to the manufacturer's directions. Layer the strips of scrap wood across the countertop core, spaced every 6 to 12 inches. Lay the laminate over the strips — they will not adhere to the contact cement.
Carefully check the position of the laminate and adjust if necessary. Beginning at one end of the countertop, remove the wood strips and press the laminate down against the MDF. As the two surfaces meet, the cemented surfaces will adhere.
7. Bond the Surface
When the entire laminate surface is in place, roll the J-roller over the entire surface to bond it. Look for any loose areas and make sure they are adhered. Once the contact cement has fully cured, it will be too late. Clean off any excess contact cement with a soft cloth moistened with mineral spirits.
8. Trim the Laminate
Use the router and flush-cutting bit to trim away the excess laminate so it is precisely flush with the edges of the countertop. Make a second pass with the router, this time with a 15-degree bevel-cutting bit. This will create a slightly chamfered edge that will make the edges of the countertop less sharp. Make sure to set the router depth shallow enough so that the bit does not cut down into the core but only trims the edge of the laminate. Use a fine-tooth file to slightly dull the edges of the countertop. Without this, the laminate edges can still be quite sharp — sharp enough to cut skin.
9. Build and Attach the Backsplash
Repeat steps four to eight to create the backsplash, bonding strips of laminate to the front, ends and top. You do not need to cover the back of the backsplash, which will rest against the wall. To install the backsplash, apply a bead of silicone caulk to the bottom edge of the backsplash and then clamp it in place along the back edge of the countertop using bar clamps. From underneath the countertop, drive 2-inch drywall screws up through the countertop and into the bottom edge of the backsplash. Wipe away any caulk that has seeped out from the joints.
10. Install the Countertop
Run a bead of silicone caulk around the top rim of the base cabinets and then carefully position the countertop on the cabinets so that the backsplash is flush against the wall and the sides of the countertop overhang equally on both sides.
Working from inside the cabinets (you will need to remove drawers to gain access), secure the countertop to the cabinets with 2-inch drywall screws driven up through the cabinet corner brackets and into the countertop core. If desired, run a bead of caulk around the backsplash where it meets the wall.
References
- Home Depot: How to Install a Laminate Countertop
- National Kitchen and Bath Association: Choosing a Bathroom Vanity Top
- ImproveNet: Laminate Countertop Prices
- Black & Decker The Complete Guide to Cabinets & Countertops: Cool Springs Press, 2013, pages 178 to 185