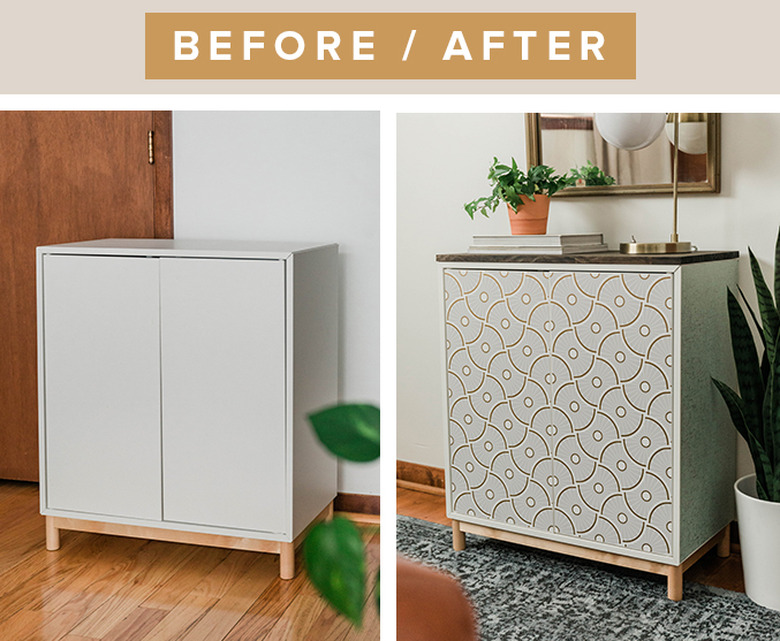
IKEA And Target Are Behind This Beautiful Entryway Cabinet Makeover
We may receive a commission on purchases made from links.
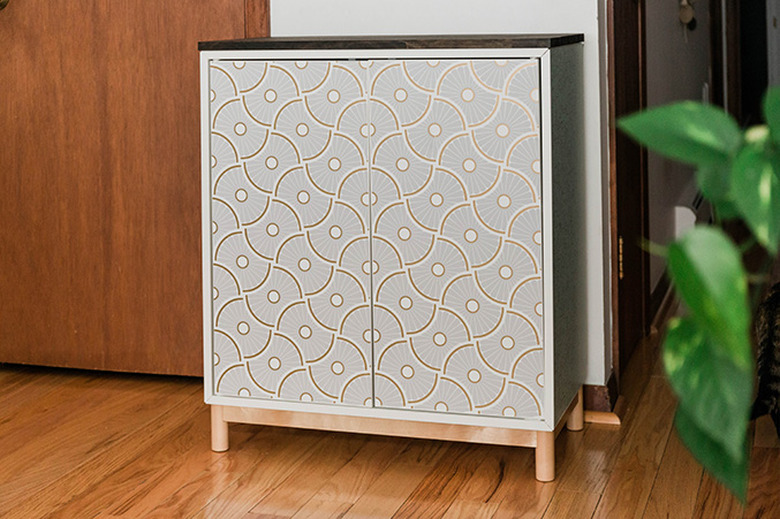
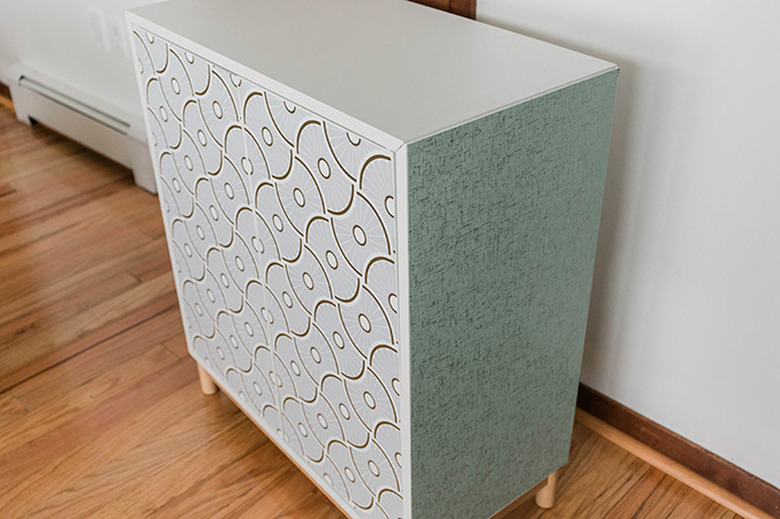
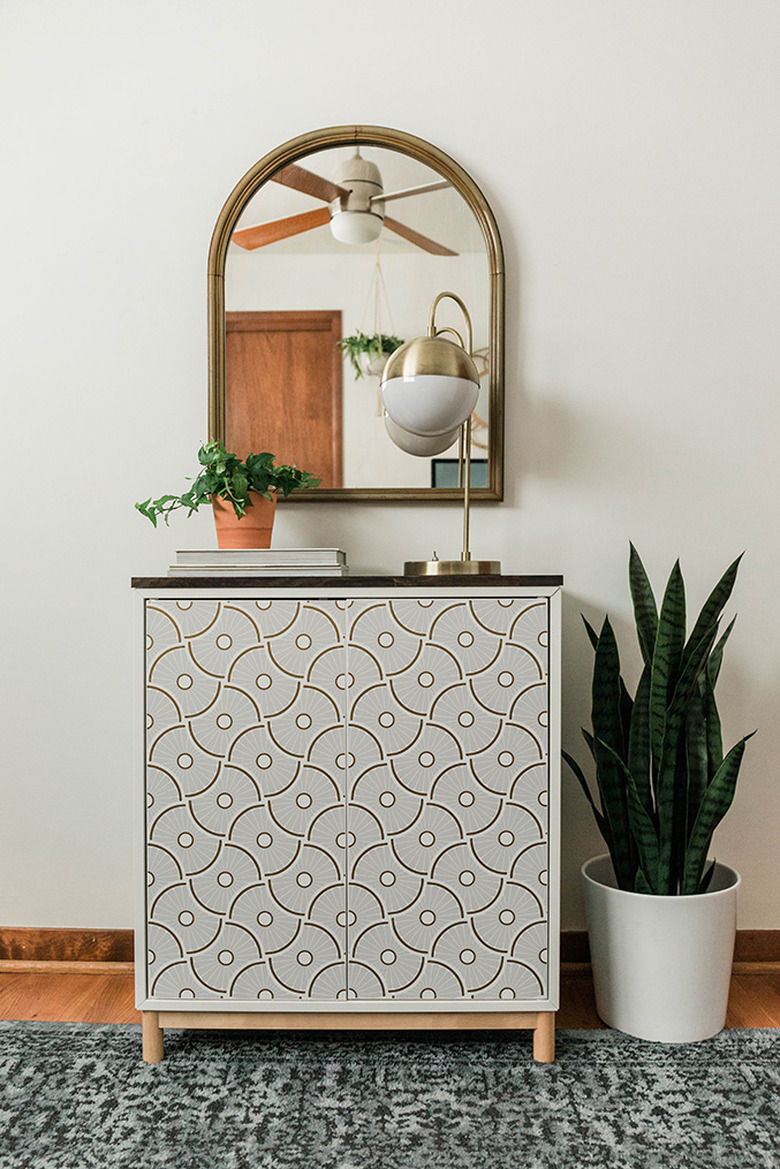
Got some time on your hands and looking for a home decor project? Follow this entire step-by-step DIY transformation of an IKEA Eket cabinet — from simple to stylized, thanks to peel-and-stick wallpaper from Target. Your entryway will certainly look elevated.
 Carrie Waller
Things Needed
-
3/4-inch-by-16-inch-by-3-foot paint grade wood panel
-
Saw (optional)
-
Peel-and-stick wallpaper, in Wheels Mist and Weave, Mint/Silver
-
Pencil
 Carrie Waller
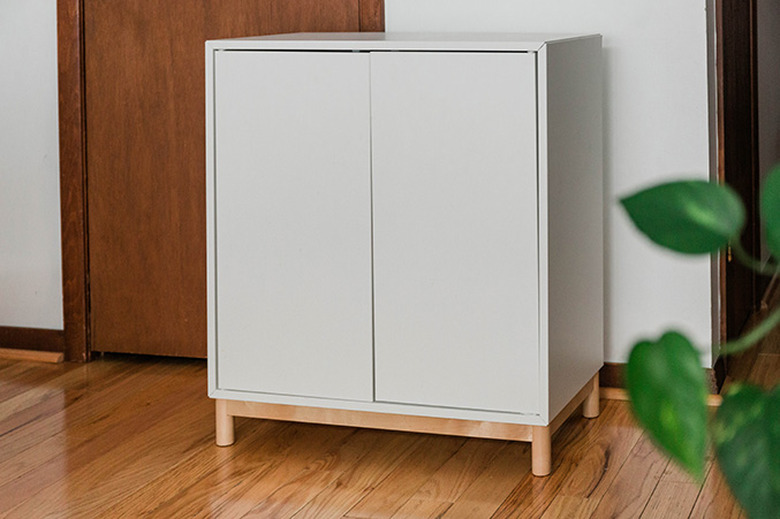
Step 1
Assemble your IKEA cabinet according to the directions that came with it. Put the entire piece together—no need to stop at any one point before following the rest of the steps in this tutorial.
 Carrie Waller
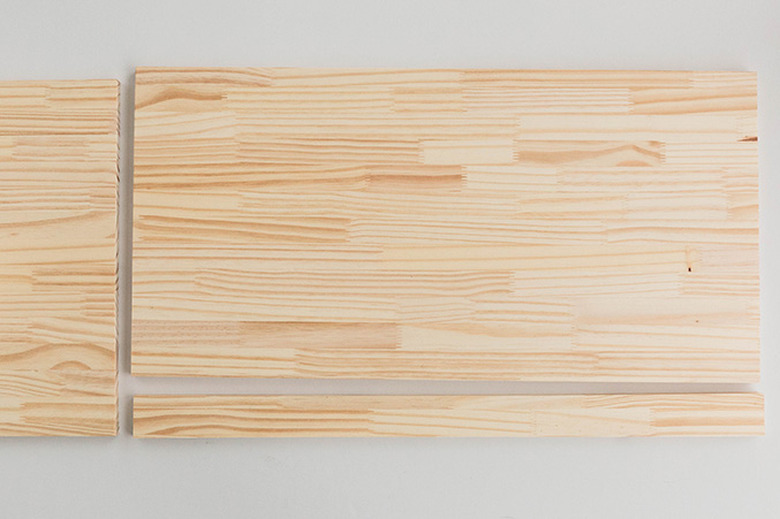
Step 2
Measure the top of the cabinet, and transfer those measurements to your wood panel using a pencil. If you'd like to have a small overhang on the front and sides of your cabinet, like we did, round your measurements up to the nearest inch.
Cut your wood panel to size along your marks using a table saw. If you don't have a table saw, plan ahead and bring your measurements and pencil with you to the hardware store. Mark the panel right there in the aisle, and ask a hardware store employee to cut it for you. Many hardware stores offer this service for free.
 Carrie Waller
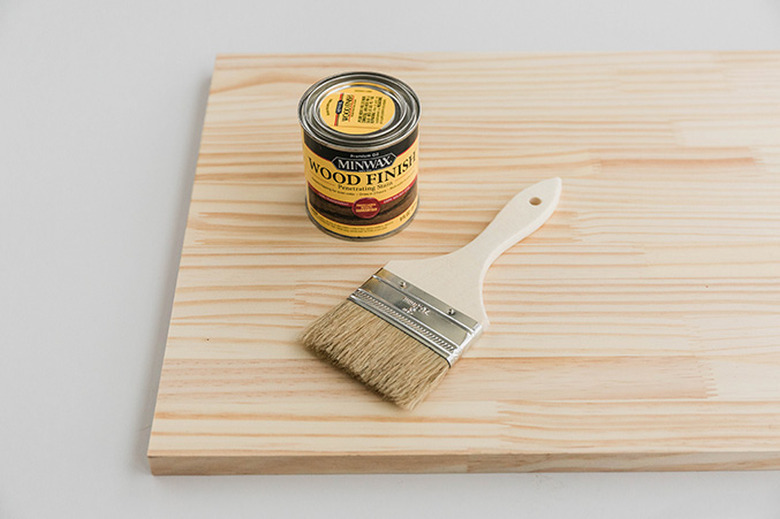
Step 3
Sand any rough edges of the wood panel using a sanding sponge. Use a paint brush to stain your wood panel a darker color, making sure to stain a little bit around the bottom edges, too, if you decide to include an overhang. Let the stain sit on the wood for a minute, then wipe off any excess stain with a clean rag or paper towel. Repeat those steps until you achieve your desired darkness of color. Allow the stain to dry completely overnight.
 Carrie Waller
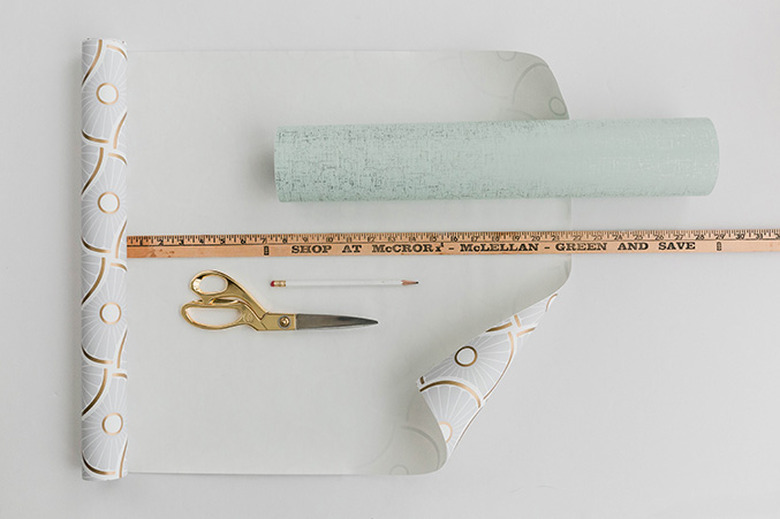
Step 4
Measure the front doors of the assembled IKEA cabinet. Transfer those measurements to the back side of your peel-and-stick wallpaper. For the doors, we used the Wheels Mist wallpaper pattern. Note that you may want to measure and cut just one piece for the door, then flip the wallpaper roll right-side up, and find a spot in the pattern that lines up with the piece you already cut. This will give you a sharper, more symmetrical look on the front of the cabinet since the doors butt right up to each other.
Repeat the same steps, this time measuring the side panels of the cabinet, and transferring those measurements to the Weave, Mint/Silver wallpaper pattern.
 Carrie Waller
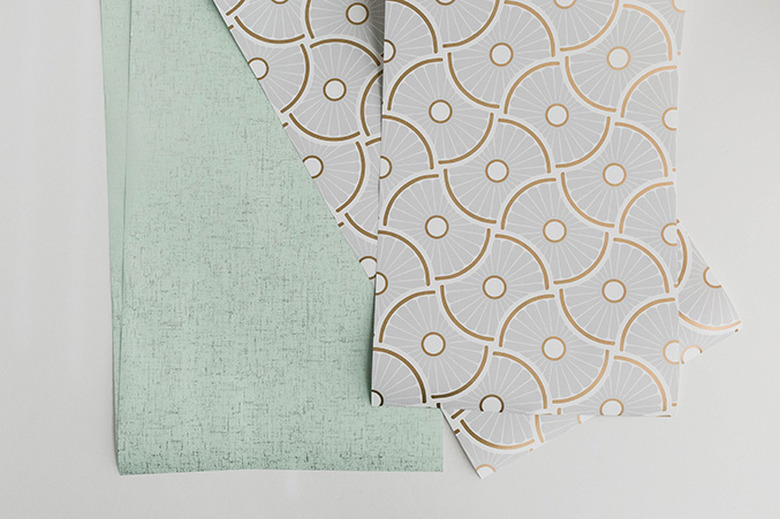
Step 5
After you have all four pieces of wallpaper measured and cut to size, adhere them one by one to the front doors and sides of the cabinet. Use a wallpaper smoother to get rid of any air bubbles as you go. Run a razor blade along any uneven edges to clean them up.
 Carrie Waller
 Carrie Waller
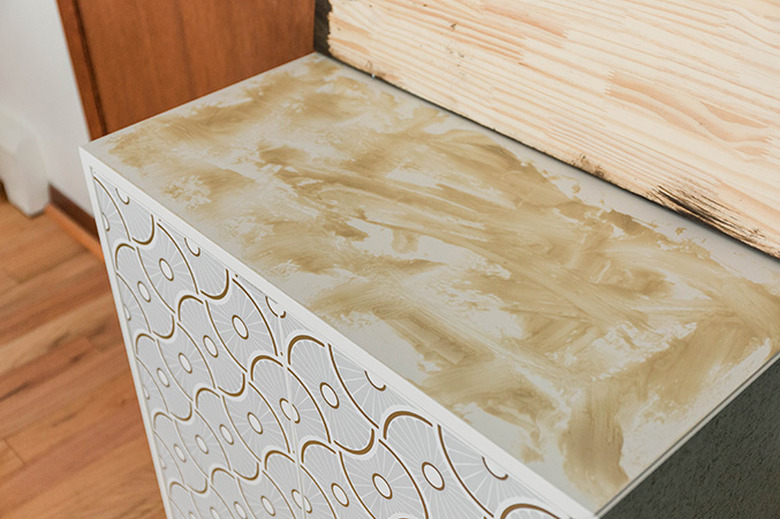
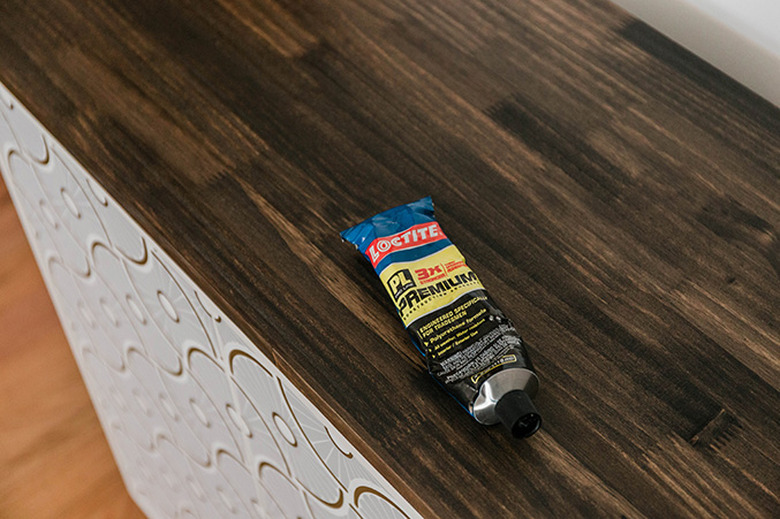
Step 6
Smear large dollops of construction adhesive on the top of the cabinet. It doesn't need to be pretty—just nice and even. Make sure to put glue along all four sides and in the middle for a tight fit. Then, quickly lay the now-dry stained wood panel over the adhesive, making sure to center it as best you can (use a ruler if it helps, but we just eyeballed it). Place heavy books or other household items on top to make sure the wood panel stays in place as it cures. Let it dry overnight before handling.
 Carrie Waller
 Carrie Waller
Step 7
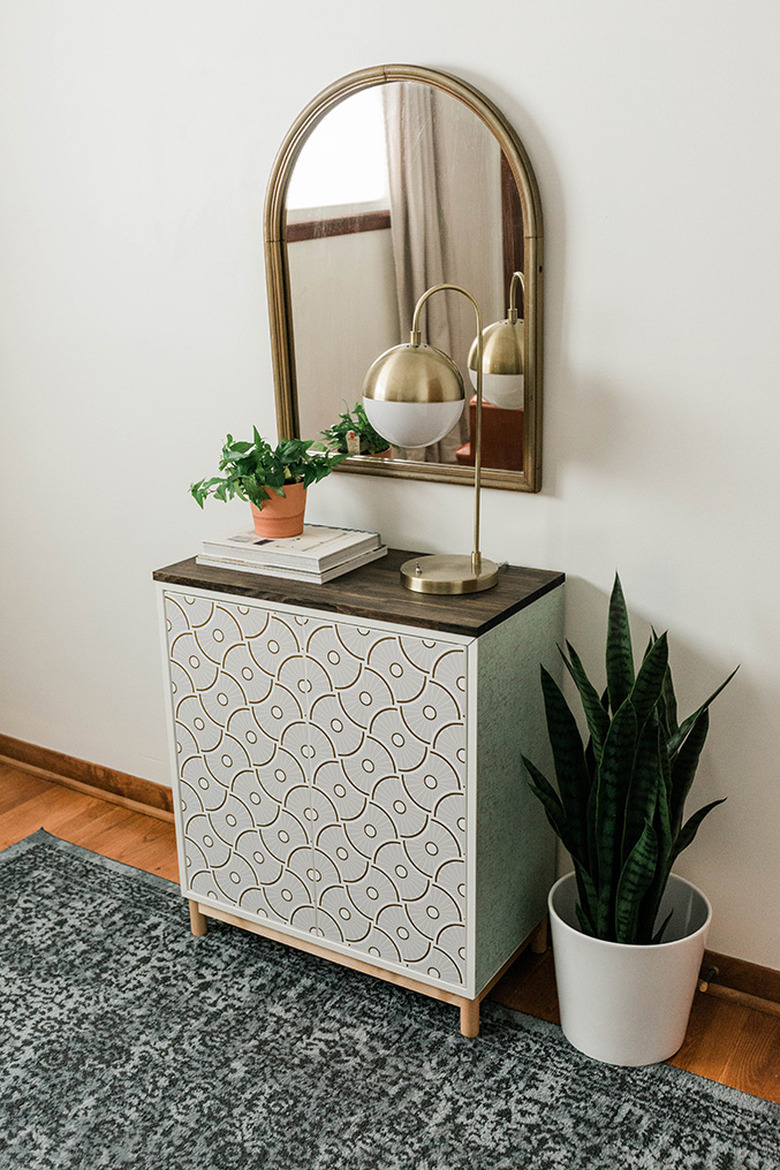
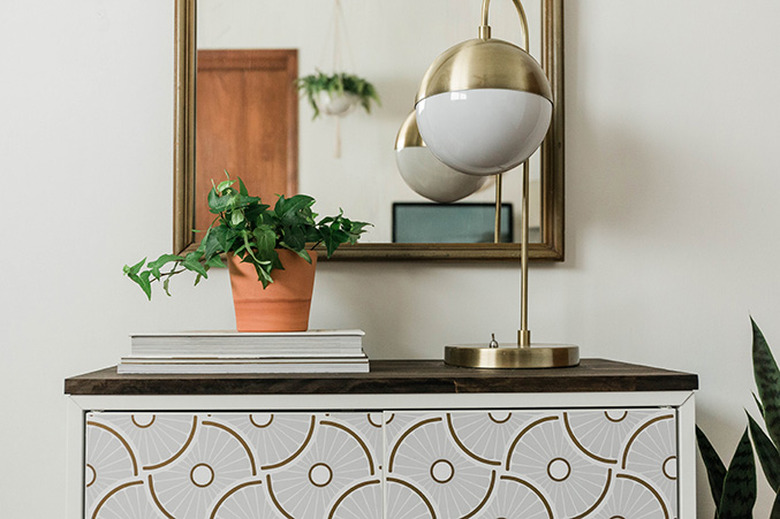
Style the finished cabinet in your entryway with things like coffee table books, a plant, a lamp that you can easily switch on when you come in through the front door at night, and a cool arched mirror for quick hair and makeup checks!
 Carrie Waller
 Carrie Waller
 Carrie Waller