Concrete Flooring: A Homeowner's Comprehensive Flooring Guide
- Solid Concrete Slab
- Concrete Slab Installation Overview
- About Concrete Overlay
- Overlay Installation Overview
- Concrete Over a Wood Subfloor
- Concrete Over Wood Installation Overview
- Grinding, Polishing and Sealing Concrete
- Acid Staining Concrete
- About Dyeing Concrete
- Coating Concrete With Epoxy
- Pros and Cons of Concrete Floors
- Cleaning and Maintenance
At one time, a concrete floor was regarded as a very basic, utilitarian surface suited only for a basement slab, utility room or garage. Homes with slab-on-grade foundations often had solid concrete as the subfloor, but it was always covered over with some type of finished flooring material, such as carpet, vinyl, hardwood or laminate.
In today's homes, as noted by the Concrete Network, concrete is often used as a decorative flooring surface, and it no longer is regarded as cheap. Especially in homes with a modern style, a concrete floor can be highly prized.
A variety of texturing, coloring and polishing techniques can be used with concrete floors, and almost no flooring is more durable or easy to maintain. Concrete flooring in residential applications generally falls into one of three categories:
- Solid concrete slab
- Concrete overlay
- Poured concrete over wood subfloor.
Solid Concrete Slab
Solid Concrete Slab
A floor consisting of a solid concrete slab begins with the same kind of concrete pour that is used to make sidewalks or driveways. This type of concrete floor is practical only for a home with a slab-on-grade foundation or for basement floors. It's generally impossible to pour a solid slab over wood framing, as the shear weight is too much for a wooden floor structure to bear.
A concrete slab floor is a solid layer of concrete, usually about 4-inches thick, poured directly over a prepared sub-base of crushed gravel with steel mesh or reinforcement bar (rebar) embedded in the concrete for strength. In more utilitarian applications, a concrete slab is simply smoothed (floated) and left as is. However, when used as a decorative indoor floor, the slab receives a surface treatment that can include:
- Polishing and sealing for a glass-smooth, shiny surface
- Coloring with dye
- Treating with acid to color the surface
- Coating with epoxy for a decorative finish.
Concrete Slab Installation Overview
Concrete Slab Installation Overview
The process usually begins during the construction of the home, when the ground is excavated and a layer of compactible gravel is laid down and compressed to form a firm base. Steel mesh or rebar is positioned over the gravel and then wet concrete is poured over the area. The wet concrete is floated and troweled to a smooth surface and is then allowed to dry and cure.
 Anatoliy Sizov/iStock/GettyImages
The preliminary process of pouring, floating and troweling is generally done by a general concrete contractor. Some contractors can also perform whatever finishing treatment is desired, usually returning to finish the work after the building construction is completed. There are also specialized contractors who do only the decorative finish work.
While pouring a concrete slab floor is sometimes attempted by DIYers, this very hard work is not recommended. Moreover, concrete slabs are generally poured at the same time a house is constructed, making it impractical for amateurs. The decorative finishing work, likewise, is usually done by professionals, although some methods of finishing can be done by careful DIYers.
About Concrete Overlay
About Concrete Overlay
In a concrete overlay floor, a thin layer of plain or colored concrete is applied over an existing concrete slab. The layer can be feather thin or up to about 1-inch thick, and it is often applied in a self-leveling manner to flatten a concrete slab that is cracked or uneven. The surface of the overlay can be brushed, troweled and "knocked down" to provide a textured finish or stamped to create a design. It can also be treated in the same manner as a solid slab: polished, acid stained, dyed or coated with epoxy.
Overlay Installation Overview
Overlay Installation Overview
Application of an overlay begins with the same careful preparation that is used when preparing a slab for an epoxy coating. The slab is thoroughly cleaned, all sealers and other foreign materials are removed through sanding and/or chemical solvents and the slab is etched with acid to slightly roughen it.
The concrete mixture used for an overlay is a special formulation that spreads easily over the slab with trowels or brooms. The mixture can be left uncolored, or coloring agents or granules can be added to the wet mixture before it is spread over the slab. Once dried, a plain overlay can be ground and polished with diamond pads and can then accept any of the same surface treatments used with solid slabs. The wet overlay concrete can also be tooled, brushed or stamped to give it texture.
A simple overlay can be applied by a DIYer, but when polishing, stamping or texturizing methods are needed, the work is usually done by pros who specialize in such treatments.
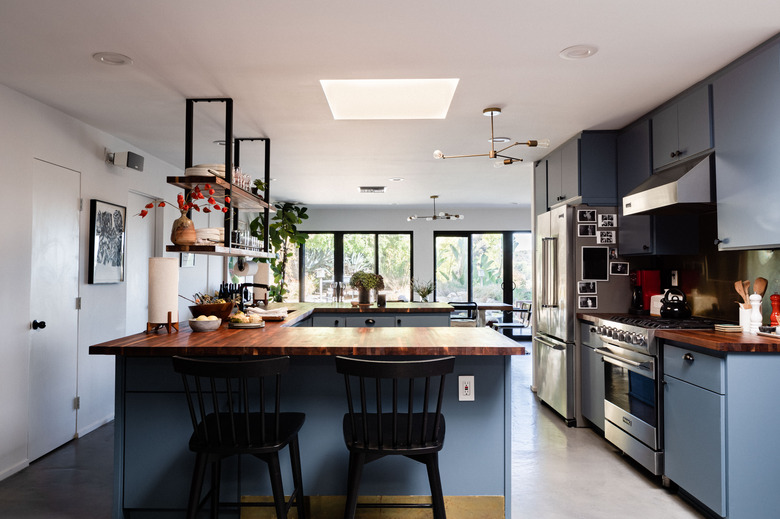
Concrete Over a Wood Subfloor
Concrete Over a Wood Subfloor
With the increased popularity of decorative concrete flooring, several manufacturers have developed products and methods for creating these floors over traditional wood framing. Rather than a heavy 4-inch slab, these special concrete materials can be poured in thicknesses of only 1/2- to 3/4-inch thick and can then accept virtually any of the finishing techniques used with solid slabs. When installed over a wood floor, concrete flooring installation resembles the manner in which stucco is applied to exterior walls.
 Stephen Paul
However, not all wood subfloors can accept this kind of treatment. The weight of even a thin layer of concrete is quite substantial, so the floor joists need to be evaluated to make sure they can bear the weight. The smaller floor joists in older homes may not be strong enough for the additional load unless they are reinforced with sister joists. The subfloor surface must be exterior-grade plywood (APA rated type 1) or oriented strand board (OSB), which are standard subfloor materials in modern homes. A concrete overlay can also be applied over solid hardwood flooring that is securely fastened to the subfloor.
Concrete Over Wood Installation Overview
Concrete Over Wood Installation Overview
The methods for pouring a concrete floor over a wood substrate vary, but the method recommended by one manufacturer, Duraamen, is typical. The subflooring or wood flooring that will support the concrete needs to be firmly anchored to the joists; any loose areas must be screwed or nailed down. Cracks and damaged areas of the floor are filled with leveling compound, and the entire surface is covered with a primer coat. Sheets of galvanized metal lath are then nailed or stapled to the floor with the seams overlapping by about 2 inches.
Then, a layer of special self-leveling cement, such as Param 5500, a cementitious base coat or fill coat is mixed. This material is poured over the floor, embedding the lath, and is troweled smooth. This cement layer can mixed with coloring agents or texturizing particles before pouring, or it can receive any treatment used with solid slabs, including polishing, acid staining, dyeing or decorative epoxy.
Grinding, Polishing and Sealing Concrete
Grinding, Polishing and Sealing Concrete
When a modern industrial look is what you seek, the concrete slab undergoes a multistep grinding and polishing process that resembles the way hardwood floors are sanded and refinished. This process can be done either with freshly poured slabs or with an existing concrete slab that has been properly prepared.
The finishing process begins by repairing any cracks or chips and by removing any existing floor coverings. If there is adhesive residue left on the slab, this can be removed by grinding the surface with a power grinder equipped with 16- or 20-grit diamond abrasive pads. The surface is then ground with progressively finer abrasive pads: 30-grit or 40-grit, 80-grit and 150-grit pads.
Next, a chemical hardener is applied to increase the density of the concrete. The polishing stage now begins, starting with a 200-grit diamond pad and progressing through 400-grit, 800-grit and 1,500-grit or 3,000-grit pads. At this stage, the surface is extremely smooth and shiny. Some contractors complete the work with an application of sealer or stain guard, but this is not a universal practice.
 michaklootwijk/iStock/GettyImages
The equipment required to grind and polish a slab is available to rent at home improvement centers and tool-lease outlets, but the process is hard work and requires practice to do well. Most homeowners hire contractors for grinding and polishing concrete.
Acid Staining Concrete
Acid Staining Concrete
The process for acid staining involves treating the slab with a solution that combines some form of acid, mineral salts and water and then rinsing it off. As the acid reacts chemically with minerals in the concrete, unique mottled color patterns are created. This results in a look quite unlike any other method of coloring concrete. The acid solution is mildly caustic, however, so application needs to be done very carefully while wearing protective gear.
Before staining, the slab needs to be fully cleaned and carefully patched. All waterproofing coatings must be removed using either a power grinder or chemical solvents. Acid staining tends to work best on new slabs; it can produce irregular results on older slabs that have been patched at various times since the concrete will react with the acid at differing rates. With older slabs, one option is to apply a thin concrete overlay and then perform the acid-staining technique. Acid staining is not difficult for DIYers, provided that you are careful when handling the materials.
About Dyeing Concrete
About Dyeing Concrete
A concrete slab can also be colored by applying a solvent-based or water-based dye. Water-based forms are much easier and safer for DIYers compared to solvent-based dyes that use flammable, toxic chemicals. Dyes generally create a solid color rather than the mottled appearance created by acid stains, but unlike paint, which merely coats the concrete surface, dyes penetrate the concrete. With water-based dyes, there usually is a faint marbling effect with the color.
Dyeing concrete begins with thoroughly cleaning the slab and then etching the concrete with diluted acid to give the surface some texture that will help it absorb the dye. The dye is generally sprayed on the surface, spread in an even layer with a microfiber pad and allowed to dry. In many cases, a second coat of dye is applied to deepen the color. When the final coat has dried, the floor is then coated with one or more thin layers of sealer. Concrete sealers are available in different gloss formulations depending on whether you want a matte or high-gloss surface.
Concrete dyes are one of the easier finishing treatments for DIYers to use. They are often used to create patterned floor finishes, with painters' tape used to segment the floor into sections that can receive different colors.
Coating Concrete With Epoxy
Coating Concrete With Epoxy
Epoxy coatings are more familiar as the tough, durable coating applied to garage floors, but they can also be used to decorate indoor concrete floors, where the toughness is ideal for floors that see heavy use, such as entryways, exercise rooms or playrooms.
A true epoxy coating is a different material from products marketed as "epoxy paint." These floor paints are generally just an ordinary paint reinforced with epoxy additives, but a true epoxy coating is a two-part product in which a resin is mixed with a catalyst, or hardener.
Unlike paint, which hardens as the liquid solvents evaporate, an epoxy coating hardens through a chemical reaction between the resin and catalyst, creating a very tough surface. With some epoxy coatings, mineral chips or other particles are spread over the epoxy while it is still wet. The result is a floor that has a granite-like look or one that is "gilded" with a metallic sheen.
With a genuine two-part epoxy coating, careful preparation of the slab is essential to ensure the epoxy will bond. First, the slab must be evaluated to make sure that it does not have moisture issues that will interfere with the epoxy's bond. Epoxy will not bond to a slab that has moisture bleed-through, and for this reason, it's usually recommended that new slabs not be coated for at least two months until the residual moisture in the slab has evaporated.
Second, the slab must be entirely free of waterproof coatings, floor paints and other contaminates. Grinding or sanding or chemical solvents can be used to remove any foreign substances. The slab must also be slightly porous in order to allow the epoxy to penetrate; this is often accomplished by etching with an acid solution before the epoxy is applied. Most products recommend that the slab be primed before the epoxy is applied.
Once the slab is carefully prepared, the application of epoxy is relatively easy. The two-part epoxy is mixed and spread over the floor with brushes or rollers. With some products, granular coloring chips are added into the epoxy before application, and with other products, they are sprinkled on after the epoxy is applied. The epoxy manufacturer may recommend applying an additional sealer over the epoxy to guard against water and stains.
Pros and Cons of Concrete Floors
Pros and Cons of Concrete Floors
Concrete floors have a number of advantages as well as some disadvantages when used in residential applications.
Pros:
- Well suited for modern home styles: Concrete floors fit perfectly in any home that has a modern or industrial design scheme.
- Versatile design options: Concrete is a malleable building material that can adapt to hundreds of different looks.
- Easy maintenance: If it is kept properly sealed, concrete is extremely easy to keep clean with simple sweeping and damp mopping.
- Durable flooring option: Concrete is one of the most long-lasting of all flooring options, even under the highest traffic situations. The life span of a concrete floor is typically many decades, making it a cost-effective choice in the long run.
- Well suited for radiant floors: Concrete is a perfect substance for holding embedded tubing for radiant heating. This can turn a normally cold substance into one that gently heats a room.
Cons:
- Very hard and cold material: Concrete is definitely not a warm and fuzzy flooring option. By nature, concrete is a cold material, and because it is rock hard, it is not a good choice for rooms used by young children or older adults who are prone to falling. Using area rugs can help correct these deficiencies.
- Moisture can migrate: In basements, ground moisture can migrate up through the soil, creating dampness on the floor. This can be mitigated by properly sealing the concrete and by correcting drainage issues around the foundation.
- Cracking can occur: Over the years, virtually any concrete slab or overlay will develop cracks. This is not necessarily a drawback, as an aged concrete floor can develop an antique patina that is very attractive.
Cleaning and Maintenance
Cleaning and Maintenance
Concrete floors are typically very easy to clean and maintain, though the precise methods vary somewhat depending on the finish.
- Polished concrete floors generally are not sealed or waxed. Use a dry dust mop regularly to clean away grit and dust. Routine cleaning can be done with a pH-neutral cleaner designed for polished concrete. If the floor loses its shine, buff it with a commercial polishing compound.
- Acid-stained concrete floors are generally coated with a protective sealer that should be reapplied every few years. Some experts recommend applying wax over the sealer to protect the surface shine. Cleaning involves regular mopping with a dry dust mop and occasional scrubbing with a pH-neutral cleaner.
- Dyed concrete requires regular sealing and cleaning in the same manner as acid-stained concrete. Dyes are subject to fading from UV light, however, so you may need to strip and re-dye the floor every few years. You can prevent this to some degree by limiting direct sunlight or coating windows with anti-UV film.
- Epoxy coatings can usually be cleaned with simple hot water and a scrub brush. Avoid using detergents, which can cause a dingy film to build up. Make sure to never use citrus or acid-based cleaners, as these can break down the catalyst in the epoxy and ruin the finish. If the product recommends a protective sealer, this should be reapplied every few years.
References
- Concrete Network: Maintaining Colored Concrete
- Concrete Network: Stained Conrcrete – The Art of Acid-Etch Staining
- Best Tech Coatings: A Guide to the Different Types of Concrete Flooring Options
- Concrete Network: How to Care for Concrete Floors
- Onfloor Technologies: All About Concrete Dyes 101
- Lowe's: How to Seal Concrete
- Onfloor Technologies: Learn About Decorative Concrete Overlays
- Duraamen: Concrete Resurfacing Over Wood or Plywood Substrates