Hardwood Flooring Repair: A How-To Guide
We may receive a commission on purchases made from links.
In recent decades, hardwood flooring has made a comeback as a popular choice of flooring for homeowners. The natural look of a hardwood floor goes with any decor and will add value to your home. When properly maintained, it will last decades, and when accidents do happen, you can make hardwood floor repairs yourself by following just a few simple steps.
Even if you maintain your floor regularly, it can acquire scratches, cracks and gouges in areas. Damage can result in costly repairs ranging from a few hundred to a few thousand dollars. However, there are easy DIY fixes that you can make if you feel comfortable enough to do so, and you can always consult with a professional along the way. Before attempting to repair your floor, make sure to thoroughly clean the floor around the damage so the area is free of any debris.
Hardwood Floor Repair for Scratches
Hardwood Floor Repair for Scratches
If the damage runs against the floor's grain, it may not disappear entirely, but you can undoubtedly make scratches in hardwood less noticeable. There are several ways to fix small scratches on a hardwood floor.
Use a blending pencil or finish restorer that is the same color as the wood and fill shallow scratches by following the directions on the product packaging. Both can be especially effective for light scuffs and scratches if there is no other damage to the wood.
Create your own solution with everyday household products. Mix an equal amount of apple-cider vinegar and olive oil into a cup. Stir it, dab the solution into the scratch with your finger and let it sit for 24 hours before rubbing off the excess. Baking soda mixed with a few drops of olive oil also works well in reducing and removing scratches. Add the mixture to the scratch, let it sit for five minutes and then buff it with a soft sponge before cleaning with a damp cloth and towel-drying the area.
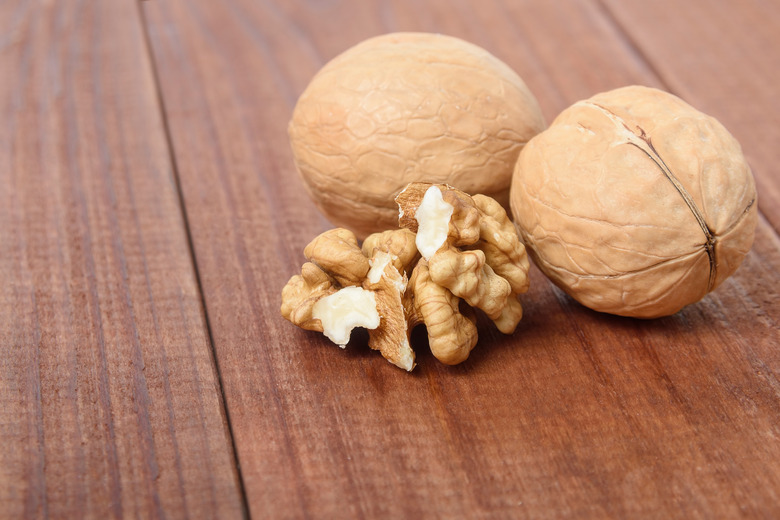
Walnuts can do wonders for minor scratches — just rub a walnut over the scratch several times in small, circular motions to allow the wood to absorb its oil, then buff the area with a cloth. You can also hide minor scratches with a brown marker or shoe polish, but make sure they are close to the same shade as the floor.
 art159/iStock/GettyImages
There are many scratch-repair products on the market for both solid wood and laminate floors. They come in a variety of light and dark wood tones and can hide minor scuffs and scratches when you apply them with a soft cloth on clean wood.
For deeper scratches, you'll have to put in a little more work. With fine sandpaper, sand along the grain of wood where the scratch is located but don't sand too hard. After the area is smooth, fill the scratch with a wood filler that is close to the color of the floor. You may need to blend fillers to get your desired shade.
Hardwood Floor Repair on Gouges and Dents
Hardwood Floor Repair on Gouges and Dents
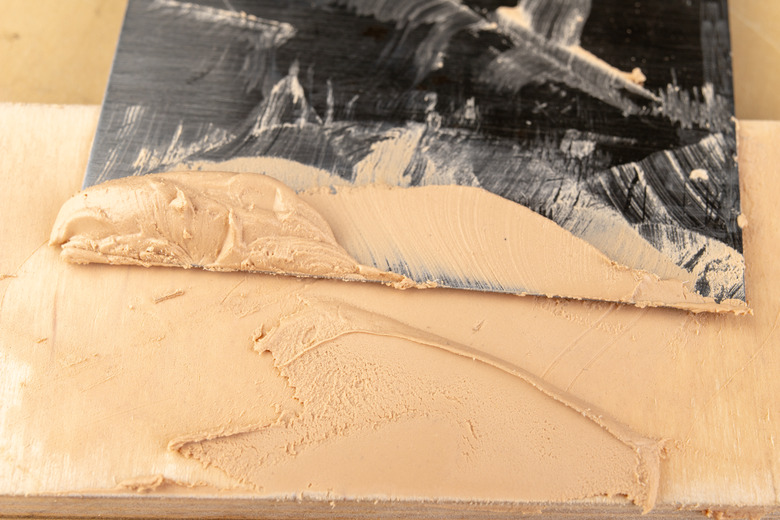
A gouge occurs when part of the flooring chips away after something heavy falls on it. A deep-enough gouge can expose raw wood under the finish. To fix a gouge, use wood filler, which is quick-drying. It also comes in several colors and should be easy to match to the floor.
Sand the area over the gouge toward the wood grain with fine sandpaper until it's smooth. Fill the gouged area by placing the wood filler on a putty knife. Press it into the gouge using more filler than necessary and use the putty knife to scrape off the excess. When it dries, sand the patched area until it is as smooth as the rest of the floor. Let it dry and then refinish the area where the gouge was to match the floor.
 Piotr Wytrazek/iStock/GettyImages
A dent occurs when something heavy has been sitting on the floor for a long time. The object can create an impression in the wood, which may seem permanent, but you can steam it out since hardwood expands and contracts from moisture or the lack of it. If the dent is small and there is no missing or splintered wood, you can swell it back into place with an iron and a little water.
Wet a washcloth, wring it out so it's not too wet and place it over the affected area, allowing the moisture to sink into the wood. Turn on the iron, let it heat to its highest setting and iron firmly, making small, circular motions and continuing until the cloth is dry, which shouldn't take very long. As the wood fibers absorb the water, the wood should expand back to its original state. If it doesn't happen on the first try, repeat the process until the dent is flush with the rest of the wood. Steaming may not always work if the dent is too deep — in that case, you may need to replace the floorboard altogether.
Repairing Squeaky Floors
Repairing Squeaky Floors
Squeaky floors are quite common in older homes, but they can occur in any home. If you don't have access to the area underneath the floor, a dry lubricant such as powdered soapstone, graphite or talcum powder should fix the problem. Sprinkle it over the joints between floorboards in the affected area. Place a cloth over the area and walk over it to push powder between the cracks to silence the squeaks. Vacuum any excess power remaining on the floor.
If you can get under the floor, there are a few options for correcting the squeaks. While you're below, have someone walk across the floor so you can hear from where the noise is coming. Once you pinpoint it, use a flashlight to see if there's a gap between the top of the floor joist, the wood that supports the floor and the subfloor. If you see a gap, push a wood shim (a thin strip of wood) with carpenters' glue into it but don't force it. Insert shims into other gaps that you see to silence the floor.
If the gap runs the length of the joist, you'll need to quiet the noise in the floor in a different way. Using construction adhesive, fill the gap using a caulking gun. Make sure to check if the gap is on both sides of the area around the floor joist and fill that area as well. When the adhesive hardens, the floor will no longer move, and you won't hear the squeaking noise.
Maintaining Hardwood Flooring to Prevent Damage
Maintaining Hardwood Flooring to Prevent Damage
When it comes to wood flooring, the best offense is a good defense. To keep your floors as repair-free as possible, use protector pads underneath any furniture no matter how light or heavy it is. Also, remember to trim pets' nails regularly and do not walk on hardwood in high heels, cleats or hard-soled shoes. Always remember to wipe up spills as soon as you see them to keep your floor stain-free.
The types of cleaning products you use on hardwood flooring depend on its finish, not the type of wood. For floors with surface finishes like urethane or polyurethane coating, it is safe to use a water-based cleaner. For flooring with penetrating finishes, like linseed or tung oil with a top layer of wax coating, clean with only solvent-based products.
If you aren't sure of your floor's type of finish, take a knife to an unseen area of the floor and scrape off a small amount. If transparent material comes up when you scrape, your floor has a surface finish. However, if nothing comes up and you leave a smudge, your floor has a penetrating finish.
Your floors will keep their luster for decades to come if you follow a consistent schedule over the weeks, months and years to maintain them:
- Daily: Sweep, dust and lightly mop the floors
- Weekly: Thoroughly mop (with a barely damp mop) high-traffic areas like hallways or foyers
- Monthly: Clean with the recommended products for the floor's finish
- Three to five years: Apply a new coat of finish
- Every few decades: Sand and refinish
The National Wood Flooring Association also suggests that you remain aware of the humidity in your home, as wood can swell with moisture or shrink when the environment is too dry. Moisture can cause planks to cup, which means their edges will rise as their centers stay flat. Conversely, a dry environment can cause planks to loosen and split. Keep your home between 60 and 80 degrees Fahrenheit and 30 to 50 percent humidity throughout the year to prevent this kind of damage.
References
- National Wood Flooring Association: Problem Prevention
- Family Handyman: Refinish Hardwood Floors in One Day: How to Refinish Wood Floors Step by Step
- This Old House: Patching Damaged Wood Floors
- Home Depot: How To Clean Hardwood Floors
- Popular Mechanics: 7 Ways to Silence Your Squeaky Floor
- Bob Vila: How To: Use Wood Filler