DIY Clay Wall Art Literally Anyone Can Do
We may receive a commission on purchases made from links.
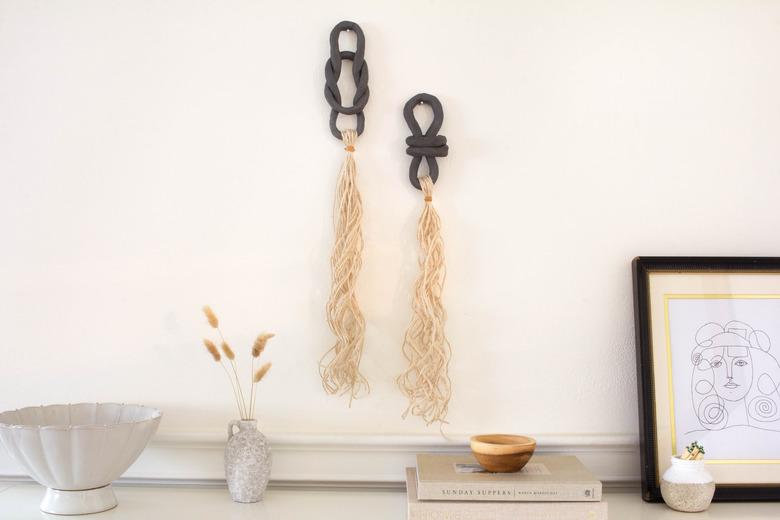
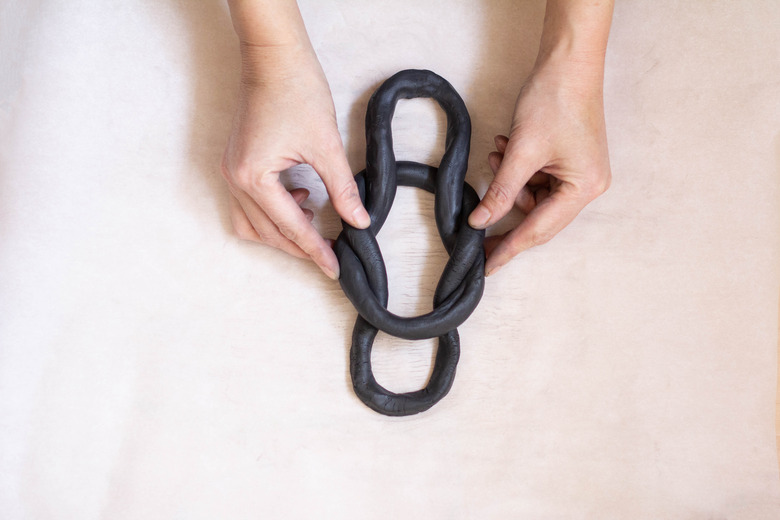
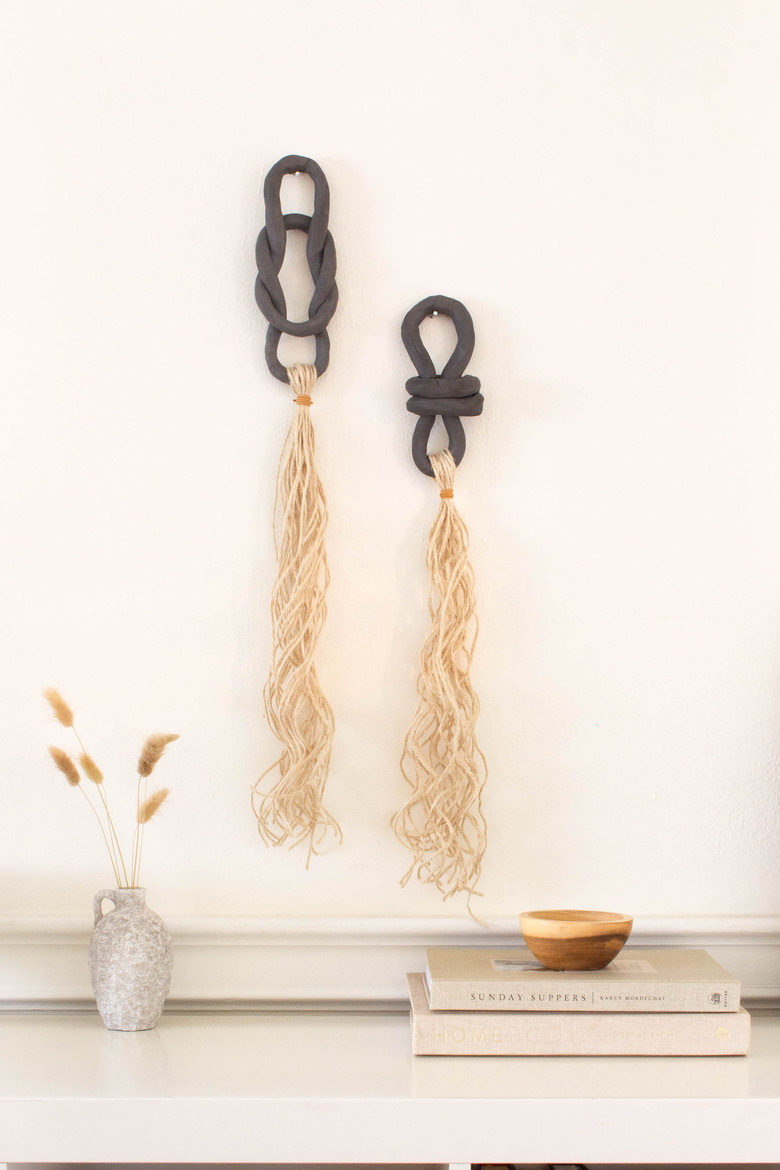
If wall hangings offer texture where sculptures offer dimension, then combining the two in tassel form yields a must-have accessory for any home. Lucky for you, we figured out how to create such a thing using air-dry clay (no kiln required) and simple jute twine. In case you're wondering, you don't have to be an artist whatsoever to make these. Working with air-dry clay is totally beginner-friendly, and oddly calming, too. With two variations of clay oval shapes — one linked and one knotted — we just love the contrast between the smooth sculptures and coarse tassels, as well as the dark clay against the light twine. If your bare walls are begging for texture or a sculptural focal point, this one's for you.
Things Needed
-
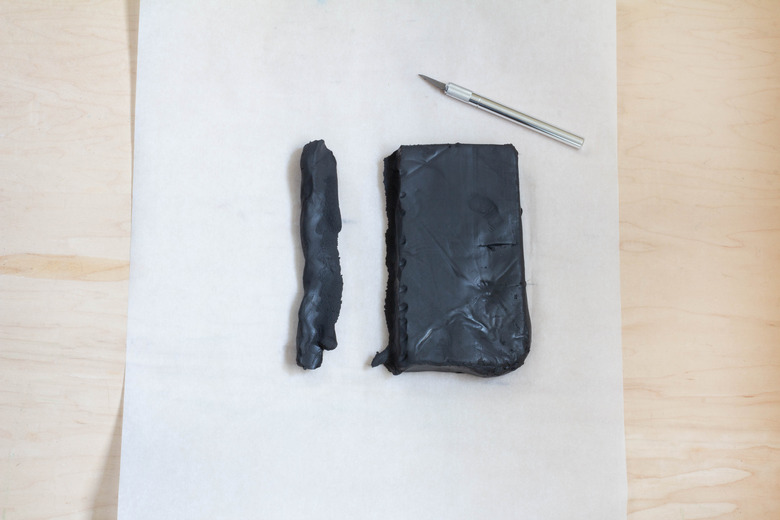
Air-dry clay (we used black)
TIP: We used black air-dry clay, but if you can't find it, or you already have a different color, you can simply paint your sculptures once they're dry.
 Trisha Sprouse
Linked Oval Shape
Step 1
Place the block of clay on a sheet of parchment paper, and use a utility knife to cut off a 1-inch wide strip.
 Trisha Sprouse
Step 2
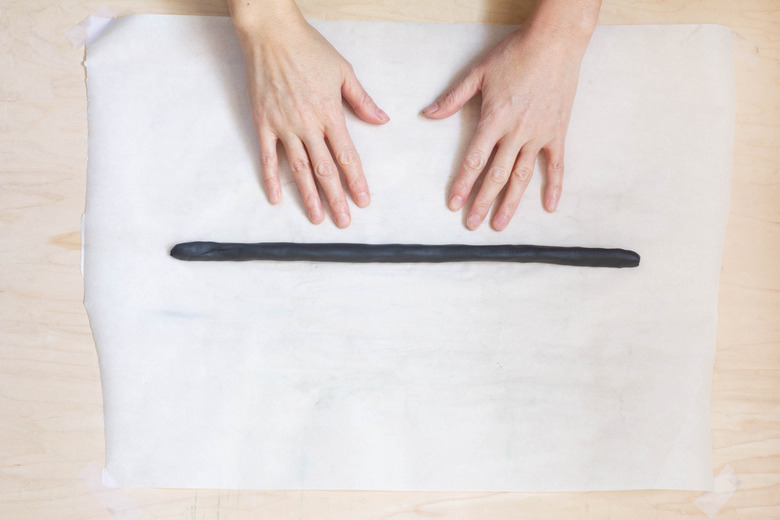
Roll it into a long tube shape that's approximately 16 inches long.
 Trisha Sprouse
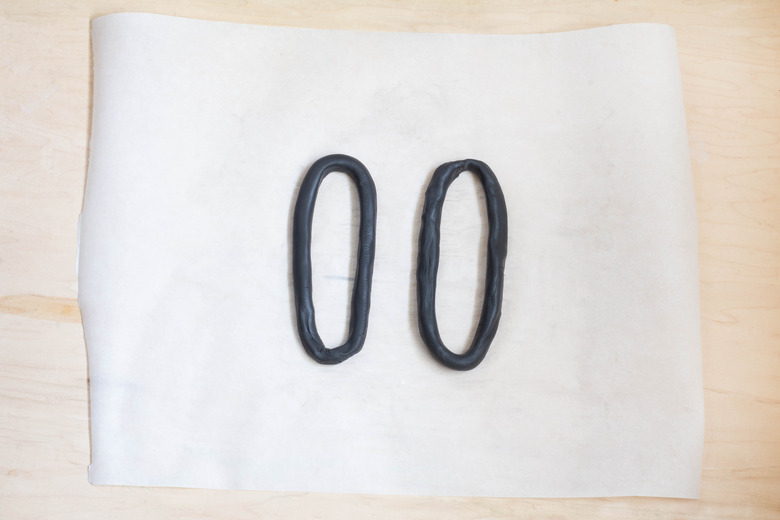
Step 3
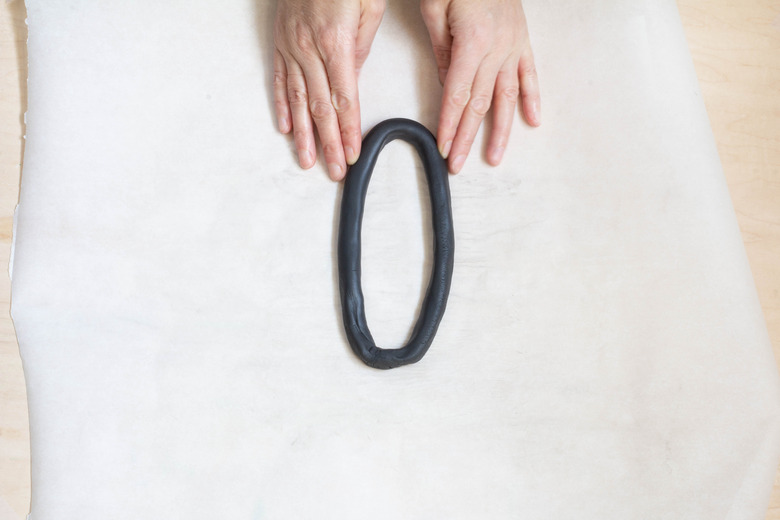
Form the clay into an oval shape, pinching and smoothing the ends together to close the loop.
 Trisha Sprouse
Step 4
Repeat to create a second oval.
 Trisha Sprouse
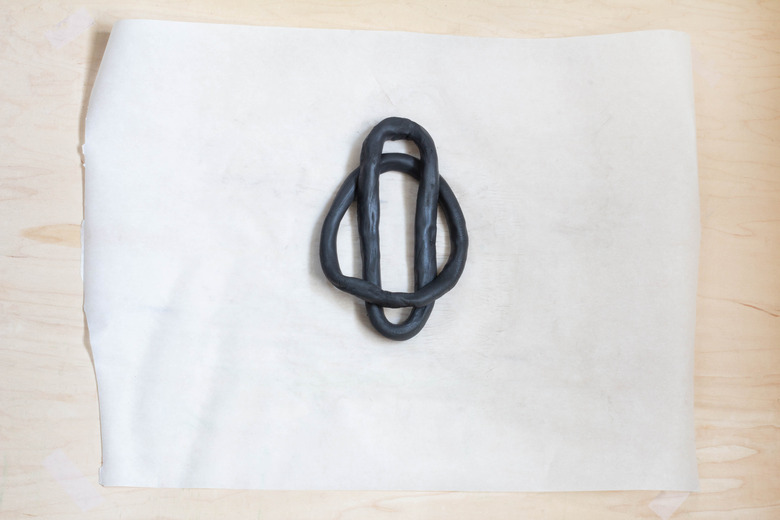
Step 5
Place the first oval on top of the second oval, and then pull the bottom of the first oval underneath the bottom of the second oval. Don't worry if the second oval more resembles a circle at this point, as we'll be reshaping it later.
 Trisha Sprouse
Step 6
Lightly cinch the bottom of the second oval together and feed it under the bottom of the first oval.
 Trisha Sprouse
Gently pull the the second oval down until the top is about midway down on the first oval.
 Trisha Sprouse
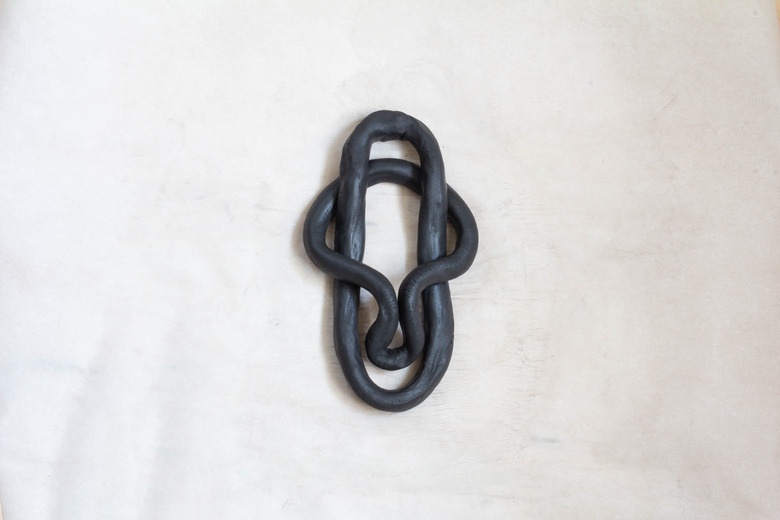
Step 7
Smooth and reshape the ovals to open them up so they look symmetrical. Gently but firmly press together the points where the two ovals meet to adhere them together, then leave it to dry for 24 to 48 hours.
TIP: Our particular brand of air-dry clay cures within 24 hours for pieces that are 1/4-inch thick, but drying times will vary depending on the thickness of your piece and the amount of humidity in the air. We let ours dry for two days to ensure they were completely dry.
 Trisha Sprouse
Knotted Oval Shape
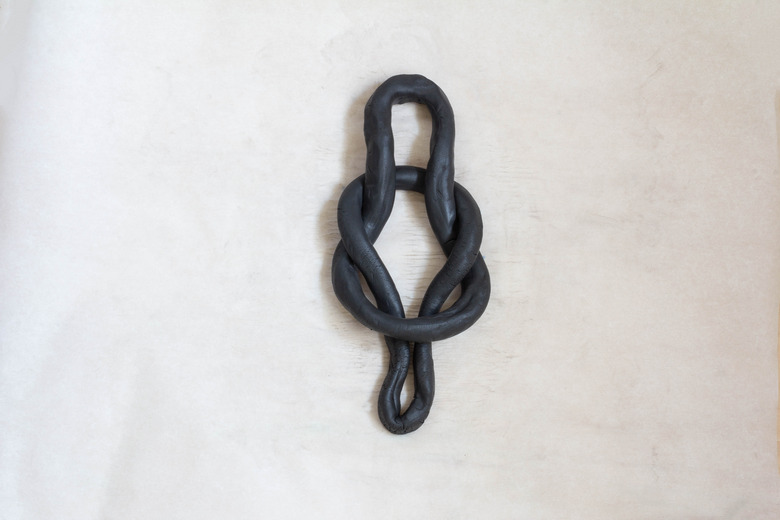
Step 1
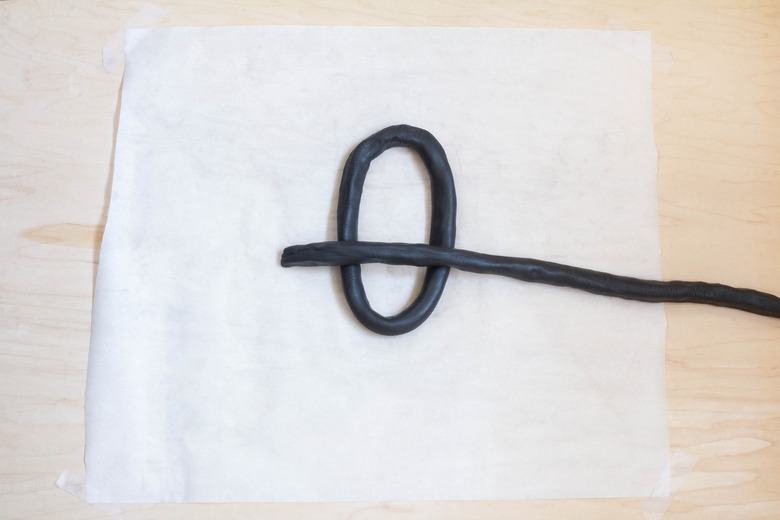
Follow steps 1 and 2 above to create two long tubes of clay. Form one tube into an oval shape, and then place the second tube on top of it.
 Trisha Sprouse
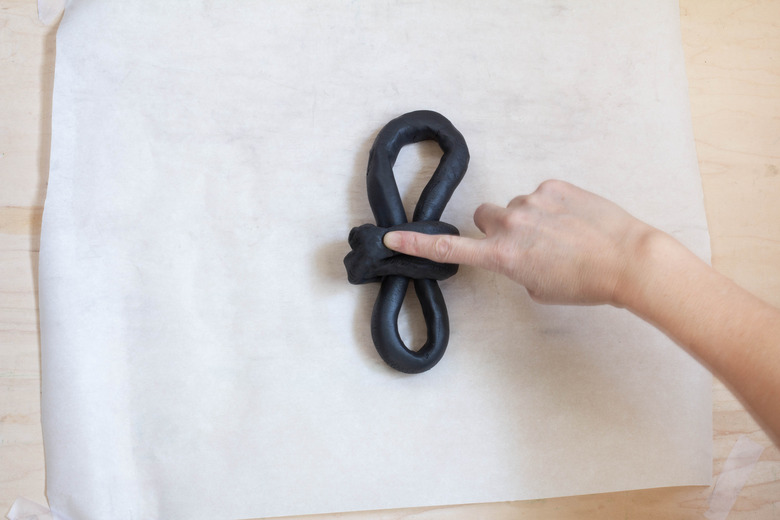
Step 2
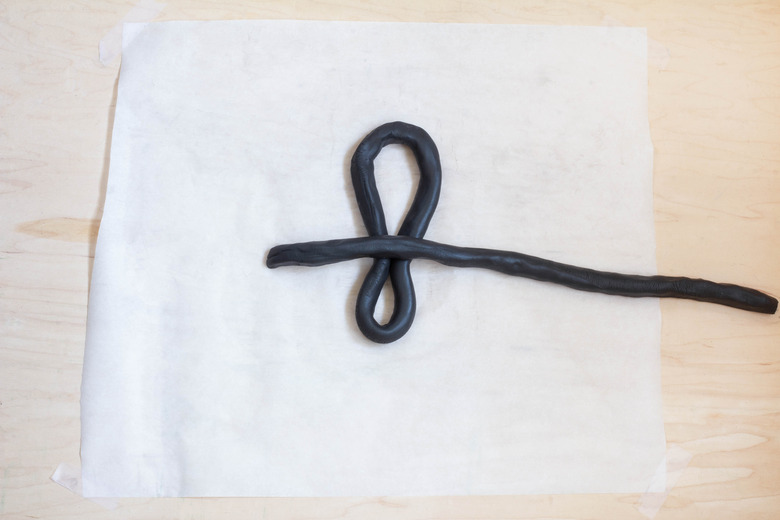
Cinch the bottom of the oval together to create an asymmetrical figure 8.
 Trisha Sprouse
Step 3
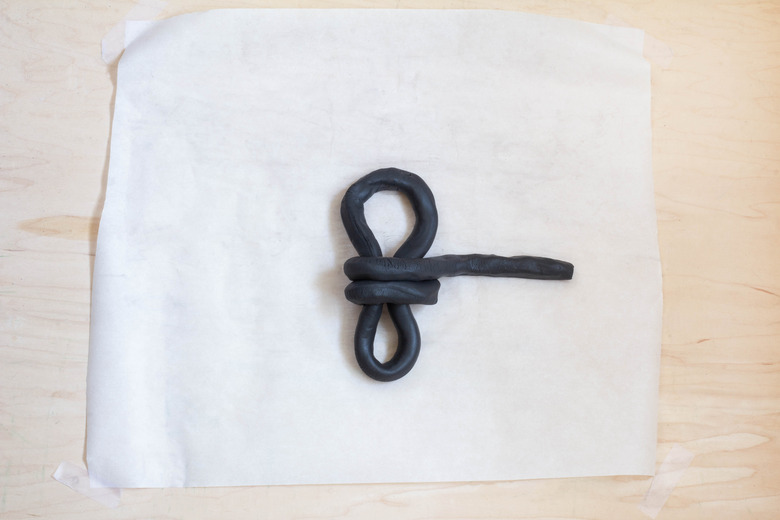
Wrap the tube around the oval twice.
 Trisha Sprouse
Step 4
Cut off the excess clay with a utility knife.
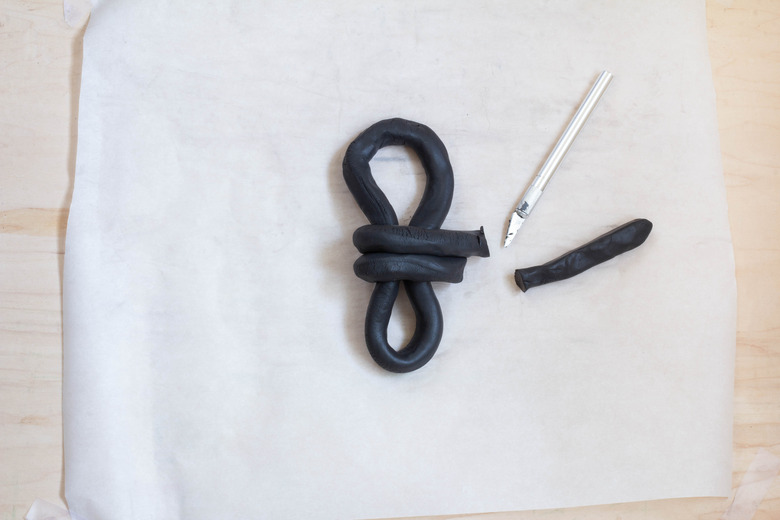 Trisha Sprouse
Step 5
Turn the clay piece over, and smooth the loose end of the tube to the spot where you began wrapping it around the oval. Set aside to dry for 24 to 48 hours.
 Trisha Sprouse
Make the Tassel
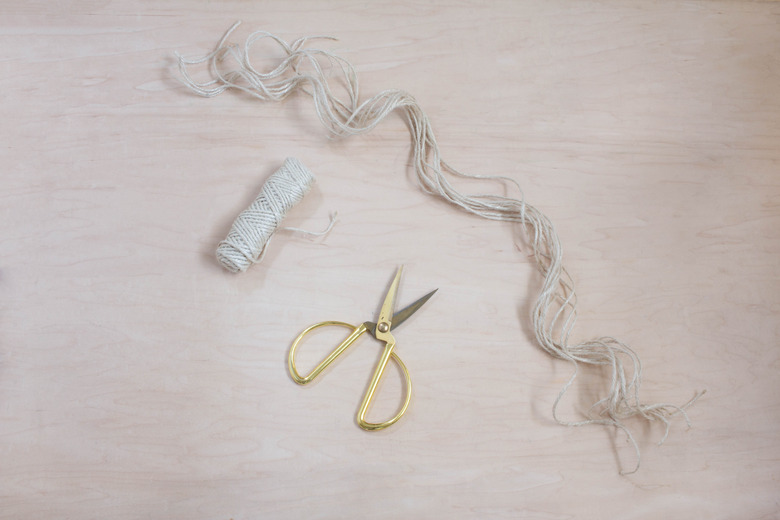
Step 1
Cut 15 to 20 strands of twine that are each 40 inches long.
 Trisha Sprouse
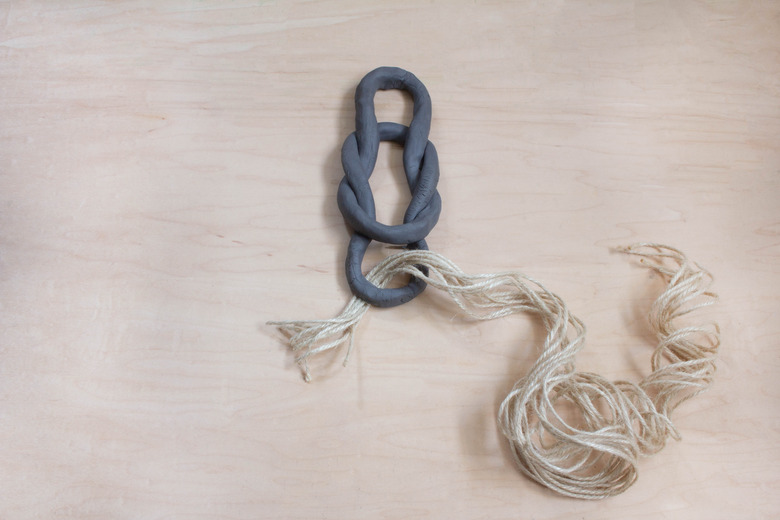
Step 2
Group all of the strands together and feed one end through the bottom of the clay oval.
 Trisha Sprouse
Pull the strands through until the lengths are even on both sides.
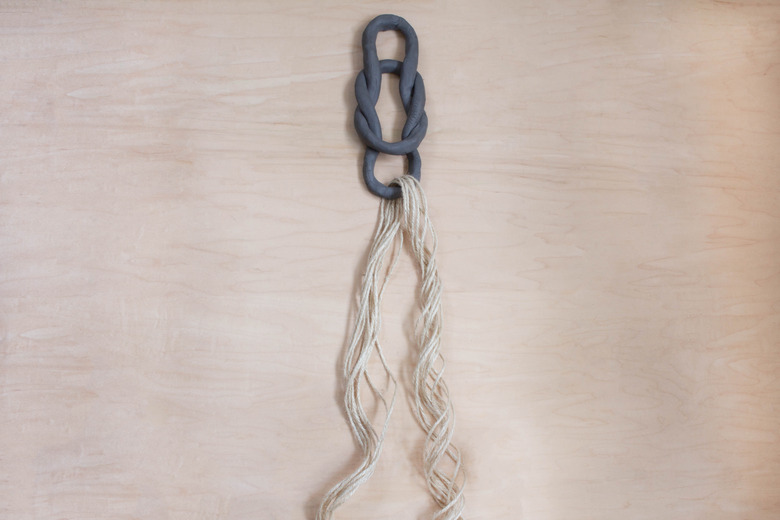 Trisha Sprouse
Step 3
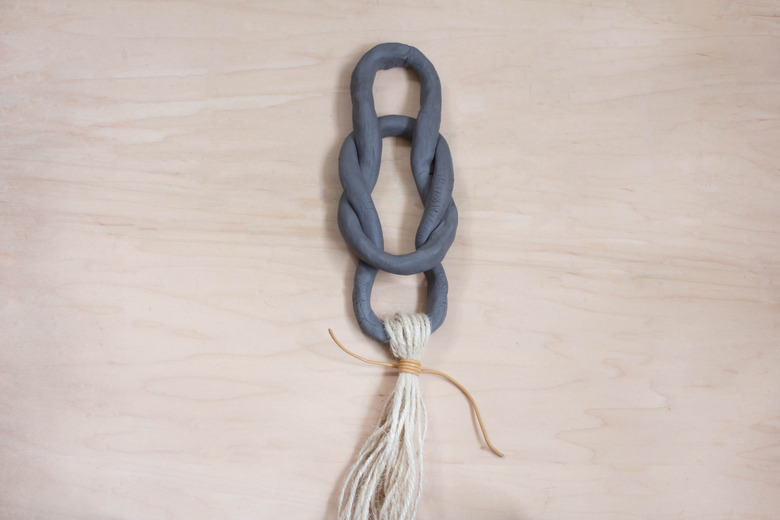
Wrap leather cord several times around the top of the strands to cinch them together and form the tassel. Tie the leather cord into a tight knot on the back of the tassel, and clip any excess.
 Trisha Sprouse
Simply hang your tassels from nails and enjoy the sculptural warmth they bring to your walls.
 Trisha Sprouse