How To Install Linoleum Flooring: A Complete Guide

When discussing linoleum flooring, it's important to note that it's not the same as its vinyl counterpart. In fact, although they look the same, the two materials couldn't be more different.
Vinyl flooring is a synthetic product, and it was developed in the 1930s as a substitute for linoleum, which was patented more than 50 years earlier. Although linoleum and vinyl flooring cost about the same, the former is considered the more luxury option. And that's partly because it is constructed with natural materials. Originally designed for use on ships, it can definitely stand up to the high foot traffic, spills, and general kitchen wear and tear. If you're considering this option for your existing flooring, you have a choice between sheet linoleum and linoleum tiles.
Linoleum Is Eco-Friendly

Linoleum Is Eco-Friendly
According to the Hagley Museum and Library, the history of linoleum began in 1855. Englishman Frederick Walton forgot to seal his can of linseed oil paint thinner and, as linseed oil does, it developed a skin. When Walton peeled off the rubbery dry layer, he thought it could work as a flooring material. To test the theory, he mixed the substance with cork, wood flour, and pigments, then rolled the mixture onto a jute backing.
Walton's invention caught on so quickly that he lost a copyright infringement lawsuit on the name "linoleum" in 1878 because it was considered a generic term. The word he coined in his patent application in 1860 refers to the Latin terms for flax (linum) and oil (oleum). And other than flax oil, which is the same thing as linseed oil, linoleum contains little else. That means there are no petroleum products, and all of the ingredients are renewable and biodegradable.
Apart from having updated designs and a durable factory finish, contemporary linoleum isn't much different from the material Walton invented. And it has proven its resistance to water damage, too. In fact, preserved linoleum tiles were even recovered from the wreck of the Titanic. Consequently, this substance is ideal for kitchens as well as floors in other high-traffic areas of the house.
Comparing Linoleum to Vinyl Flooring

Comparing Linoleum to Vinyl Flooring
If you've narrowed your kitchen flooring options to linoleum and vinyl, you don't have to bother with a price analysis because the two materials cost pretty much the same. If your decision hinges on design, you'll probably be more attracted to vinyl because there are more choices are available.
Keep in mind, though, that the designs on vinyl flooring and tile are stamped on the surface and wear off easily. Linoleum designs, although simpler, extend all the way through the material and don't wear off.
Both home improvement materials come as sheet flooring or glue-down tiles, and you use the same procedures for installation. Because they are thicker, linoleum tiles are a little more difficult to cut, but you use the same adhesive to secure them.
Linoleum as a Kitchen Floor Covering

Linoleum as a Kitchen Floor Covering
Linoleum has a reputation as an industrial-age floor covering, and old floors made of this material are common in pre-20th century tenements in large North American and European cities. Modern kitchen linoleum has evolved a lot, though, and it comes in an array of contemporary patterns and colors that fit with most kitchen decor schemes in easy-to-install formats.
When it comes to durability, a well-maintained kitchen linoleum floor can last twice as long as a comparable vinyl one. And although neither have the longevity of ceramic tile flooring, they are far less expensive and easier to install. Laying linoleum or vinyl tile can be done as a DIY, but you may want to hire a pro to install sheeting because of the crucial need for accurate measuring and cutting.
Shopping for linoleum is easy. According to Floor Critics, Forbo manufactures a proprietary product known as Marmoleum and offers the widest range of colors and styles on the market. Armstrong, which has been in the linoleum business since 1908, has a smaller selection in its LinoArt series, but each choice comes with more than a century of manufacturing experience. If eco-friendliness tops your list of priorities, check out Johnsonite's Harmonium XF series, which is manufactured with 94% natural raw materials.
Installing Linoleum as a DIY Project

Installing Linoleum as a DIY Project
Installing linoleum floor is certainly something you can undertake yourself, and we're here to help. Here's what you'll need to get going.
Things Needed
-
100lb Roller
-
Carpenter Square
-
Chalk Line or Washable Marker
-
Tape Measure
-
Utility Knife or a hooked linoleum knife
-
Floor Scraper
-
Trowel
-
Notched Trowel
-
Linoleum Tiles
-
Linoleum Adhesive
-
Hammer & Chisel (for removing any old flooring)
1. Remove any obstructions from your subfloor
 Getty Images
First things first, you need to uncover your subfloor. Remove any furniture or obstructions from the room you're working on as well as any baseboards that may get in the way. These can be installed again after. If you're covering old tiles with linoleum, you will need to ensure they're clean and ready to be leveled.
2. Clean up
 Getty Images
Linoleum doesn't require an underlay, which makes installation substantially easier. However, this also means that any bumps in the subfloor will be very noticeable. Consequently, your subfloor needs to be completely even and free from dirt before you start.
If you're looking to cover an old floor, you will need to make sure it's completely flat. Tiles will need grout reapplied to even them out (with at least 48 hours of drying time), and concrete will need to be repaired to ensure that moisture can't seep through. Any high spots can be leveled with a masonry chisel. Adhesive residue from an existing vinyl or linoleum floor should be removed with a hammer.
If you're struggling to get your subfloor completely flat, consider adding a plywood underlay to support the linoleum. Simply cut the wood to fit the area first.
3. Acclimate your linoleum
 Forbo
Forbo
After preparing your subfloor, it's important to acclimate your linoleum. Due to its natural qualities, the material will shrink and expand depending on the temperature. These changes won't affect how the floor looks over time, but they can cause issues during installation. You should allow the material to reach its "resting" size by storing it in its intended room for about 24 hours prior to use. Let it rest somewhere level without stacking.
4. Make a template
 Getty Images
The easiest way to measure your linoleum is to make a paper template. Whether you're installing tiles or sheets, it's important that you also take your removed baseboards into account. You should leave at least a 1/4-inch expansion gap that will be covered by the baseboards when you reinstall them.
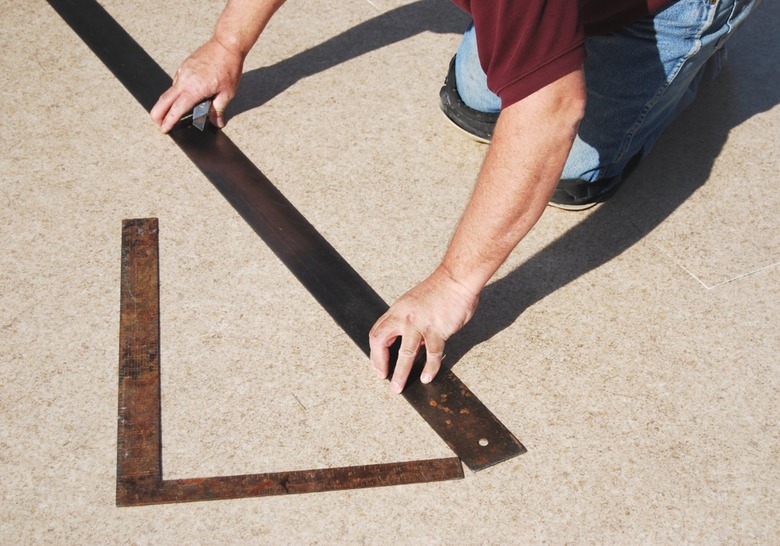
5. Mark cutting lines on your linoleum
 Getty Images
After completing the paper template, transfer it to your linoleum and mark out where you're going to cut. We recommend using a chalk line or washable marker to trace around the paper. Alternatively, you can take precise measurements and use a long ruler and tape measure to draw out your shape. If you're laying tiles, you can use the same template and marking process on a smaller scale once you come to placing the edges of your flooring.
Remember, it's easy to cut down linoleum flooring, but you can't add to it, so allow for the marking to be slightly generous; about an inch wider should be perfect.
6. Cut your linoleum
 Getty Images
Now that you've marked out your linoleum, you can begin cutting, and precision is vital. Use a sharp utility or hooked linoleum knife, to cut along the lines. You can use a safety straightedge to ensure an accurate cut. To avoid damaging the subfloor, place a layer of plywood underneath the material as you cut.
Once you have moved the linoleum piece into place, work the flooring around any corners and obstructions, taking care not to crease it. If you marked and cut your linoleum so that you have an extra inch or two on every side, the material will lay up against the walls.
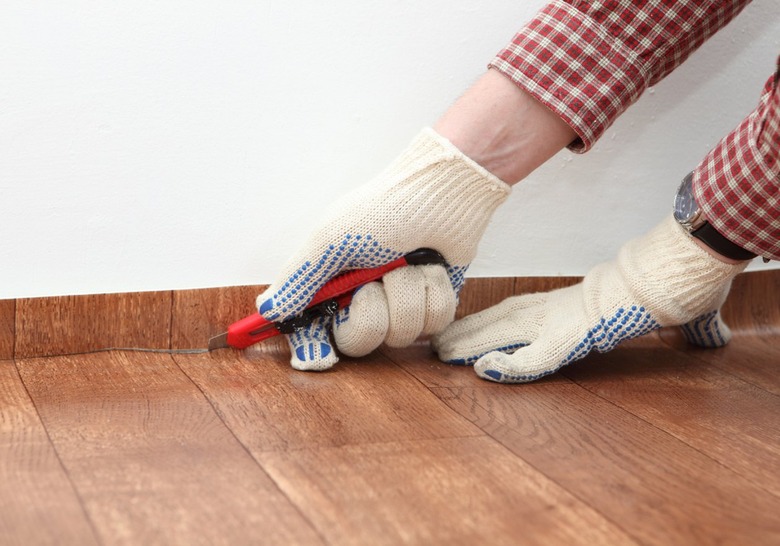
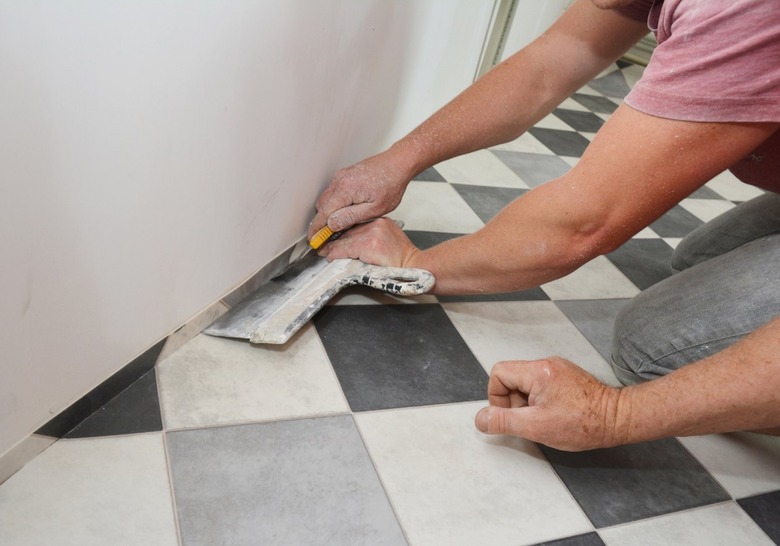
7. Perfect your cut
 Getty Images
Use your cutting tool to trim the edges of the linoleum so it lays flat on the floor and flush against all edges. For straight corners, you can use a piece of wood to crease the linoleum. For inside and outside corners, you can use V-shaped cuts to shave off material. Do this with extra care to avoid taking off too much.
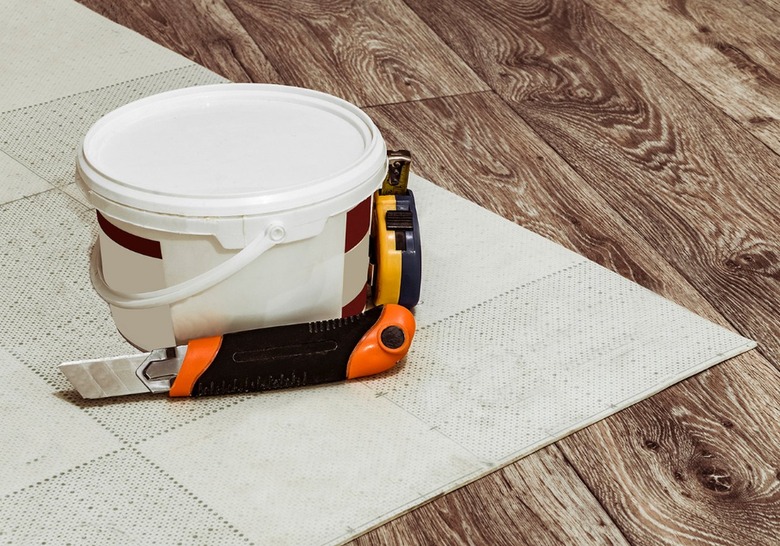
8. Spread adhesive
 Getty Images
Whether you're installing sheets of linoleum or tiles, you will need to consult the manufacturer for the recommended adhesive.
To apply, peel back the material and use a notched trowel to spread the adhesive on the underside of the linoleum. Again, depending on the manufacturer, there might be specific instructions for this step. For example, some types will only need glue applied to the edges, while others will need adhesive all over. Allow the material to sit for a short while before rolling the linoleum back down and pressing it into place. Continue this process for the remainder of the floor.
9. Secure the linoleum with a roller
 Forbo
Forbo
After you have successfully glued down the sheet or tile flooring, you will need to use a roller to remove air bubbles and securely adhere it to the subfloor. Work from the middle of the room to the edges, ensuring every part has been pressed. You may notice excess adhesive seeping out of the edges; this can be dissolved using a solvent and wet rag.
10. Finish with a linoleum sealant
 Forbo
Forbo
Most manufacturers suggest sealing your linoleum flooring to give it a protective layer. To apply a sealant, use a brush or roller that will add a thin, even coat over the entire floor. Make sure you also seal any seams to stop peeling or water damage.
11. Let it set for at least 24 hours
 Forbo
Forbo
Now it's time for your flooring to mould, which means you should stay off of it for at least 24 hours. This will allow the adhesive and sealant to dry. Keep traffic to a minimum until the underlying adhesive sets completely. Replacing your furniture too early or walking excessively on the floor can cause the still-pliable base to deform as it dries, leading to permanent bumps and divots.
How to Maintain a Linoleum Floor

How to Maintain a Linoleum Floor
Because it's a natural material, linoleum is slightly porous. And while it has a history of marine use and water resistance, it can definitely sustain damage. Like hardwood and laminate flooring, this material is especially vulnerable to standing water and pet accidents, so you should clean up spills quickly and avoid excessive liquid when mopping.
It's best to maintain this flooring with a damp mop dipped in a pH-neutral cleaning solution and wrung well. You can also fill a spray bottle with a 50/50 solution of vinegar and water and wet the floor directly ahead of your mop. Do not use ammonia-based cleaners to remove scuffs because they will strip the linoleum.
While you should avoid this practice if you have vinyl, you should wax linoleum periodically to help it maintain a shine. When you clean the floor in between wax treatments, try putting a little fabric softener in the water. It can deepen the shine.