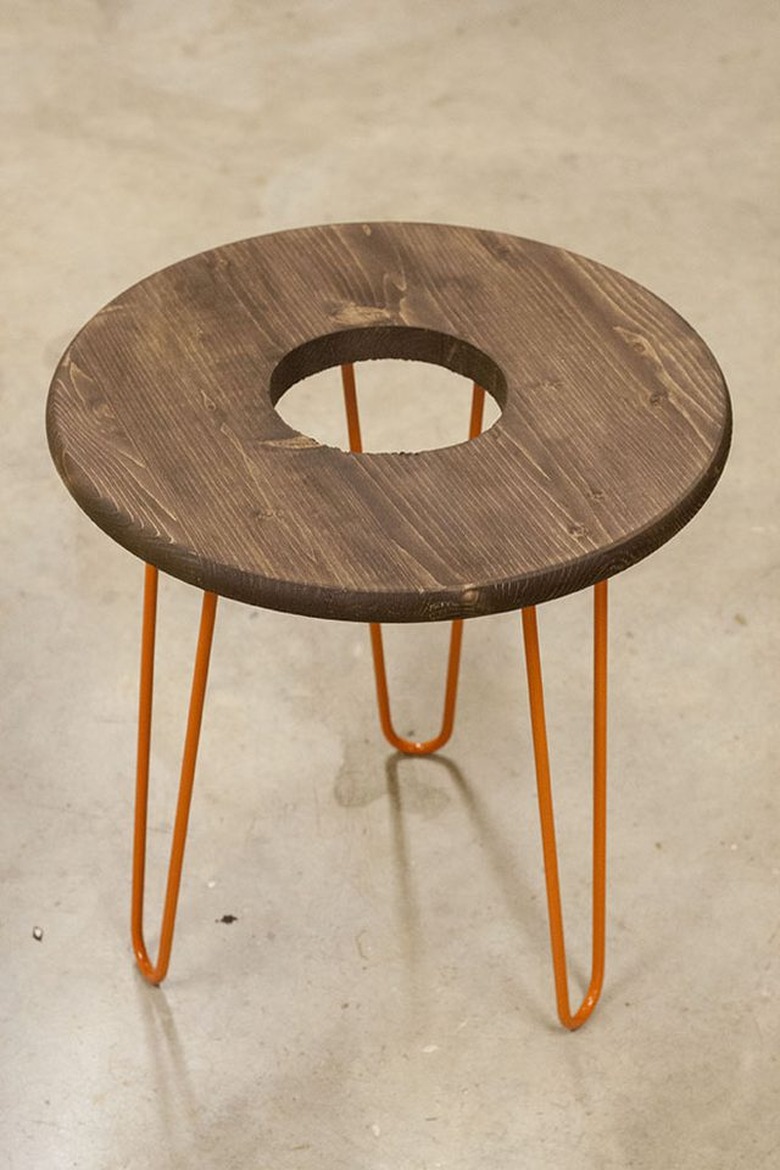
DIY Modern Planter/Side Table Tutorial
Why make a regular ol' side table when you could make a side table that doubles as a planter for your favorite potted plant? Talk about a perfect twofer. Let this DIY be your guide.
 Carrie Waller
This DIY involves woodworking tools, like some of our other advanced projects (such as this gorgeous headboard). If you're new to working with these tools, please consult your local hardware store for help.
Things Needed
-
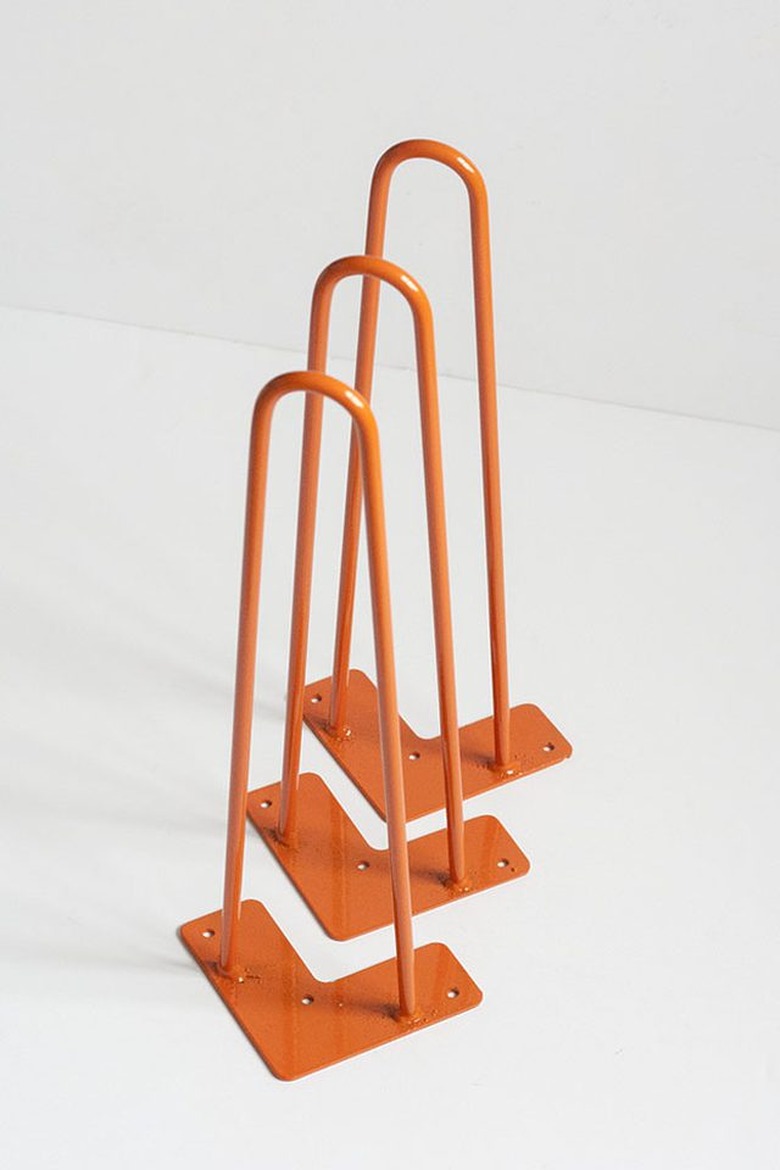
Hairpin legs with screws, ( 3 )
-
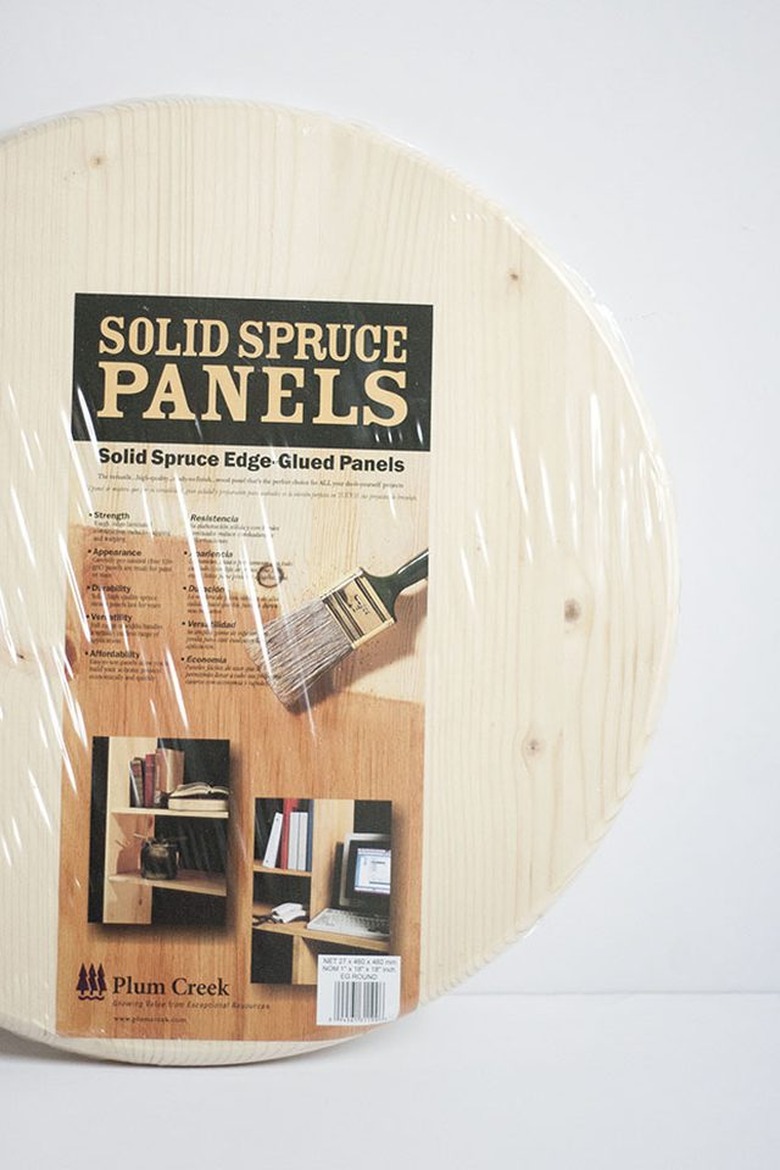
Round wooden tabletop
-
Straightedge
-
Plant and pot
-
Square ruler
-
Compass
-
Drill and drill bit
-
Jigsaw
-
Rubber gloves and rags
-
Polyurethane
Note: I ordered my hairpin legs from Hairpin Legs For Less for about $100. For a less expensive version, you can get them unpainted. Your local hardware store should have the rest of the materials you'll need for this project, including the tabletop.
 Carrie Waller
 Carrie Waller
Step 1
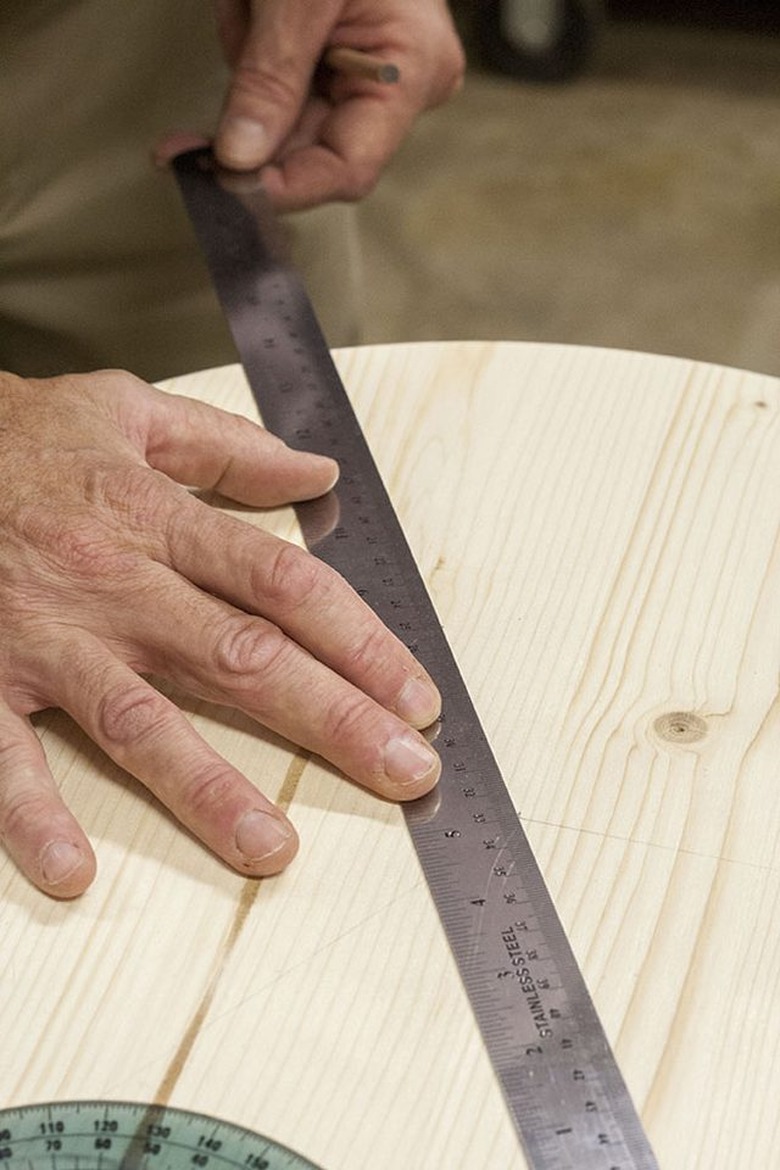
To find the center of your tabletop, use a straightedge to draw a line down the middle.
 Carrie Waller
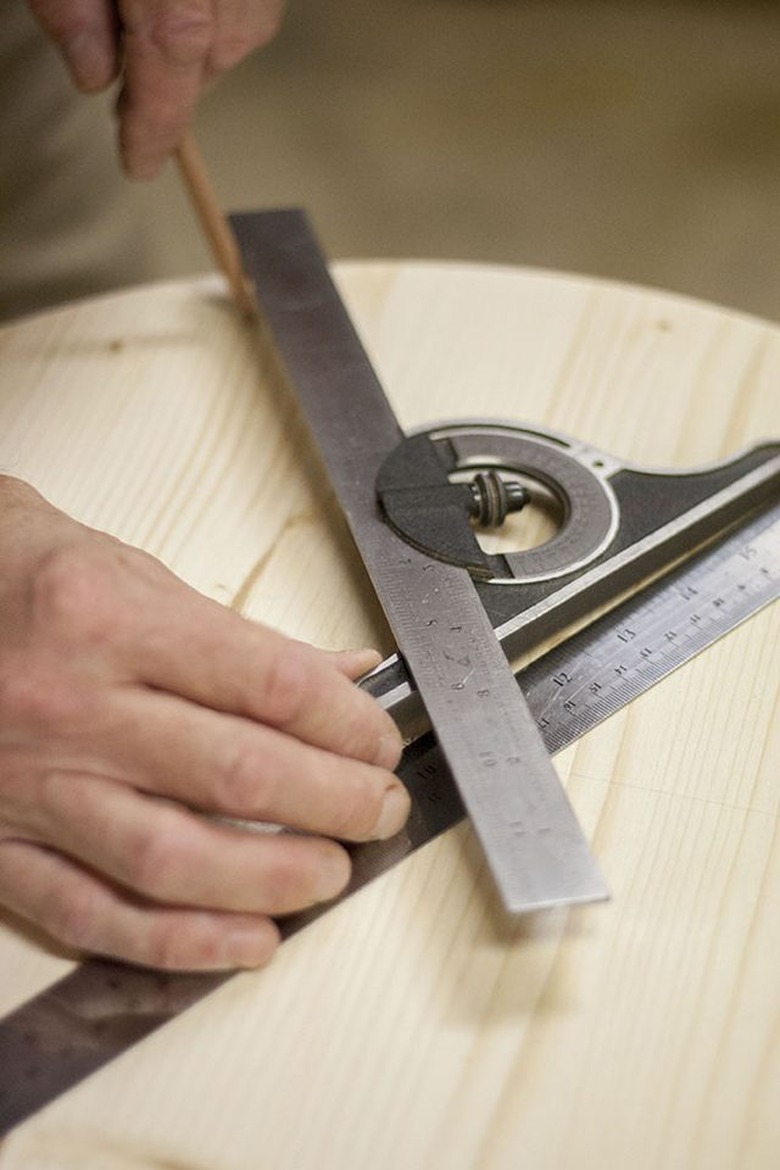
Then, using that first line as a starting point, divide the tabletop into threes by marking lines (using the straightedge) every 120 degrees. This marks the placement for the three hairpin legs.
 Carrie Waller
 Carrie Waller
 Carrie Waller
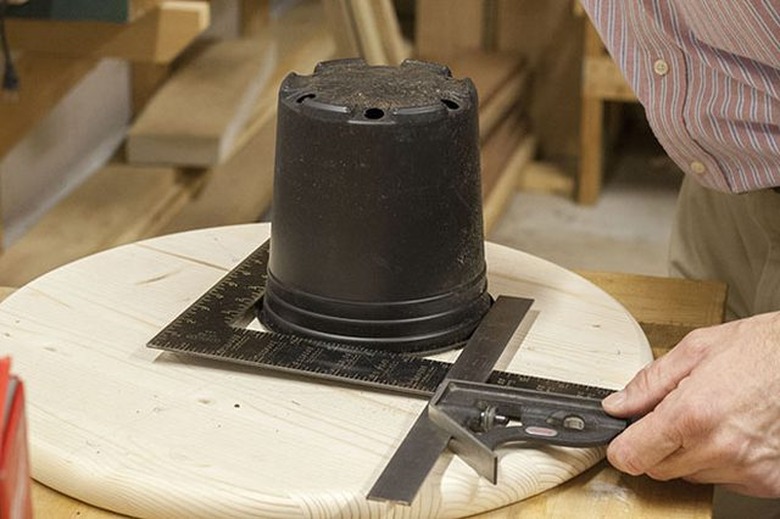
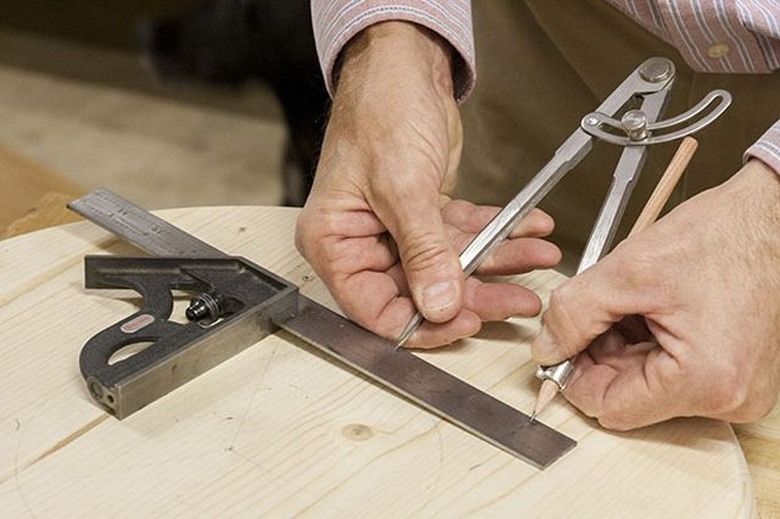
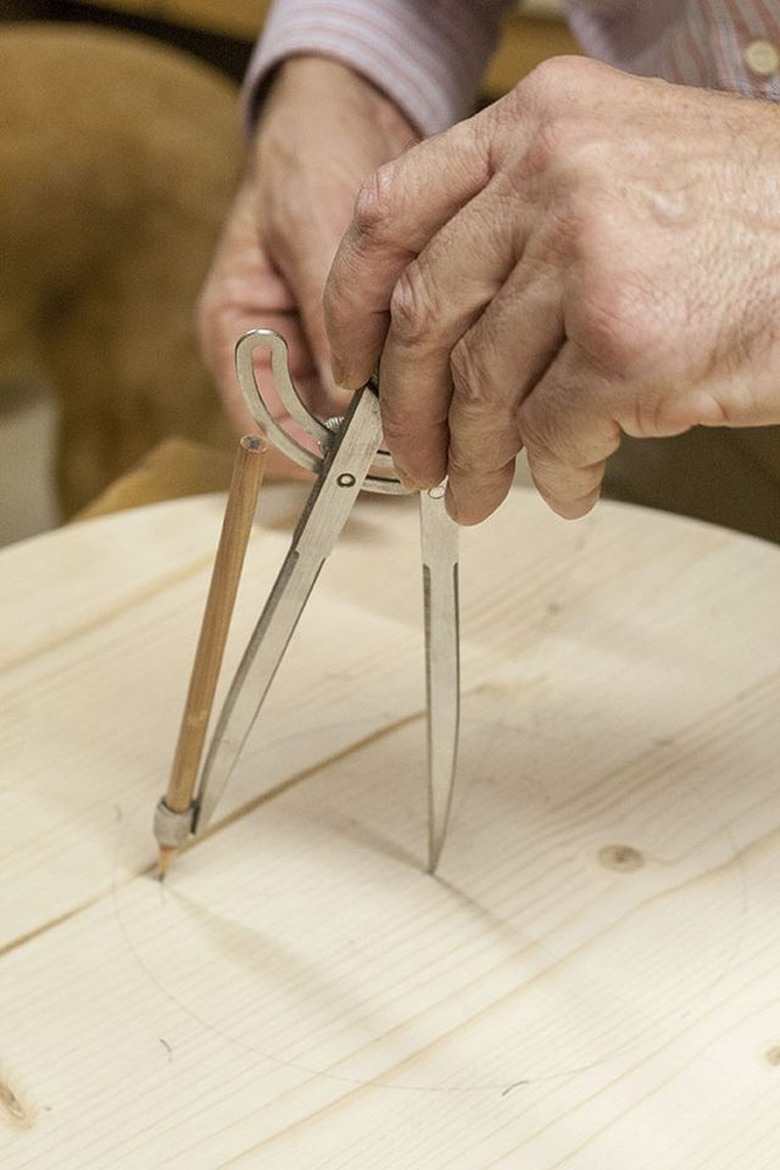
Step 2
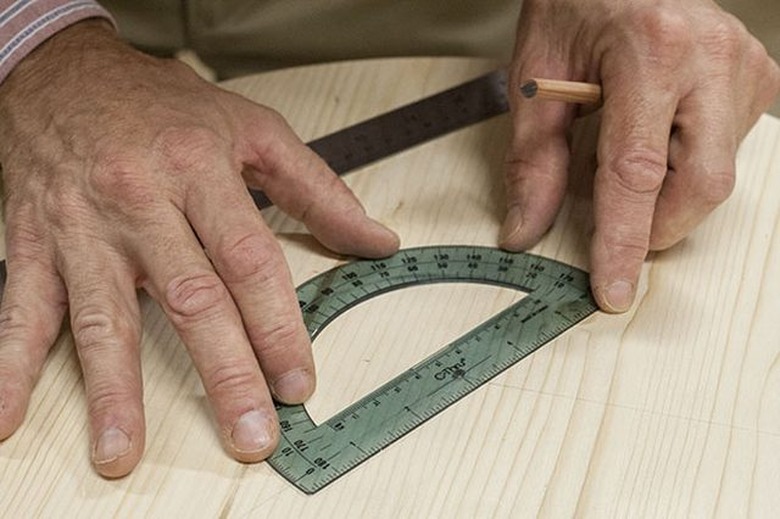
Next, determine the size of the hole for your plant. Take your pot and put it into the right angle of a square ruler. Line up another straightedge along the opposite end to get an accurate measurement of the diameter of the pot.
 Carrie Waller
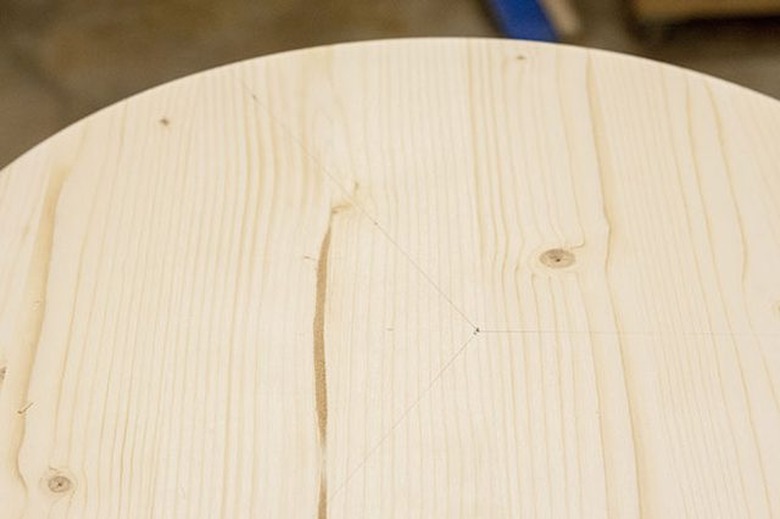
Then, draw a circle using a compass with the point positioned at the center of the table.
 Carrie Waller
 Carrie Waller
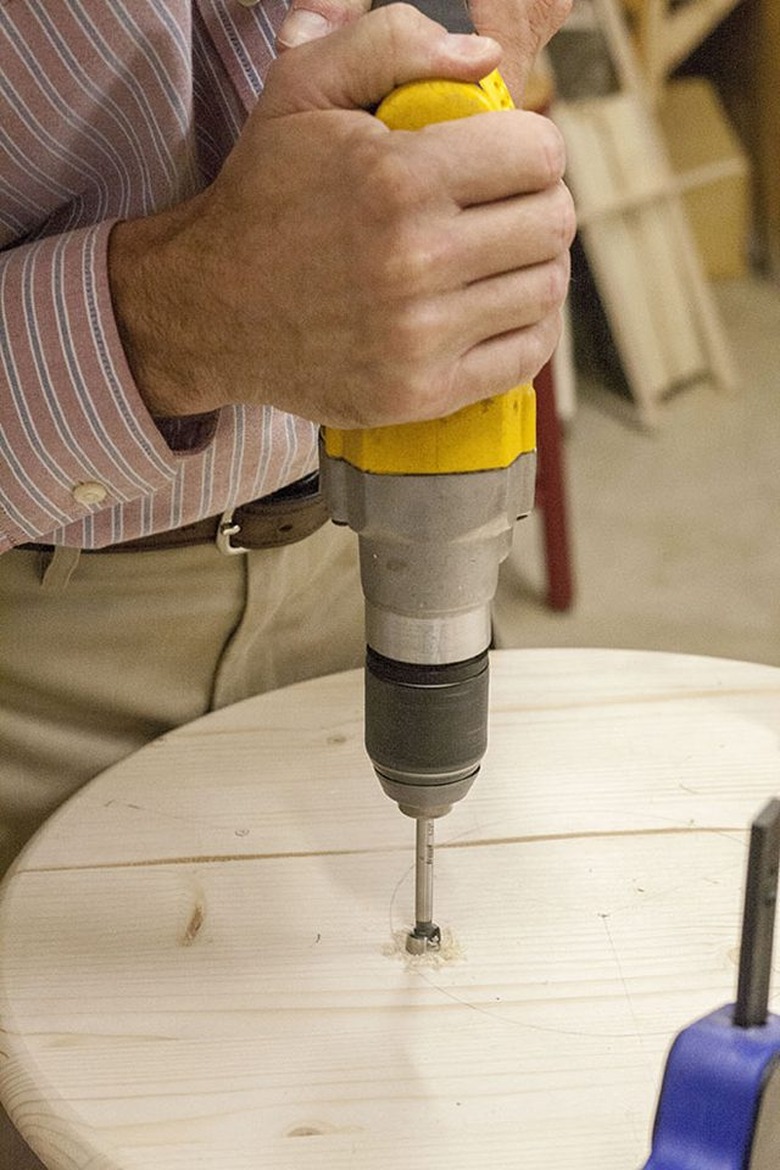
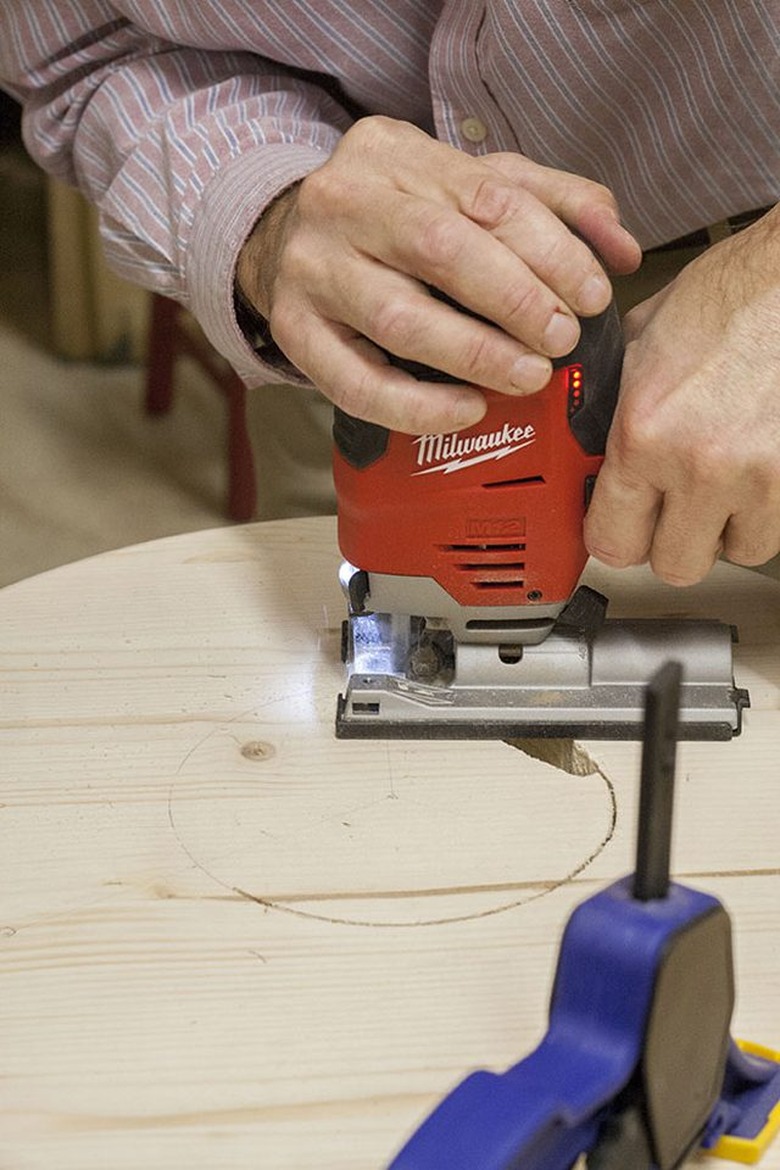
Step 3
Now it's time to cut the hole. To get the hole started, use a drill and drill bit, and then follow up using a jigsaw to cut out the rest of the hole. Don't forget to wear your safety glasses!
 Carrie Waller
 Carrie Waller
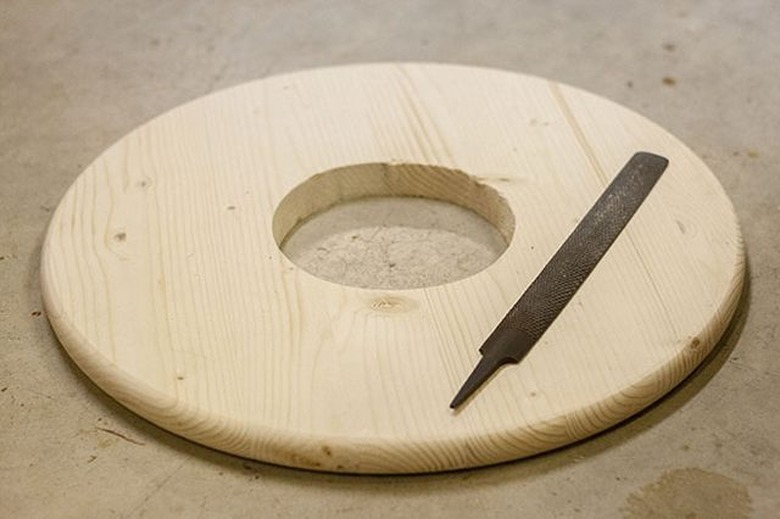
Step 4
Sand and clean the hole using a rasp.
 Carrie Waller
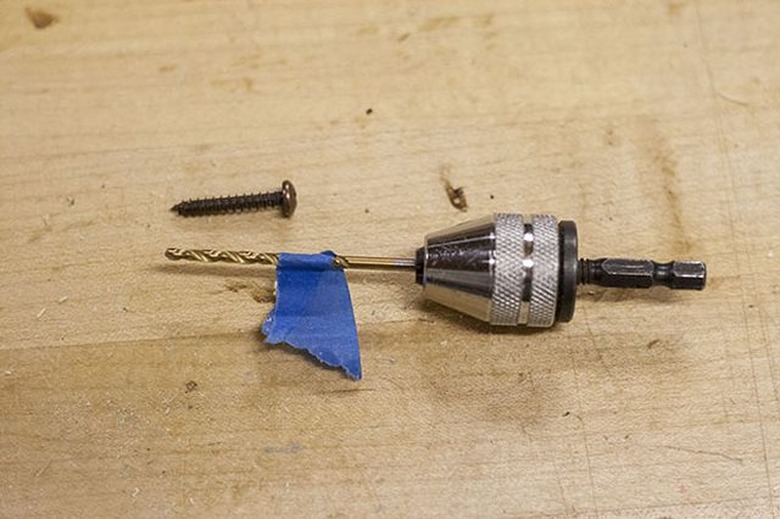
Step 5
To attach the legs, drill pilot holes into the lines you marked earlier. Screw the hardware in through the hairpin legs and into the underside of the wooden tabletop.
 Carrie Waller
Tip: Avoid the risk of drilling all the way through your tabletop by cutting off a small piece of painter's tape and wrap it around your drill bit, matching the length of your screw. Then when you drill the pilot holes, the tape will show you where to stop drilling and reverse.
 Carrie Waller
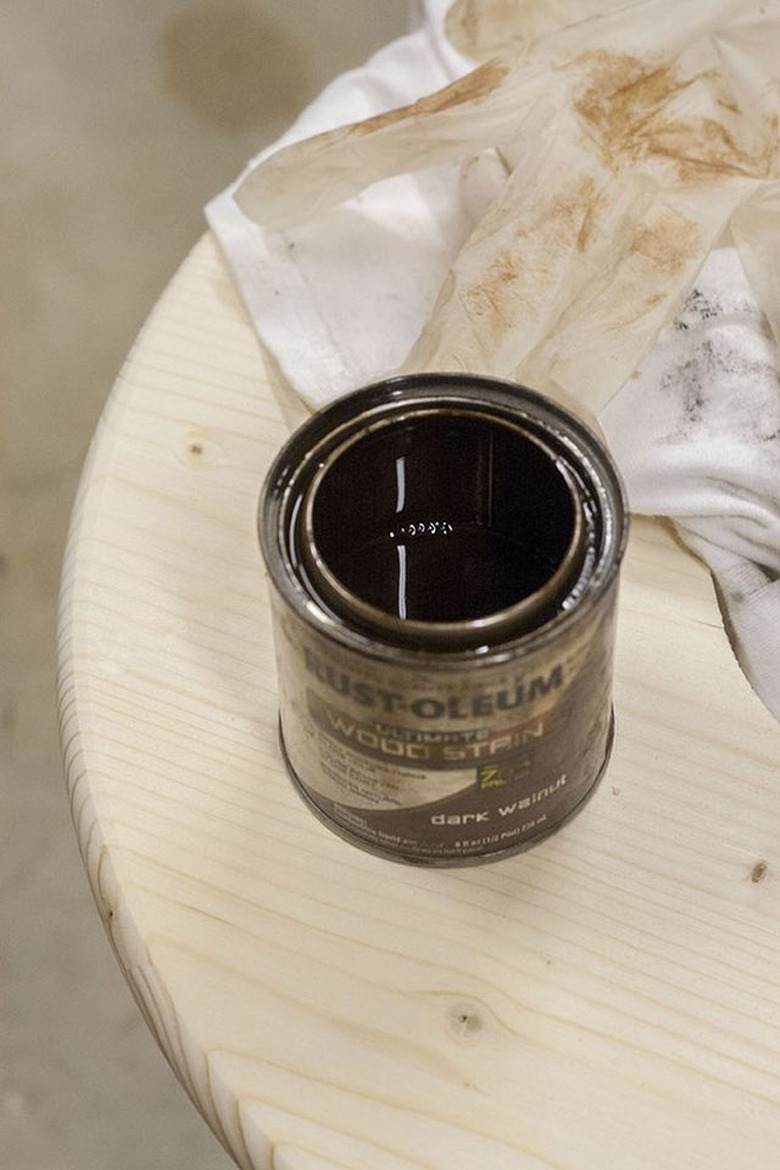
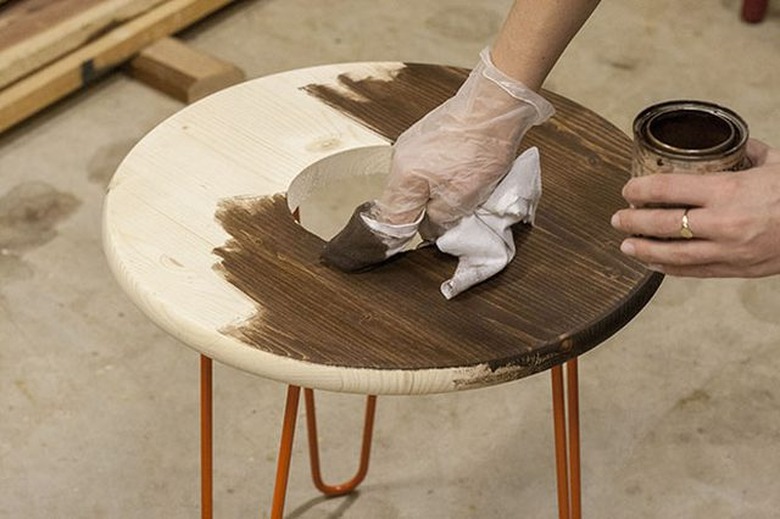
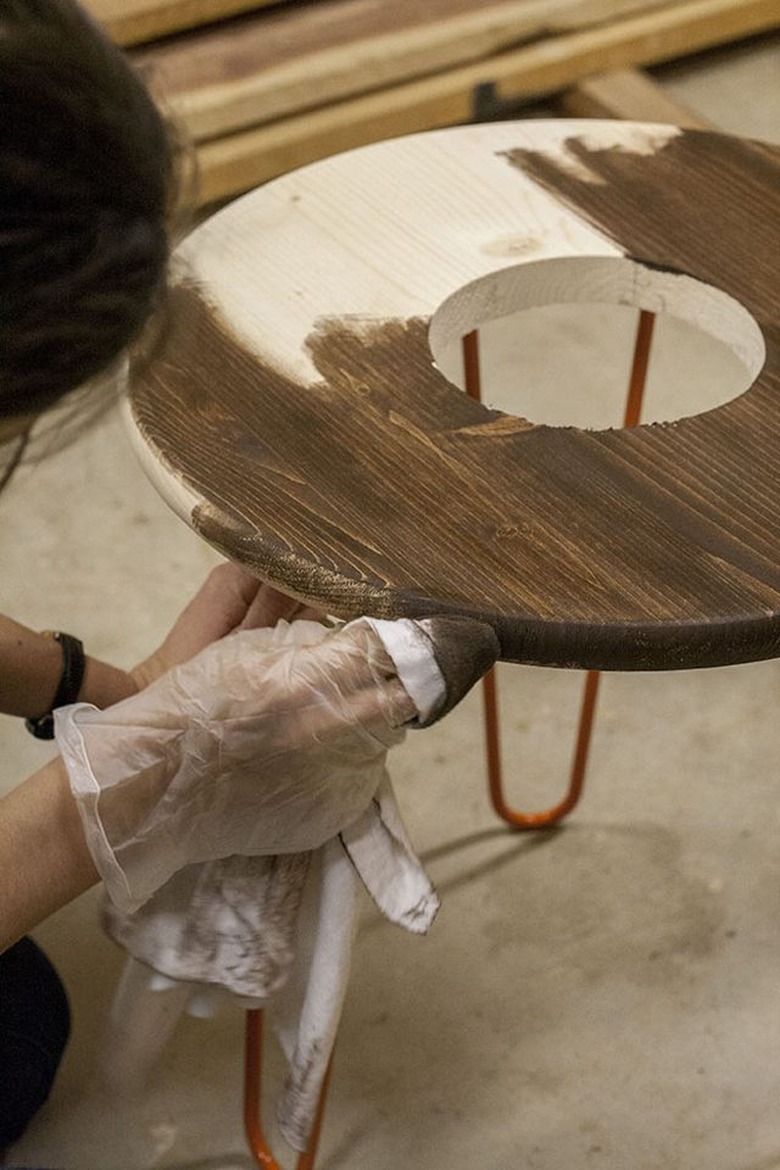
Step 6
Add the finish. While you can always paint your table any color you wish, for this project we went with a rich, dark walnut stain. This preserves the pretty grain of the wood and brings out character.
 Carrie Waller
To stain, simply dip a clean, dry rag into the can of stain and wipe onto the wood, following the direction of the grain.
 Carrie Waller
 Carrie Waller
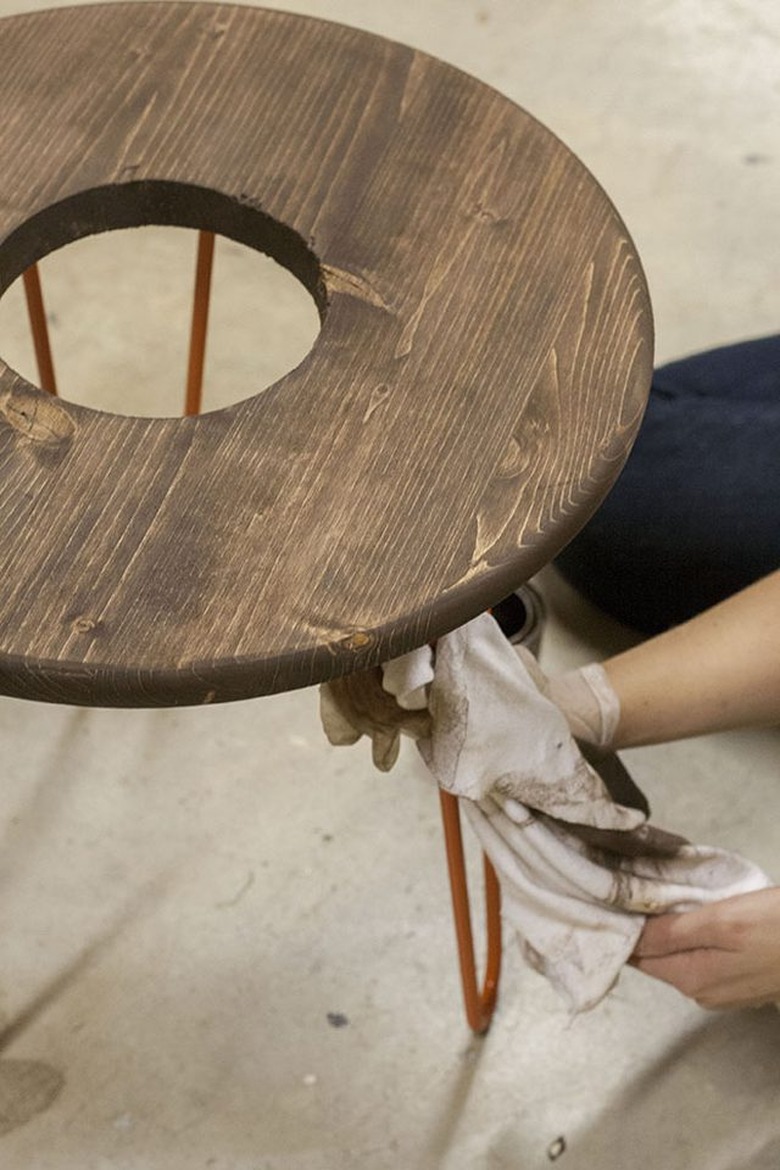
Wear gloves to prevent staining your fingertips, and if any stain gets on your hairpin legs, use a clean side of the rag to quickly wipe it off.
 Carrie Waller
Step 7
Allow your table to dry for two to three hours, and then wipe on a coat or two of polyurethane to ensure that your table is waterproof.
 Carrie Waller
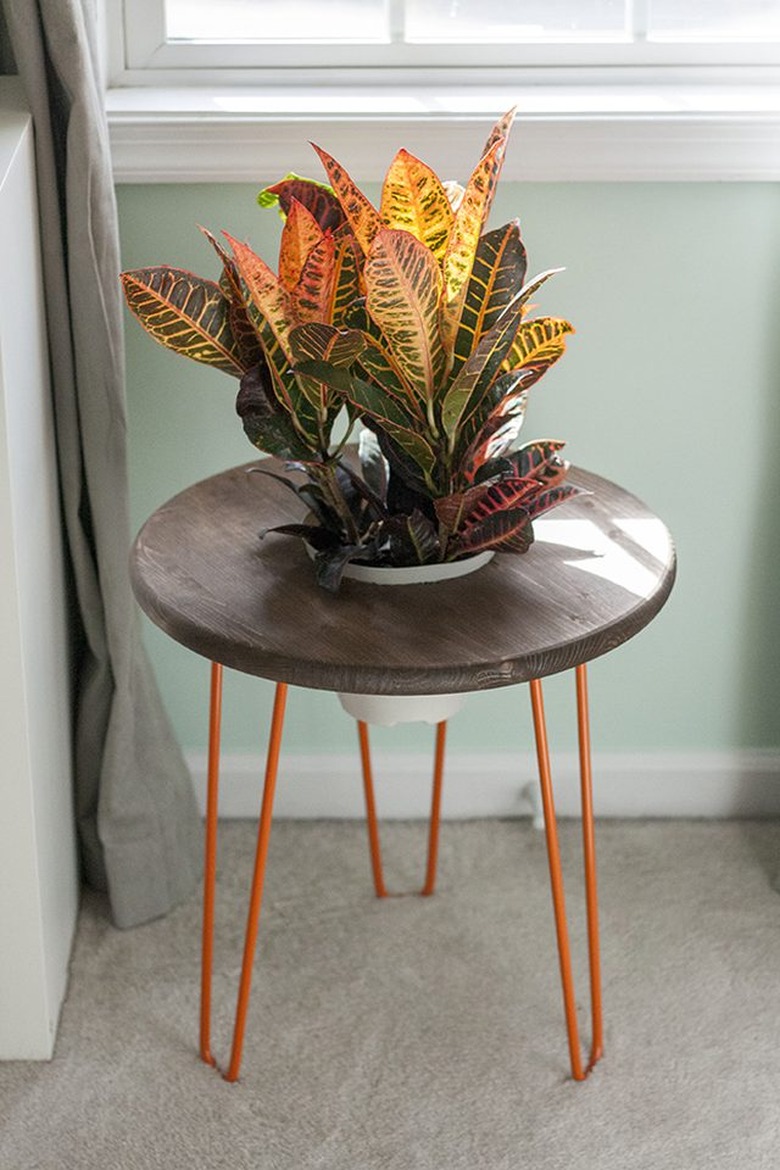
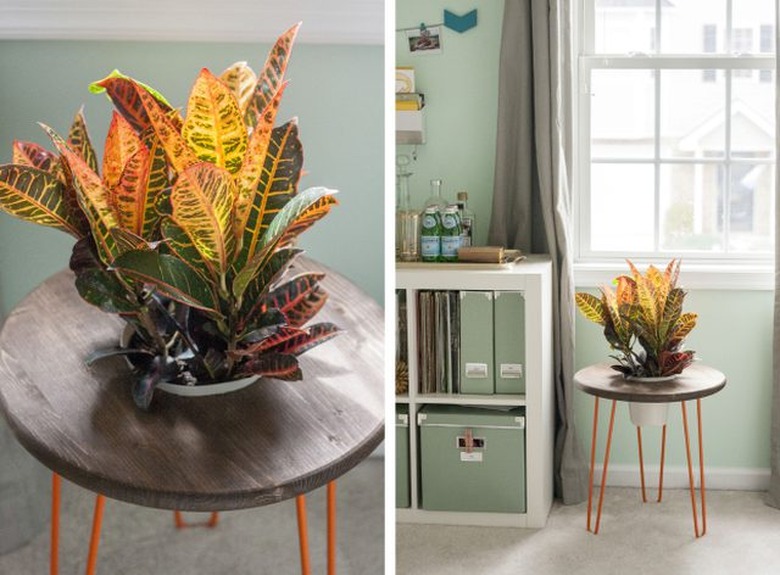
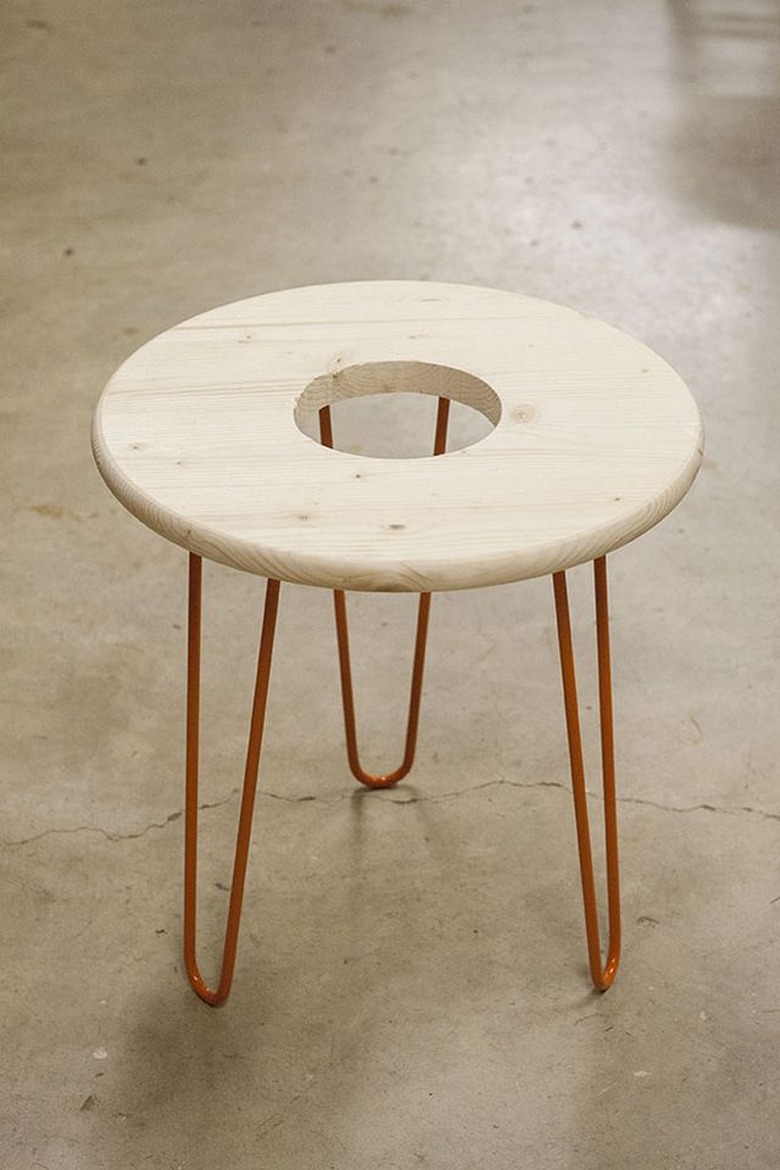
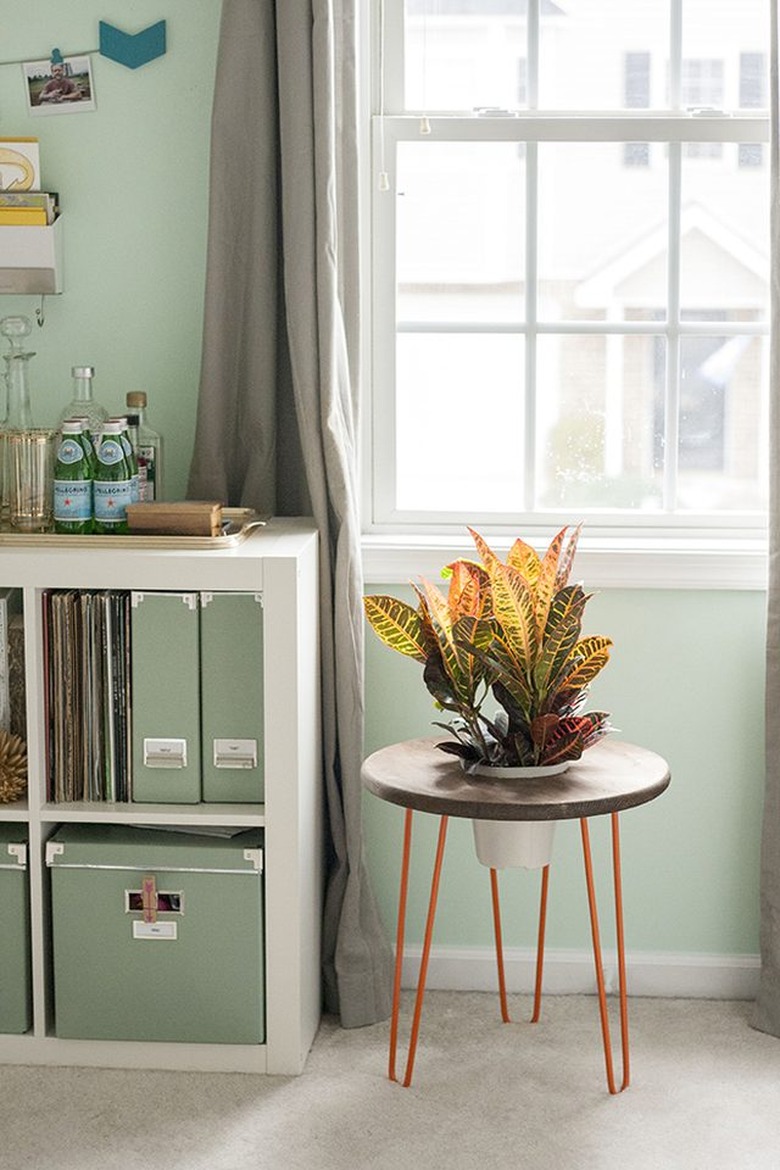
Then, finish by gently placing the potted plant into the center of your tabletop. I chose a hearty indoor plant that has a bit of orange color in its leaves to mimic the color of the hairpin legs.
 Carrie Waller
From potted plants to my daily mug of coffee, this DIY table already is a favorite sweet spot in the house!