How To Crimp Wires
Crimping is a style of joining wires to metal fittings that are then used to connect the wire to another wiring component or to other wires. The fittings themselves come in various styles, and are collectively known as "crimp connectors." They are most commonly used with stranded wires found in the wiring of appliances, electronics, or automobile systems. The technique involves compressing a small insulated metal sleeve on the end of the connector around the exposed bare wires. Wire connections using crimp connectors are often used in locations where the heat of soldering is not appropriate, or where the wire connection may need to be detached occasionally. Connections made with crimp connectors take up little space; they also are easier to make than solder connections and when done properly, they can be just as effective. When you crimp a connector onto the end of a wire, the idea is to form a tight, continuous electrical union between the wire and the connector fitting that will stay together permanently. To achieve this, both the connector sleeve and the wire both have to be malleable enough to deform under a compressive force.
Crimp connectors work best with stranded wire because solid wire usually isn't malleable or ductile enough to make a reliable connection. The wire gauge isn't a major factor. You can crimp a connector onto beefy 8-gauge wire as effectively as you can onto 18-gauge wire, as long as you use a connector of the right size.
To achieve the necessary compressive force, it's best to use a crimping tool when attaching crimp connectors to a wire. Pliers or a hammer will work in a pinch, but using such tools can result in a loose connection that ultimately results in an open circuit. Nothing is more difficult to diagnose than a loose crimp connection in complex automotive and appliance electrical systems, where crimping is most commonly used.
The Crimping Tool
The Crimping Tool
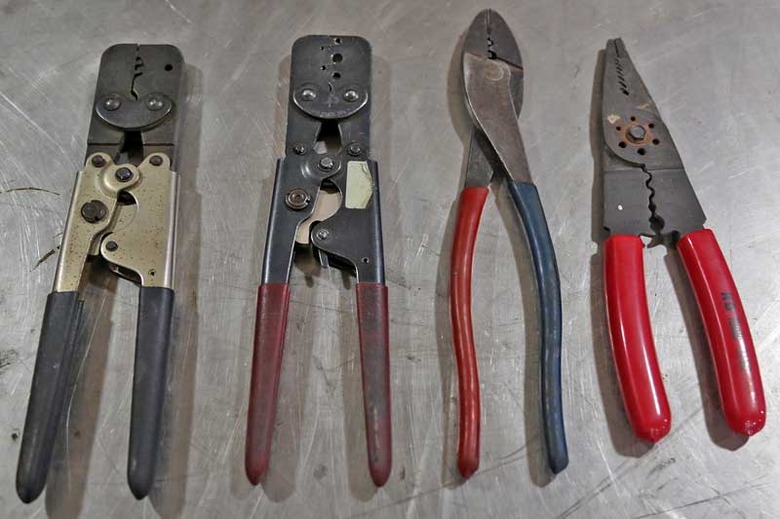
A crimping tool is a specialty implement designed only to secure crimp connectors to wires. Though it superficially resembles a pair of pliers, it's as different in function from pliers as tin snips are from household scissors. Some combination electrical tools include a crimping feature along with other functions, such as wire cutters, wire strippers, and bolt-cutters.
A crimping tool has jaws that are without the flat faces found on standard pliers. On one side is a small notch and on the other a knob that fits into it. When you place the tool around a crimp connector and squeeze the handle, the knob forces the crimp fitting and the wire into the notch, creating a deformation that permanently pinches the wires together. This creates a continuous electrical connection and prevents the wires from pulling out.
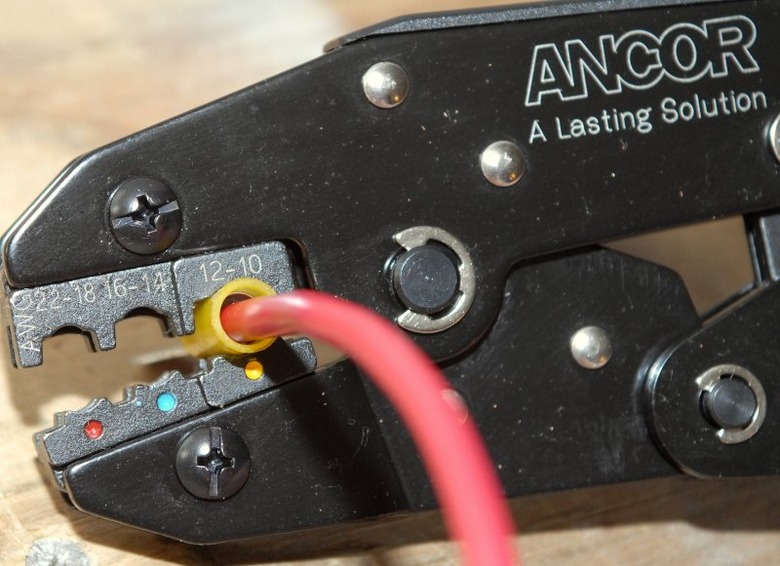
Like a crimp connector, a crimping tool is designed to work with a specific wire gauge. Some connectors have multiple knob/notch combinations, allowing you to use the tool for a range of wire gauges. The wire gauge range is clearly displayed next to each notch, along with a color.
- Red signifies the notch is suitable for 22- to 16-gauge insulated connectors.
- Blue is for 16- to 14-gauge insulated connectors.
- Yellow is for 12- to 10-gauge insulated connectors. You can also use the yellow notch for 8-gauge uninsulated connectors.
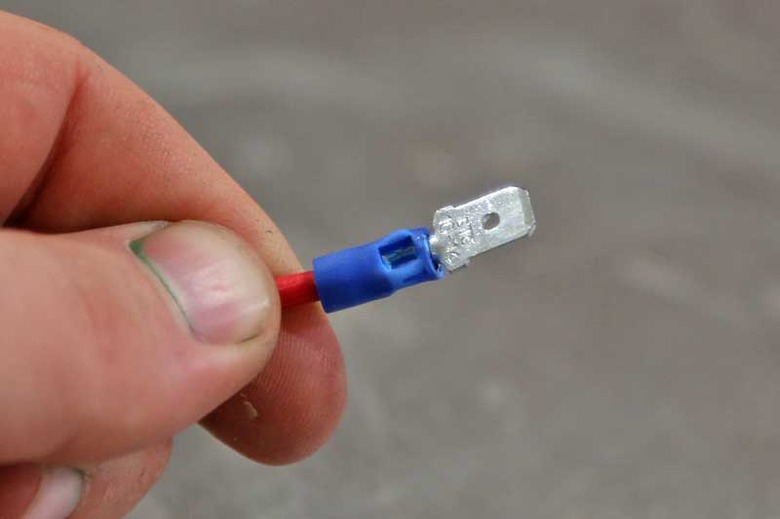
The insulation on the connectors follows the same color code as the coding on the tool notches.
Tip
A good crimping tool has a ratcheting function that increases the force you apply to the handles. It works much like a bolt cutter and makes the best _weld—_one free of air pockets that can cause rust and premature failure of the crimp connection.
Choose the Right Connector

Choose the Right Connector
Crimp connectors come in many styles, so make sure you choose the right one for the application.
- A ring connector makes the most secure connection to a terminal post. It can be disconnected only if nut on the terminal is removed.
- A spade connector is best for situations in which it's impractical to remove the nut from the connection terminal. The spade-shaped tip slides into a socket on the terminal.
- A quick-disconnect connector can be barrel-shaped or blade-shaped. You can separate the connection by pulling the two halves apart.
- A butt connector permanently splices two wires together.
Connectors for wires smaller than 10-gauge come with insulating sleeves that fit over the connection. The color of the insulation indicates the wire gauge for which the connector is suitable. If you're crimping 8-gauge or larger wire, an uninsulated connector is required.
How to Crimp Connectors onto Wires
How to Crimp Connectors onto Wires
Making a crimp connecting is a bit like doing Japanese calligraphy: It's very simple, but you only have one chance to get it right. If you make a mistake, you have to start over again from the beginning. Here are the basic steps for making a flawless crimp connection:
- Strip just enough insulation from the wire to expose about 1/2 inch of bare wire. There should be enough bare wire to fit inside the collar and extend through about 1/16 inch toward the connector tip. No bare wire should be exposed on the end of the collar opposite the connector.
- Insert the wire into the collar, ensuring all strands are inside it.
- Slide an insulation sleeve over the collar if there isn't one there already. You don't need to do this if you have an uninsulated crimp connector.
- Insert the collar into the appropriate notch of the crimping tool, with the seam of the collar facing up.
- Squeeze the tool handle with as much force as you can to complete the crimp. Give the wire a sharp tug to ensure it's seated properly in the connector, then release the handle.
If you're using an uninsulated connector, you'll want to seal the bare metal after crimping to prevent corrosion and provide electrical insulation. You can use electrical tape or liquid tape for ring and fork connectors, but it's more common to use heat-shrink sleeves for barrel-style butt connectors. To use a heat-shrink sleeve, slide it over the connector and heat it with a heat gun to contract the rubberized plastic. The sleeve is intended to be permanent, but it is possible to remove it if it becomes necessary.