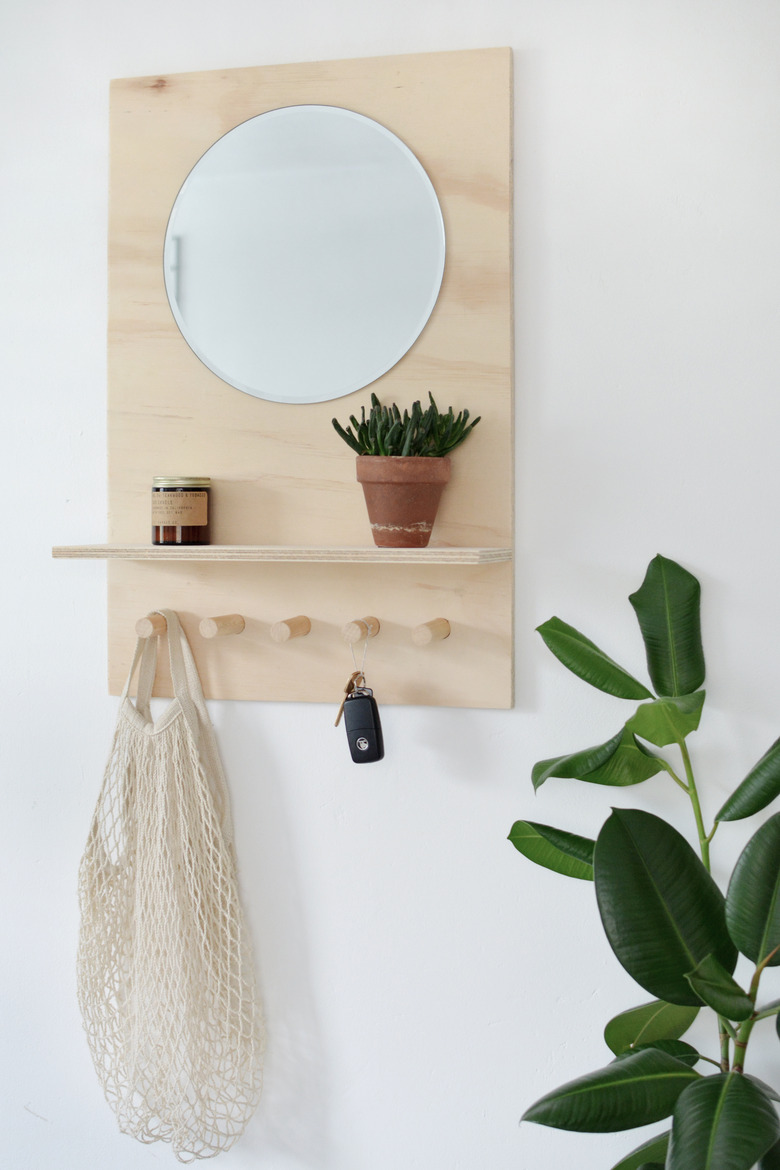
This DIY Wall-Mounted Organizer Is A Smart Solution To Solving A Messy Entryway
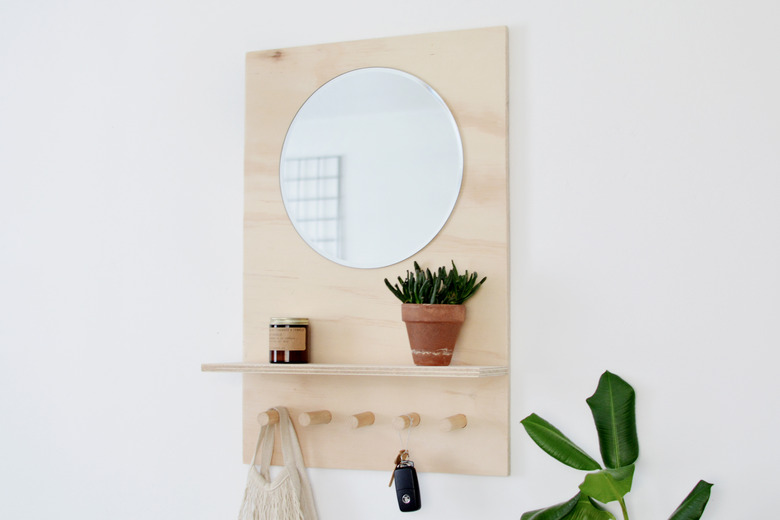
Let's face it: A home's entryway is often a place where things get dumped as people come and go. But you can help restore order with this simple wall-mounted organizer. (It's perfect for smaller spaces.) With its handy pegboard hooks to hold your keys, a shelf to stash a wallet or small purse, and a mirror for last minute touch-ups, this plywood piece is going to become the new MVP of your home.
 Caroline Burke
Things Needed
-
Plywood
-
Circular mirror, 12 inches in diameter
-
Power drill
-
Tape measure
-
Nails, 1 inch
-
Hammer
-
Wooden dowel
-
Hacksaw
Step 1: Measure the plywood.
Ask your local hardware store to cut your plywood sheet to size. You need one piece measuring 25 inches by 17 inches, and another smaller piece for the shelf measuring 5 inches by 17 inches.
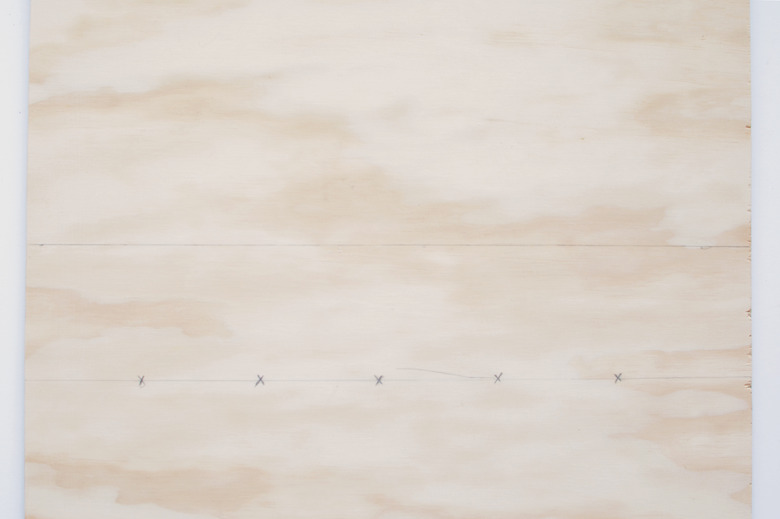
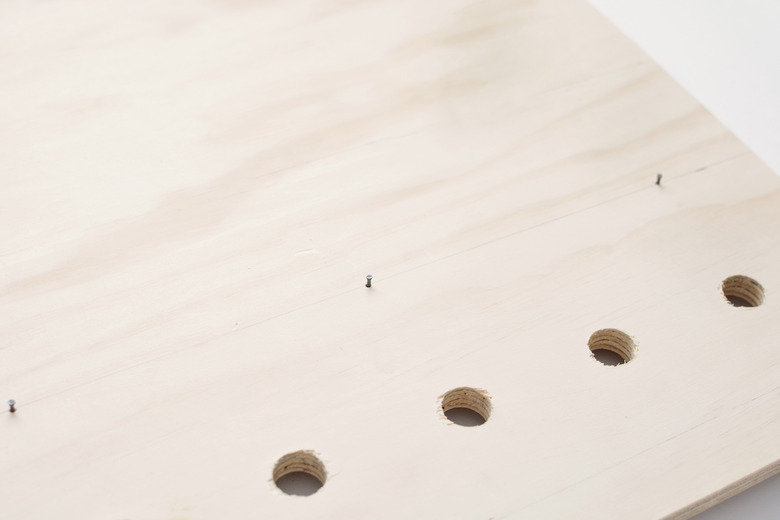
Next mark where your shelf and pegs will be located on the larger piece of plywood. Draw a horizontal line six inches above the bottom — this is where the shelf will sit. Draw another horizontal line three inches below the shelf line — this is where your pegs will be located.
Make five "X" marks at 2 ¾ inch intervals along the lower line to indicate where you will be drilling the peg holes.
 Caroline Burke
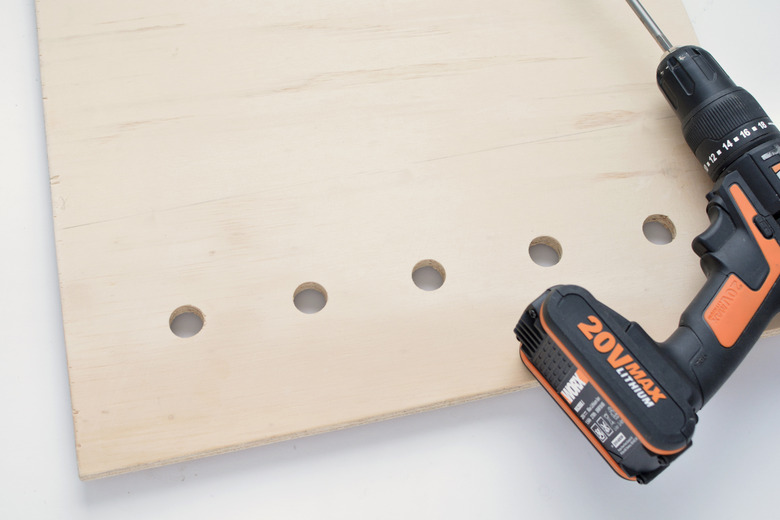
Step 2: Drill the peg holes.
Our dowel is ¾ inches wide, so we selected a wooden drill bit that was the same width. Drill through the plywood at the "X" marks.
 Caroline Burke
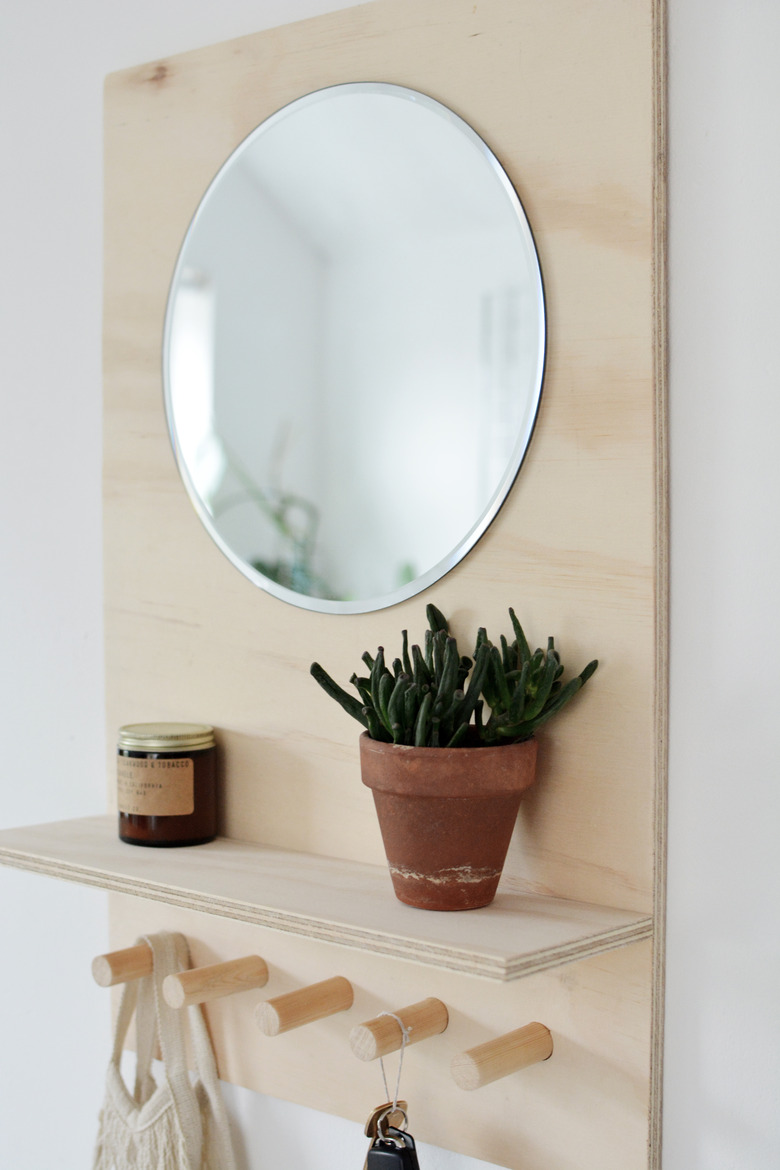
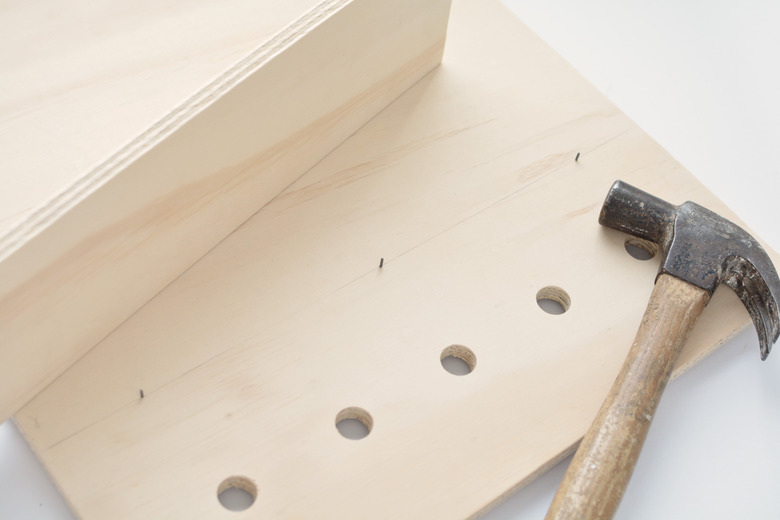
Step 3: Prep the shelf.
Flip the plywood over and mark a horizontal line where the shelf will sit — six inches above the bottom. Hammer in three 1-inch nails along the line. You'll want the nails to go through to the other side because they will act as support anchors for the shelf.
 Caroline Burke
Step 4: Secure it.
Flip the organizer to the front side again — the sharp end of the nails should be visible. Run some strong glue along the edge of the shelf that you will be attaching to the board. Line the shelf up upon the sharp nails with the glue side down, and then tap it firmly into place.
 Caroline Burke
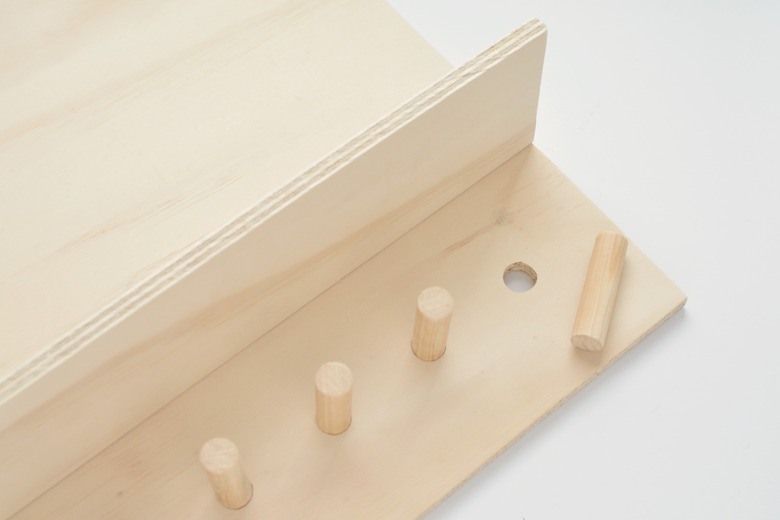
Step 5: Add the peg hooks.
Take a small hacksaw and cut the dowel into five 3-inch long pieces.
 Caroline Burke
Twist them into the holes, or tap them in with a hammer if the fit is snug.
 Caroline Burke
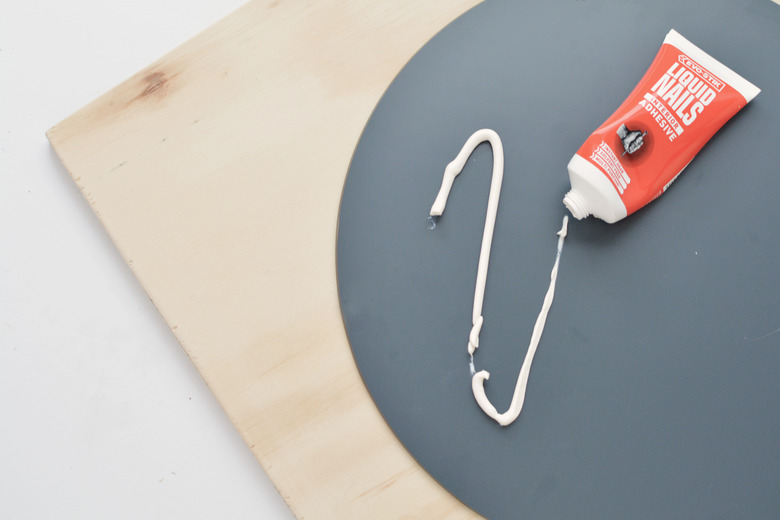
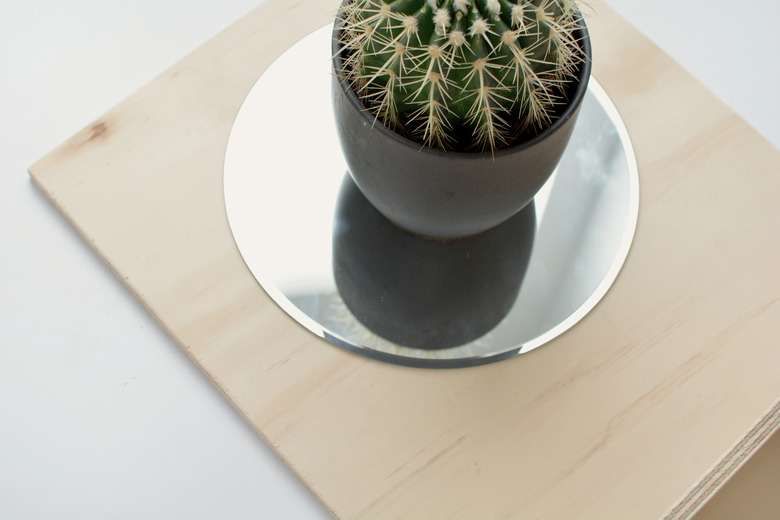
Step 6: Attach the mirror.
Prior to gluing the mirror to the board, we recommend that you trace the outline of the mirror onto the plywood so that you can be sure it's centered. Use a measuring tape if needed.
Cover the back of the mirror with strong glue, and then place the mirror into position with the glue side down.
 Caroline Burke
Carefully weigh the mirror down while the glue dries for a few hours.
 Caroline Burke
Your organizer is now ready to hang. Chaos be gone!
 Caroline Burke