DIY Modern Organizer For Your Garden Tools
We may receive a commission on purchases made from links.
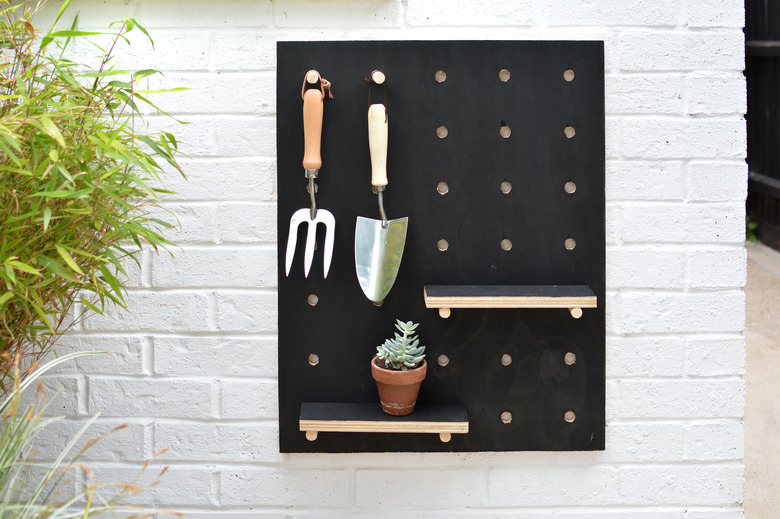
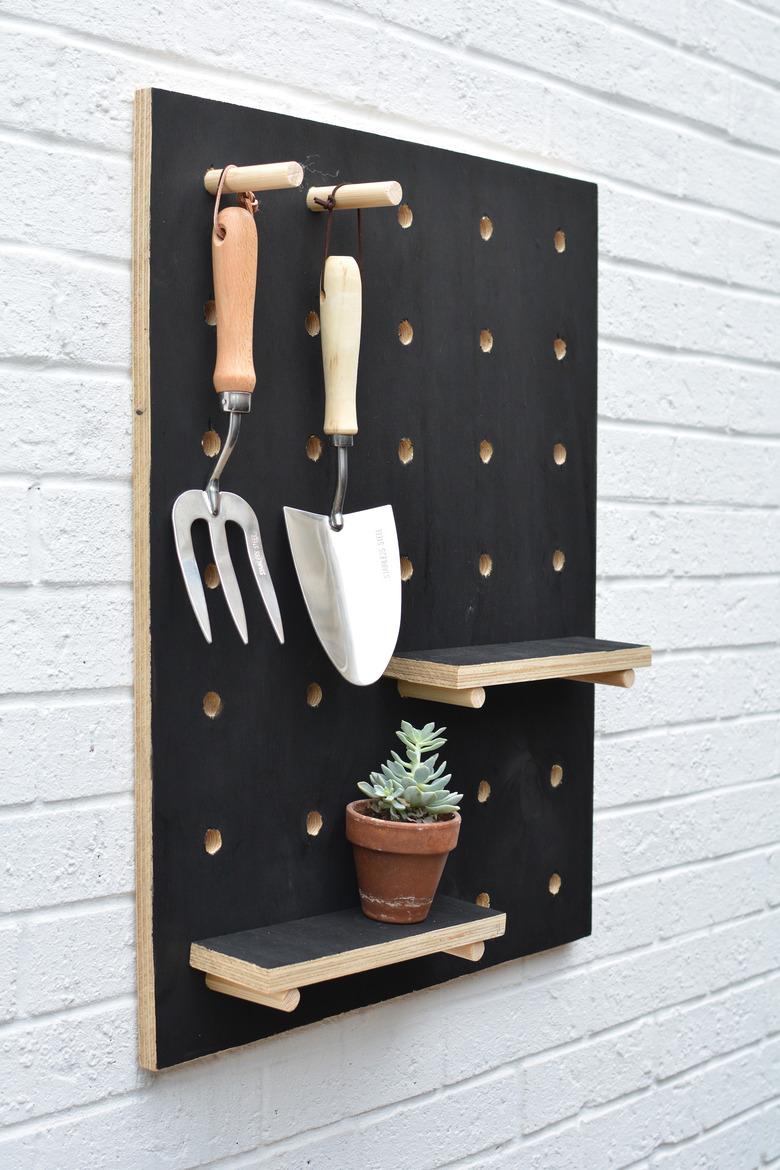
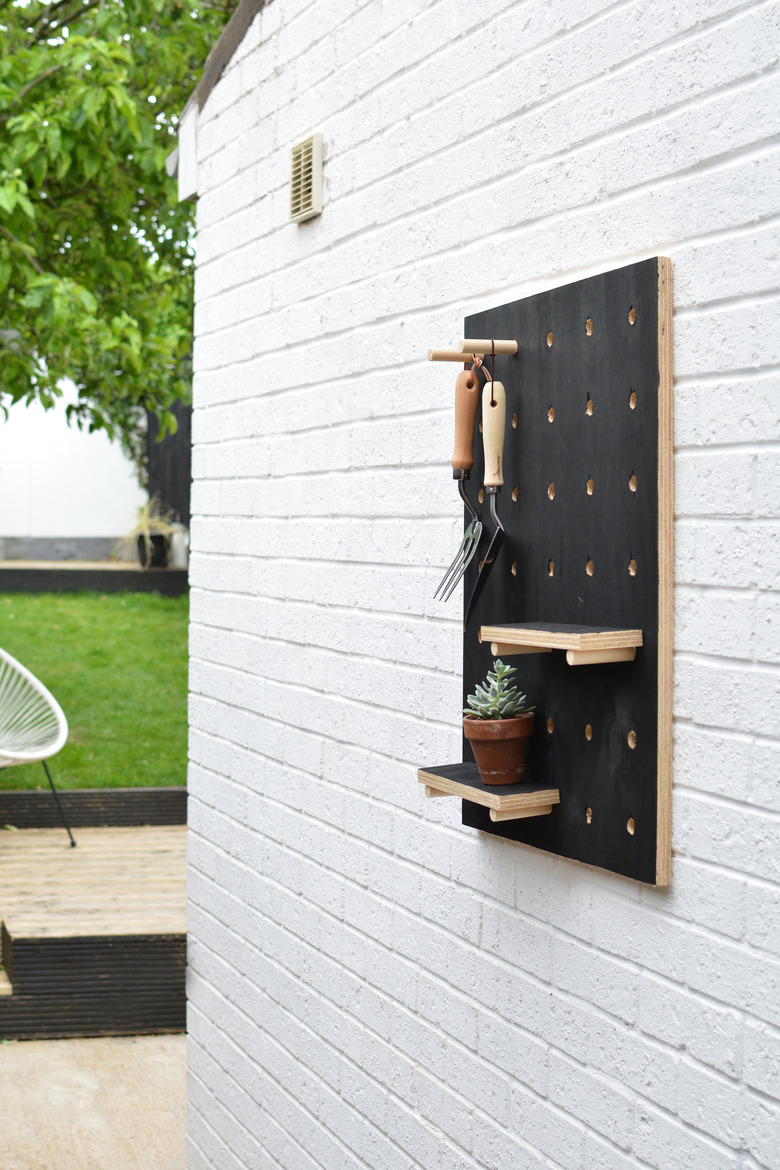
Now is perfect time to get organized around your home, both inside and out. Clean up, clear out, and feel calm in your space. This includes your garden area, whether you have a large vegetable bed in your backyard or a cute container garden on your balcony. You'll want to make sure that your tools are organized and at the ready. What better way to do that than with a pegboard organizer? For this DIY, we painted a piece of plywood (it'll look great against any background), and also created extra pegs and shelves for your plants, tools, and other outdoor accessories.
 Caroline Burke
Things Needed
-
External wood or fence paint
-
Sandpaper
Step 1
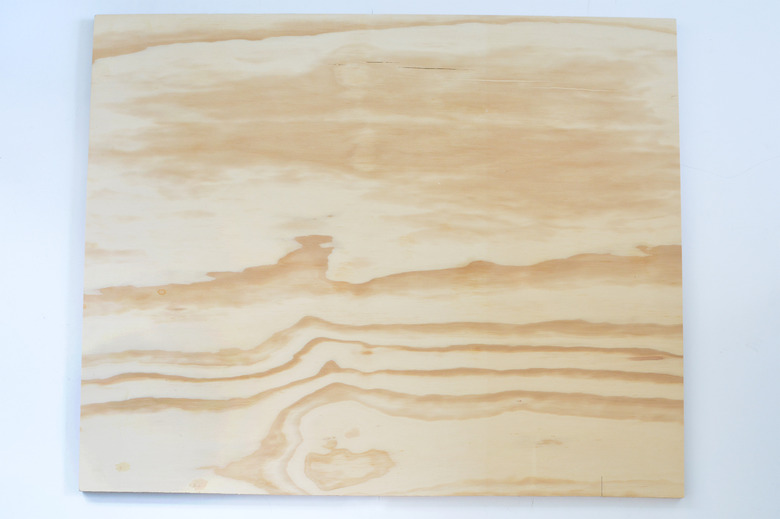
We had our plywood panel cut to measure 27 1/2 by 21 1/12 inches at our local hardware store. (You could also cut it yourself using a jigsaw, hand saw, or circular saw.)
 Caroline Burke
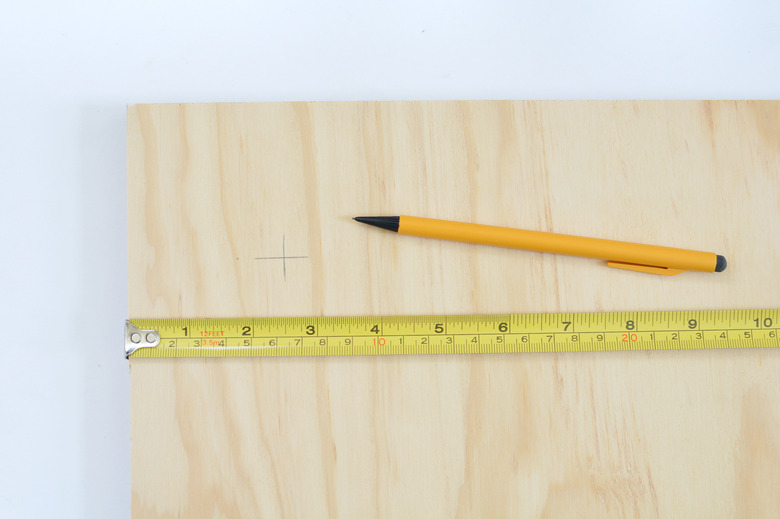
Step 2
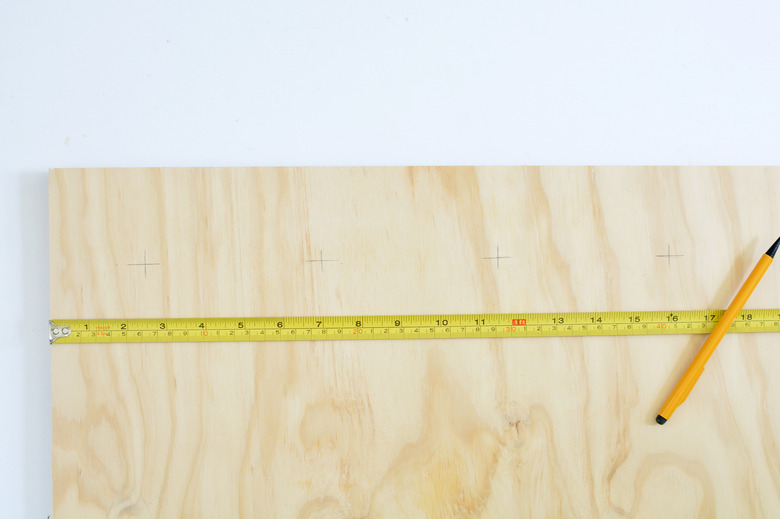
Next, mark out your peg holes. For this tutorial, we've opted for five holes on each row of our organizer — you can add more or less, just adjust the spacing measurements to suit.
Mark the first drill hole 2 1/2 inches from the top and 2 1/2 inches in from the side.
 Caroline Burke
Step 3
Mark the next hole 4 1/2 inches along from the first drill hole. Continue marking drill holes at 4 1/2 inch intervals until you have five drill holes marked on the first row.
 Caroline Burke
Step 4
Start marking the remaining rows of drill holes. Mark the second row 3 1/2 inches below the first row. Mark the first hole 2 1/2 inches in from the side and then mark the remaining four drill holes with 4 1/2 inch intervals between them to create the second row.
 Caroline Burke
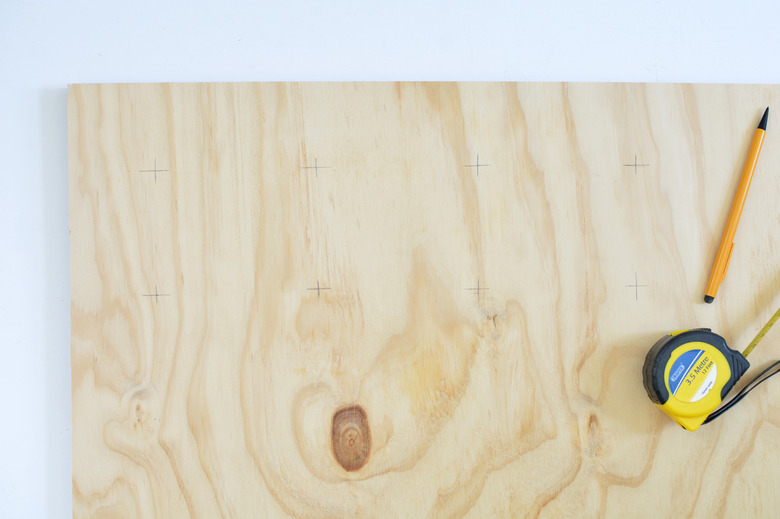
Repeat this step until you have seven rows of five holes marked in total.
Step 5
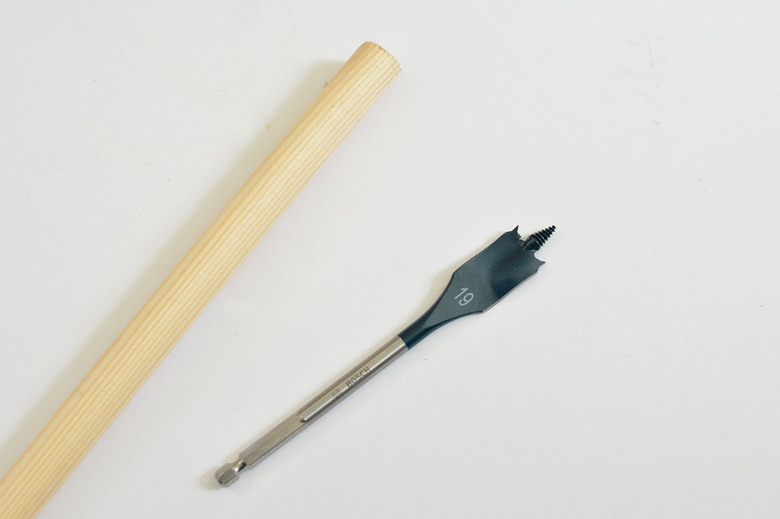
Take a spade bit that's the same width or slightly bigger than your wooden dowel and attach it to your power drill. Here, we used 3/4 inch wooden dowel for our pegs.
 Caroline Burke
Step 6
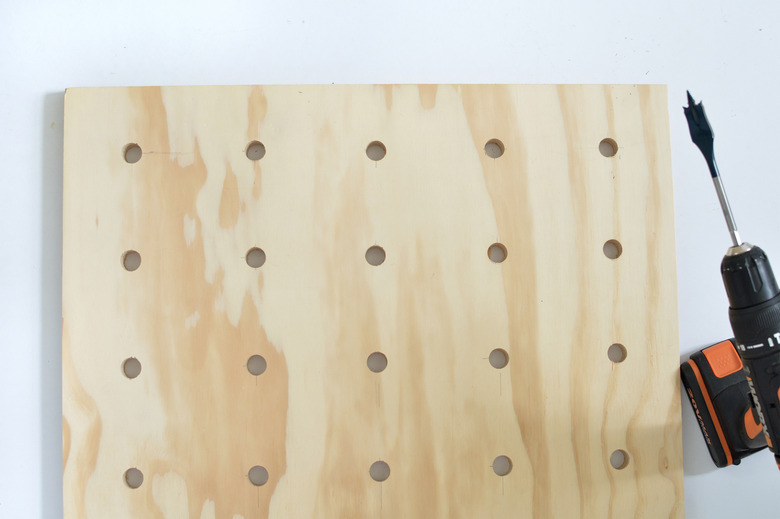
Drill along the rows you've marked out to create your peg holes. Sand down any rough edges with sandpaper.
 Caroline Burke
Step 7
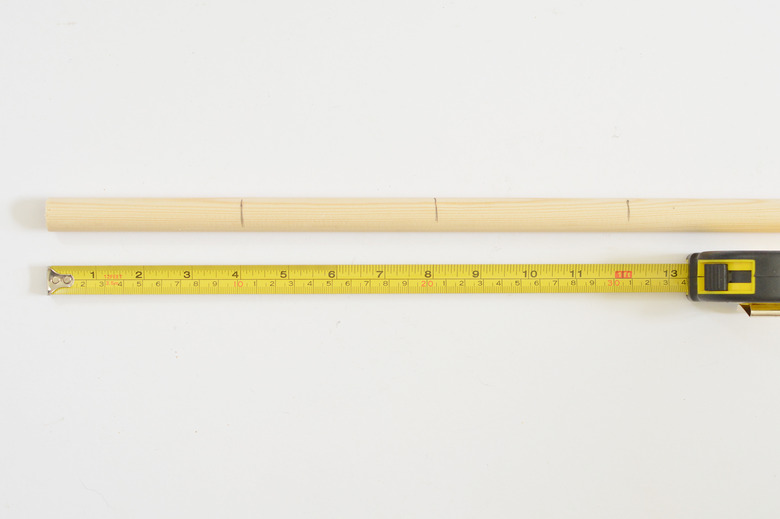
To make your pegs for the organizer measure and mark at 4-inch intervals along your wooden dowel.
 Caroline Burke
Step 8
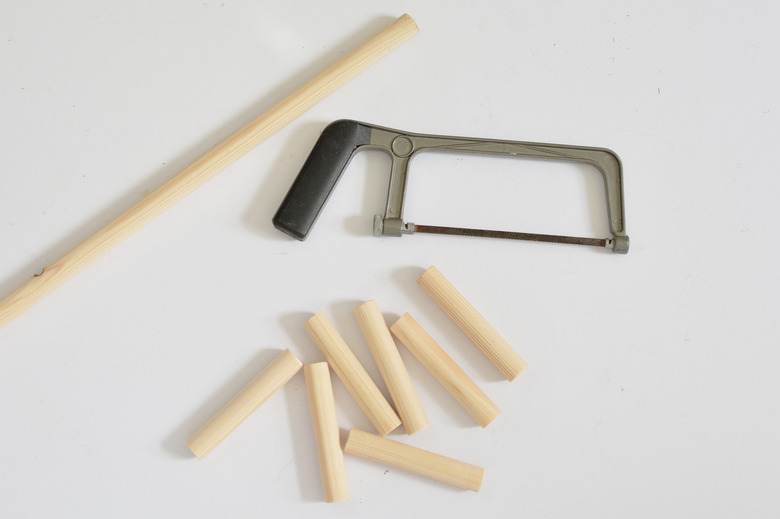
Use a hacksaw to cut your 4-inch pegs, sand down any rough edges.
 Caroline Burke
Step 9
To add shelving, cut out some small plywood pieces with a hand saw. In this DIY, we are working with 2-inch-by-10-inch shelves.
 Caroline Burke
Give your organizer one to two coats of outdoor or wooden fence paint to finish.
 Caroline Burke