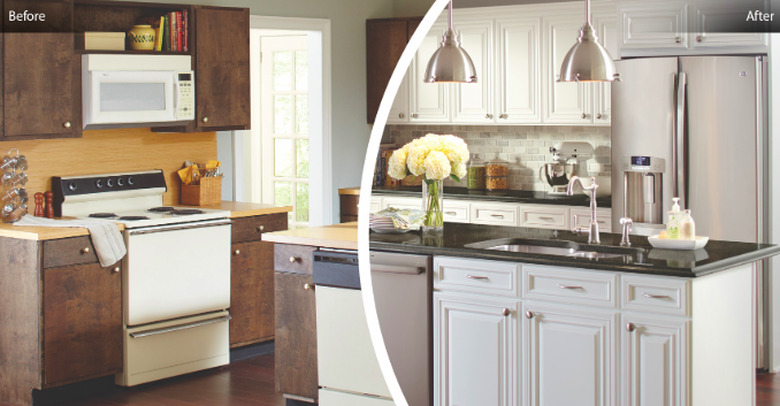
What Is Cabinet Refacing?
Kitchen cabinets are often custom-built, and when they start to show their age, replacing them can be a costly proposition. Stock cabinets may be less expensive, but the prospect of replacing them can still be daunting. Refacing is an alternative that costs about half of what professional replacement costs. Fortunately, cabinet refacing is a project most home DIYers can complete who have some workshop space, basic carpentry skills and a desire to save money. With Euro-style cabinets, the process involves covering the sides of the cabinets, the doors and the drawer faces with new plastic or wood veneer. You can also replace doors and drawer fronts with rigid thermofoil (RTF), which is a plastic laminate material thermally bonded to a particle-board substrate. With traditional frame-and-panel doors, the refacing process typically involves covering the face frames and sides of the cabinets with new veneer, then replacing the doors and drawer-fronts entirely with new materials sold by the refacing company or purchased from a cabinet shop.
Professional refacing is a three- to five-day project for contractors, but if you do it yourself, you can take as long as you want. There's nothing stopping you from working quickly, but you can also reface one drawer or one door per weekend, if that's all the time you have. But before you start planning this project, you should evaluate the structural conditions of the cabinets. Not all are good candidates for refacing.
 The Home Depot
When Does Refacing Make Sense?
When Does Refacing Make Sense?
Cabinets that are structurally unsound or poorly designed probably won't look much better after being refaced. Some less expensive kitchen cabinets are made from cheaper grades of particle board, and if the old facing is badly worn, the particle board can get wet and swell. In this case, it's usually better to replace the cabinets. When particle board gets wet or starts to deteriorate from age, there's no guarantee the adhesive you use for refacing will adhere to it. By the same token, you shouldn't waste your time and money on cabinets with broken or warped frames, unless it's possible to repair the damage.
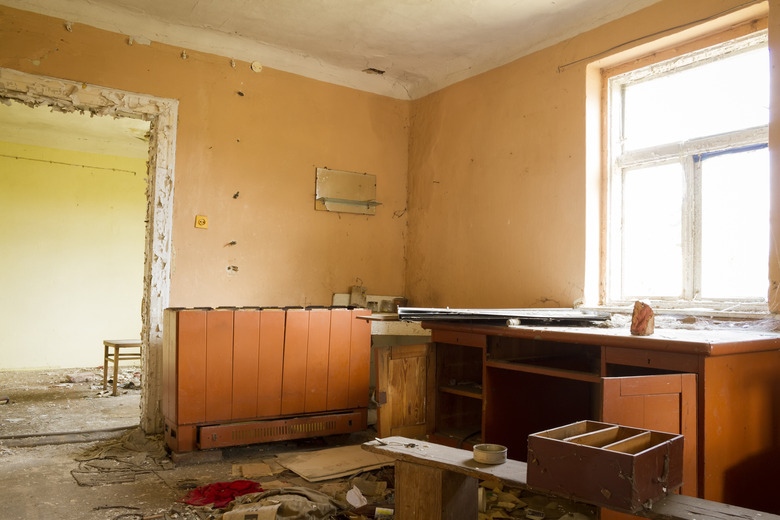
On the other hand, you may have old wood cabinets that are solidly built but have definitely seen better days. Many older cabinets are made of solid wood, and these can make great refacing projects, producing cabinets that will last another 20 years or more. From a design standpoint, cabinets typically draw the most visual attention in the kitchen, so refacing them is probably the single best way to renovate your kitchen. New-looking cabinets can more than compensate for other kitchen design problems, such as worn flooring or countertops in poor condition.
Cabinets with a minimum of face trim are the easiest to reface. These so-called "Euro-style" cabinets include flat slabs that can fairly easily be covered with new veneer. But a large number of kitchen cabinets—possibly the majority—have doors and drawers with frame-and-panel construction. These can be difficult, if not impossible, to reface completely. If they are too far gone to refinish, the best alternative is often to reface the cabinet frames and sides, then replace the doors and drawer fronts. You can often find the replacements you need at cabinet shops, or you can have them custom built. Some companies that sell refacing materials offer matching doors and drawer fronts to match the hardwood or laminate veneers they sell. If you choose this option, you'll probably also want new cabinet hardware to complete the makeover.
Do It Yourself
Do It Yourself
While the cabinets can stay in place while they are being refaced, the procedure does involve some disassembly. You have to take off the doors and remove the handles and hinges, and to complete the makeover you may want to discard the hardware in favor of upgrades. You then detach the drawer faces from the drawers, if it's possible to do this. If not, you can usually reface the drawers without taking them apart, but they are more cumbersome to handle.
Before you start refacing, it's important to clean the surfaces you plan to cover with a solution of trisodium phosphate and water. TSP is a strong detergent that removes greases and oils that might interfere with glue adhesion. You must also remove any existing veneer that has bubbled, cracked or lifted, piece-by-tedious-piece, using a putty knife or chisel. Some professionals recommend removing all the old veneer, because you never know when it may start lifting. It's your project, though, and it's up to you.
It doesn't matter whether you reface the cabinet frames first or start with the doors and drawers. It might suit your schedule to do the frames as a weekend project and do the doors and drawers one by one when you have time. Or, you may prefer to tackle the whole job at once—a process that will require at least a week.
Veneering Pointers
Veneering Pointers
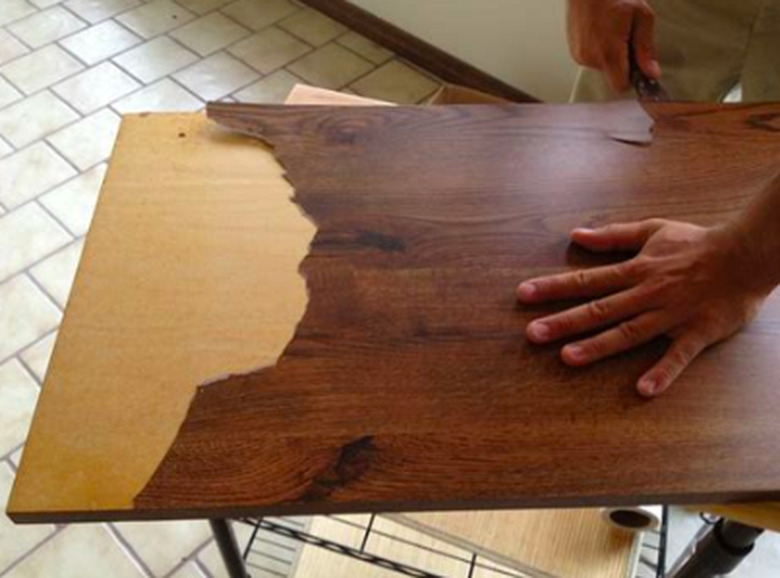
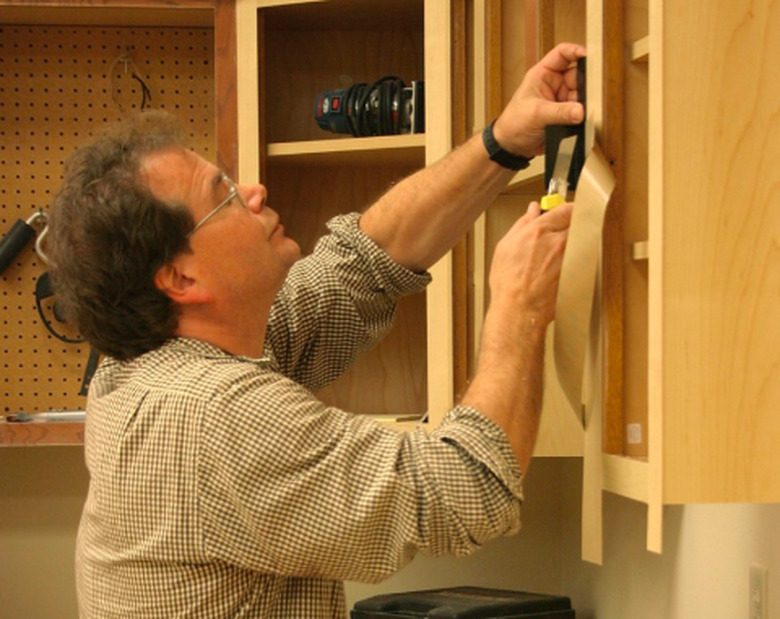
Many plastic laminate veneers are self-stick. You peel the paper backing, lay the veneer on the surface you're covering, and press it flat with a roller. Some veneers require the use of a clothes iron to heat the adhesive and activate it. A laminate router is the best tool to use for trimming the edges—it gives a clean, sharp edge without chipping the veneer. In a pinch, you can use a sharp knife and a straightedge to trim the edges.
If the veneer you use requires that you apply adhesive yourself, the best choice for most materials is contact cement. Spread it with a paint roller on both surfaces and let it dry for five minutes before pressing the surfaces together. Be sure to align the surfaces perfectly before they make contact. You won't get a second chance.
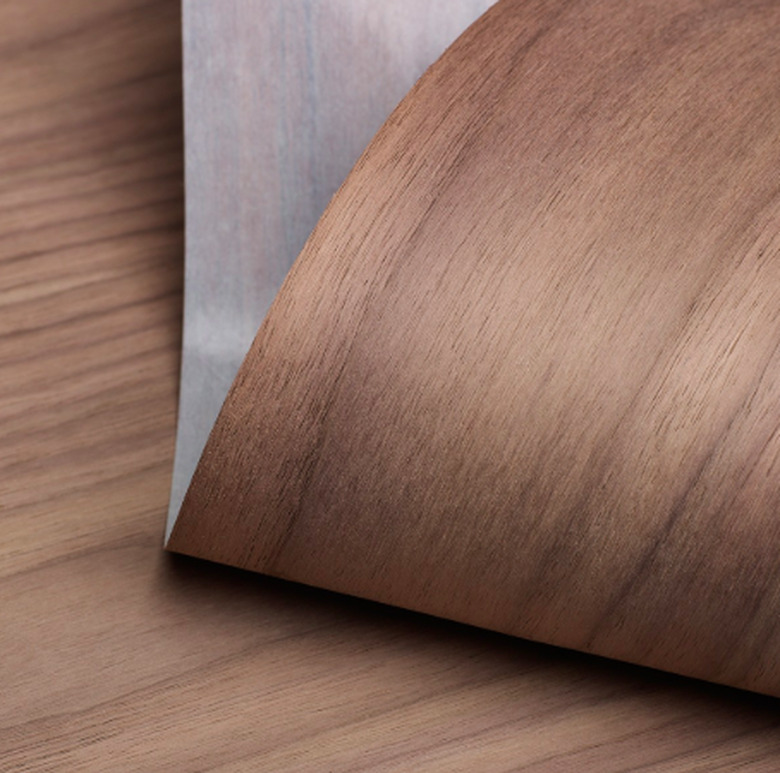
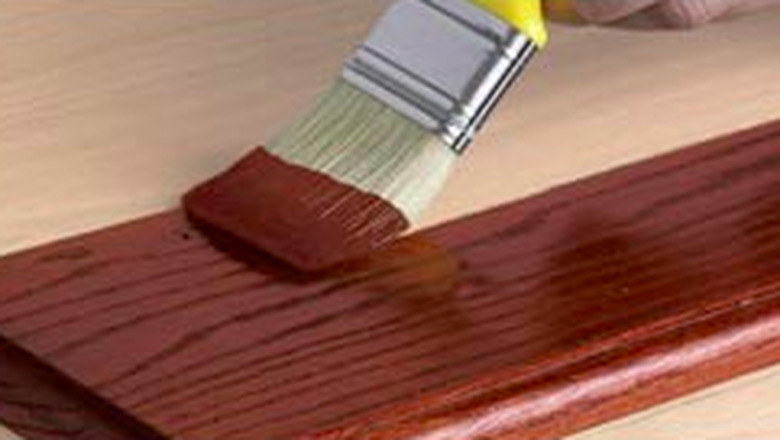
Wood veneers are more finicky than plastic laminates. Hardly any are self-stick, and wood is prone to cracking and splitting. However, manufacturers offer high-pressure laminate wood veneer, which has the same type of backing as plastic laminates. The backing helps prevent cracking and splitting and makes the veneer easier to apply. Some 300 different wood species are available as HPL wood veneer.
Get It Done Professionally
Get It Done Professionally
The main advantage of having pros reface your cabinets is convenience. Walk away from your kitchen and come back three or four days later to a dramatically improved space. Expect to pay, on average, between $4,000 and $5,000 for this convenience. A small kitchen refacing with laminates may cost as little as $1,000, while you might pay as much as $9,000 to reface a large kitchen with quality wood veneer, according to 2018 data from Houselogic.com.
You don't just pay for convenience, of course. Professionals have the skills to do the job perfectly the first time, and they guarantee their work. They can advise you as to whether your cabinets are good candidates for refacing, and they can help you select the best materials that suit your budget.
Alternatives to Refacing
Alternatives to Refacing
Refacing isn't the only way to get new-looking cabinets without replacing them. If your cabinets are structurally sound and the facing hasn't lost its integrity, all they probably need is a new finish. It's best to disassemble the doors and remove the hardware before you do this, and if the facing is wood and you want to change the color, some stripping and sanding will be required before you apply the stain. Two or three coats of clear lacquer or polyurethane finish from a sprayer can complete the job.
The job is even easier if you want to cover your cabinets with paint to create a contemporary Euro-style ambiance in your kitchen. You don't need to strip the old finish from wood facing, and you don't need to remove undamaged laminates. Simply prepare the existing facing by cleaning it with TSP and water and scuff-sanding with 150-grit sandpaper. Apply two to four coats of opaque polyurethane with a spray can or by brush, sanding between coats with 220-grit sandpaper, to get a sleek, durable finish and a renewed kitchen.