These DIY Scandinavian Stars Will Add A Touch Of Charm To Any Home
We may receive a commission on purchases made from links.
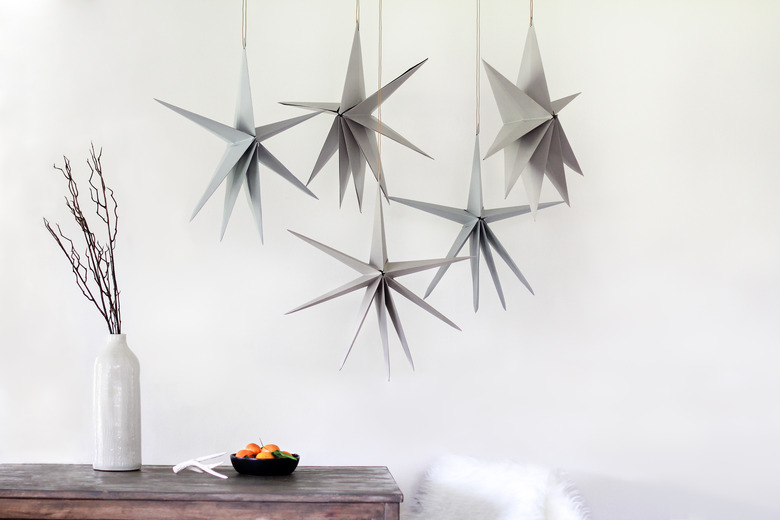
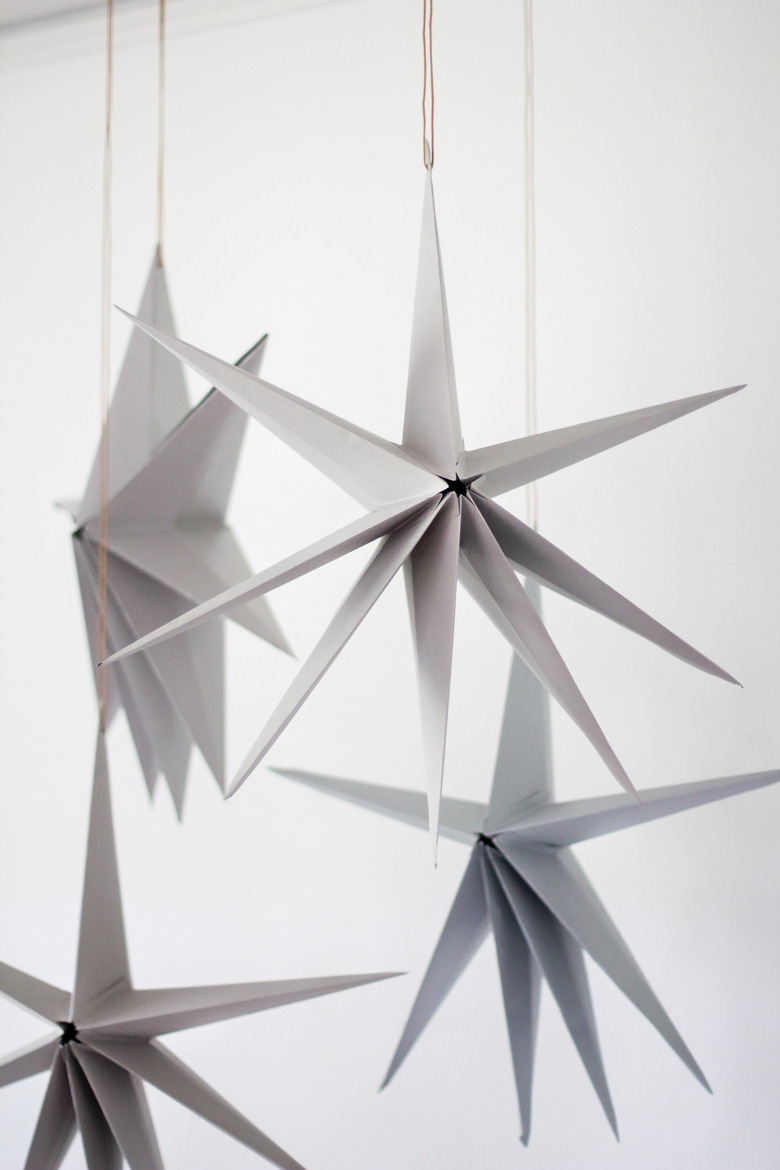
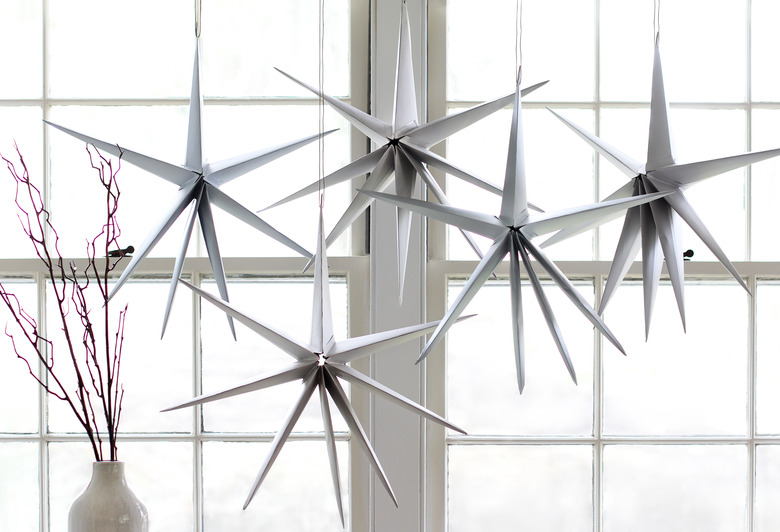
Add minimalist charm to your home by hanging a cluster of Scandinavian paper stars. The three-dimensional form has a sculptural quality that is simple, yet very chic. We opted for a tonal color palette that mixes warm and cool grays, and we strung them up with leather cording for a modern spin. Don't worry — even if you're an origami novice, we've broken the process down into simple steps so you can fold your own beautiful stars. Make them in any size or color that jives with your decor. Whether you hang them in a window, over a hearth, or from the ceiling, you'll be amazed at how a humble object can add so much personality to your space.
Things Needed
-
12-inch-by-12-inch cardstock, (seven or eight sheets per star)
-
Scissors
-
Double-sided tape or glue stick
-
Ruler
-
Hole punch
-
Leather cord, ribbon, or fishing line
-
Ceiling hooks
Note: You can use a different size cardstock if you'd like to make smaller or bigger stars. Just make sure that whatever size you use is square in dimension. Also, we recommend practicing first on scrap paper before using your nice cardstock.
 Trisha Sprouse
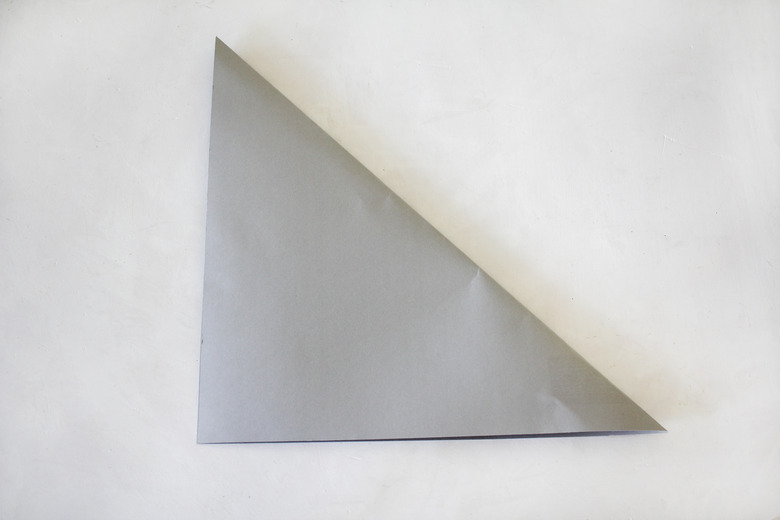
Step 1
Fold the top right corner down to the bottom left corner, forming a right-angled triangle.
 Trisha Sprouse
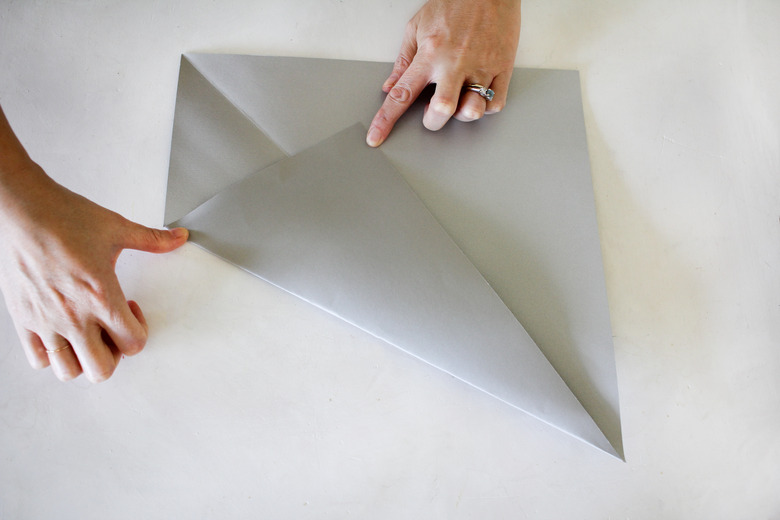
Step 2
Open up the paper, and then fold the bottom left corner approximately two inches past the crease line you just made, until the bottom right corner is split in half and forms a point.
 Trisha Sprouse
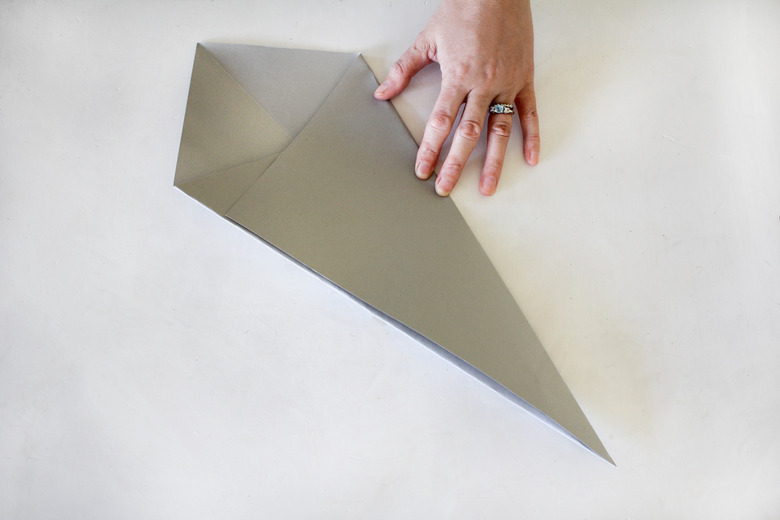
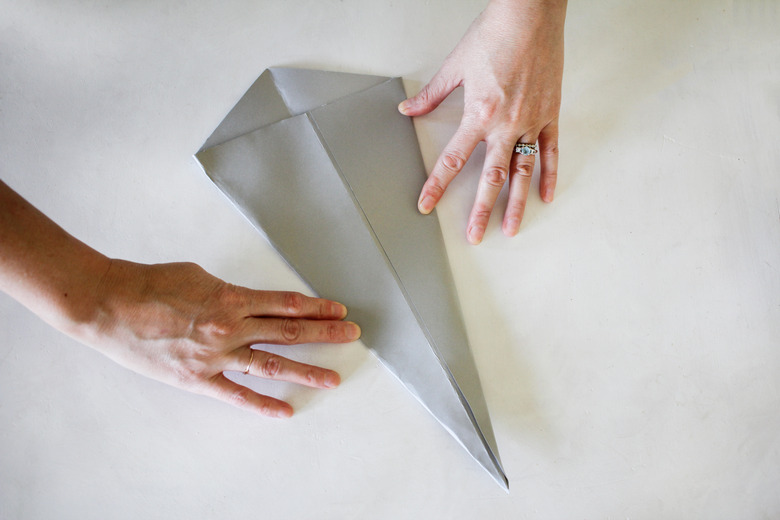
Step 3
Fold the top right corner down over the segment you just folded until the right edge is aligned with the bottom edge. The shape should somewhat resemble a scoop of ice cream on a cone.
 Trisha Sprouse
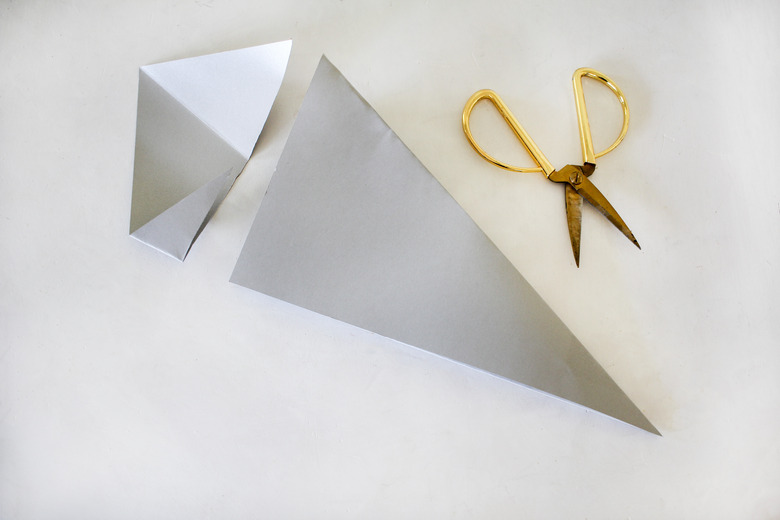
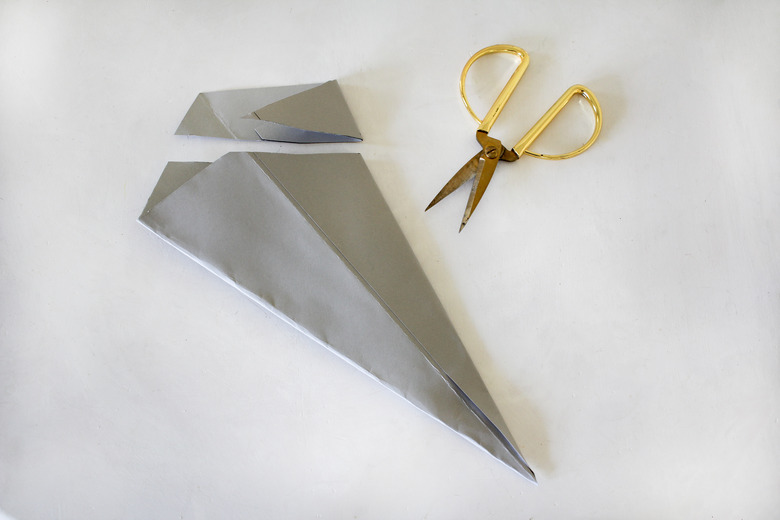
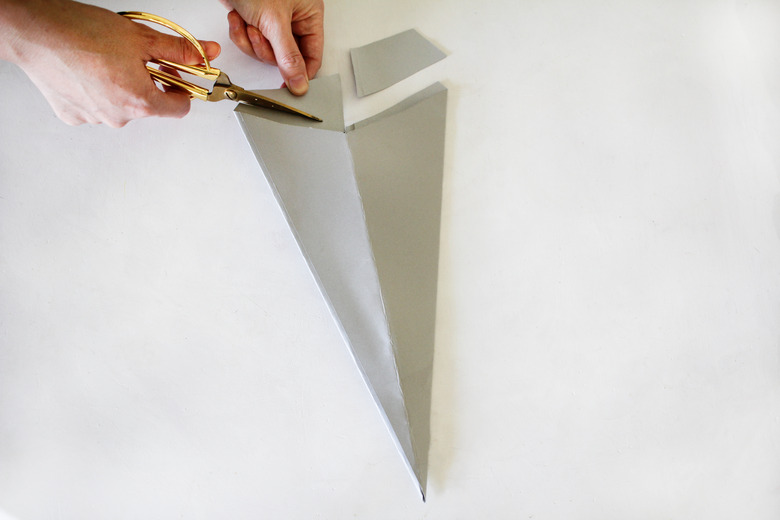
Step 4
Cut along the straight line at the top of the ice cream "cone," essentially cutting off the "scoop" part of the ice cream shape. This should leave you with another right-angled triangle.
 Trisha Sprouse
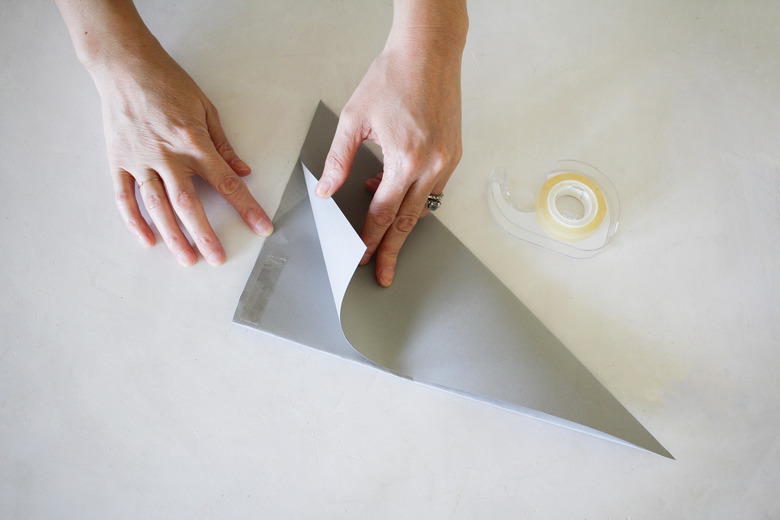
Step 5
Using either double-sided tape or a glue stick, glue the two flaps of the triangle together.
 Trisha Sprouse
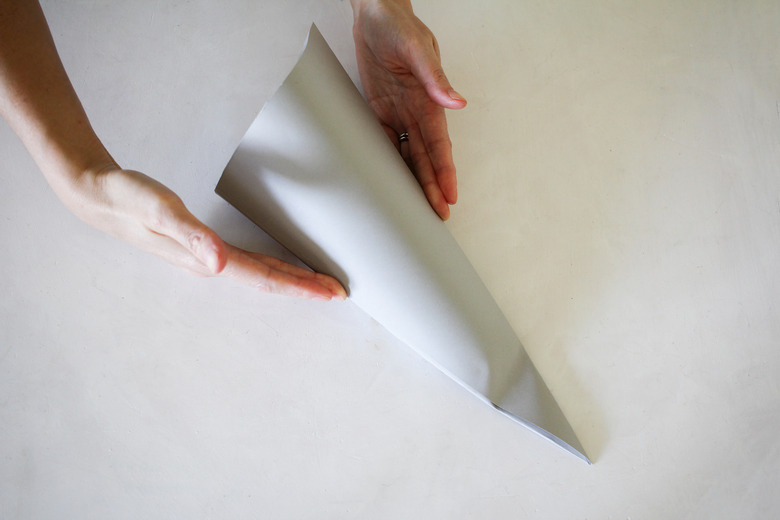
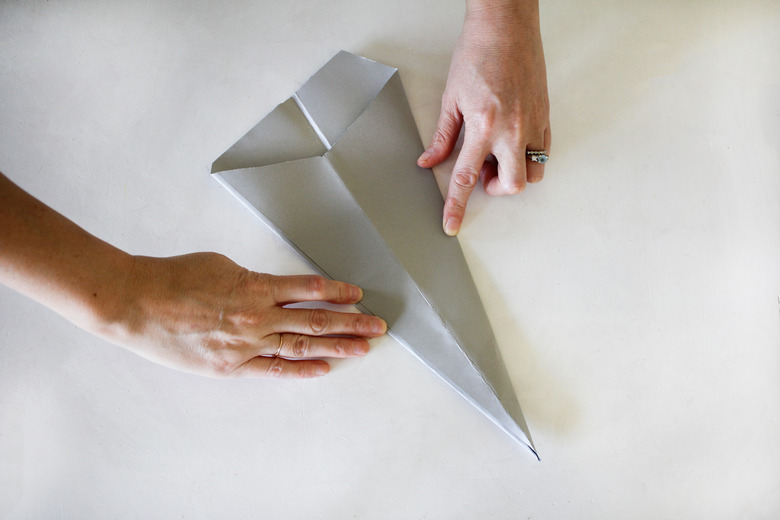
Step 6
Now push on the sides of the triangle to puff it into a three-dimensional shape. It should resemble an ice cream cone shape again.
 Trisha Sprouse
Step 7
Turn it so the top of the cone is facing up, and then flatten the paper into the ice cream cone shape. This will create two new side creases.
 Trisha Sprouse
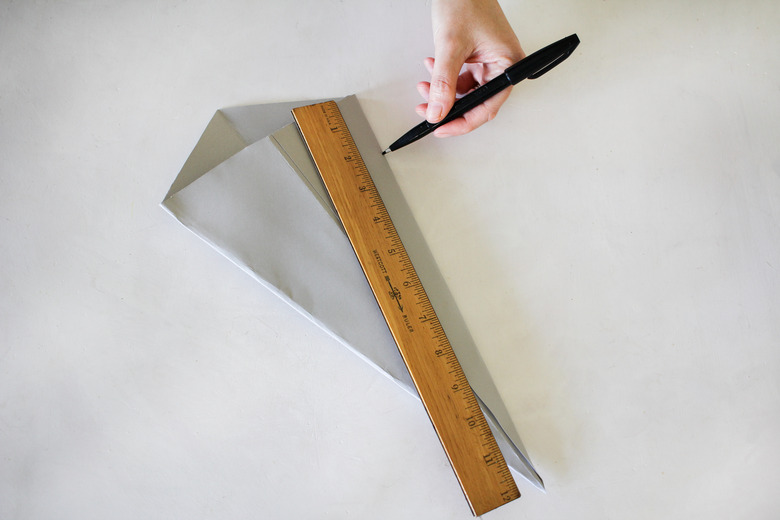
Step 8
Measure two inches down on the right side of the ice cream "cone" part and mark it with a dot.
 Trisha Sprouse
Step 9
Starting at the dot you just made, cut a diagonal line straight through the ice cream "scoop" part.
 Trisha Sprouse
Step 10
Push on the sides to make the shape three-dimensional again — this time forming more of a lopsided ice cream cone — and then flatten it into this shape.
 Trisha Sprouse
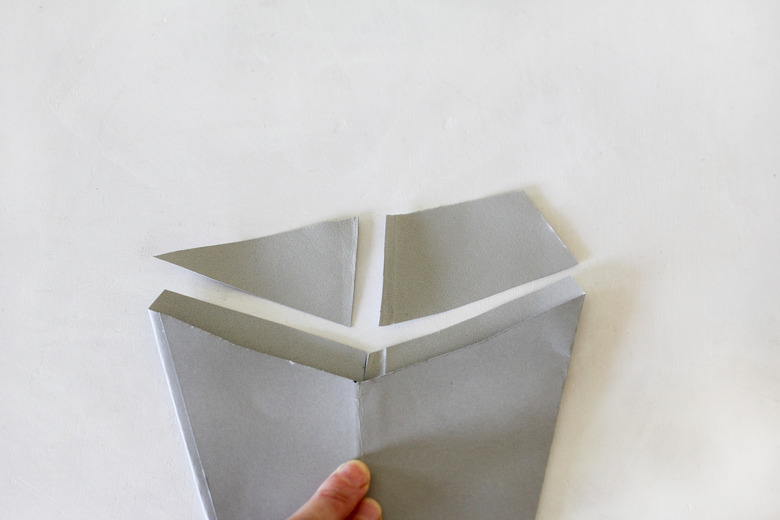
Step 11
Cut a slit in the center of the ice cream "scoop" and stop when you get to the ice cream "cone" part.
 Trisha Sprouse
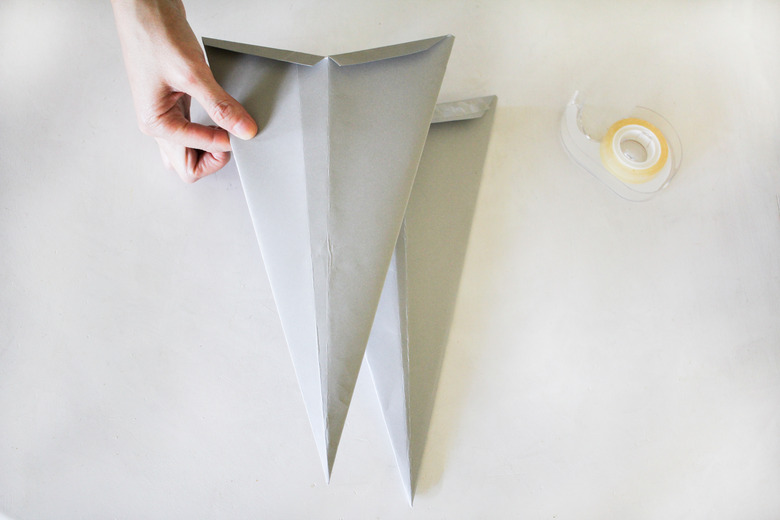
Then trim off the excess part of the ice cream "scoop" until all that remains are 1/4-inch flaps at the top of the ice cream "cone."
 Trisha Sprouse
 Trisha Sprouse
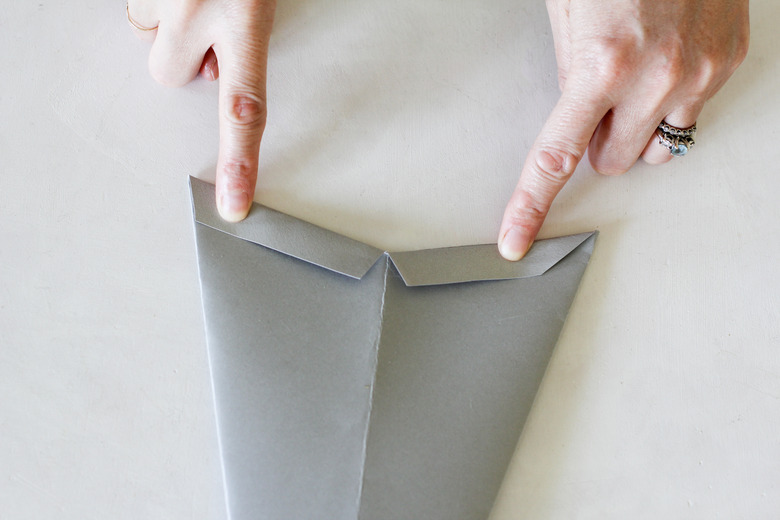
Step 12
Turn the paper over, and fold back the 1/4-inch flaps.
 Trisha Sprouse
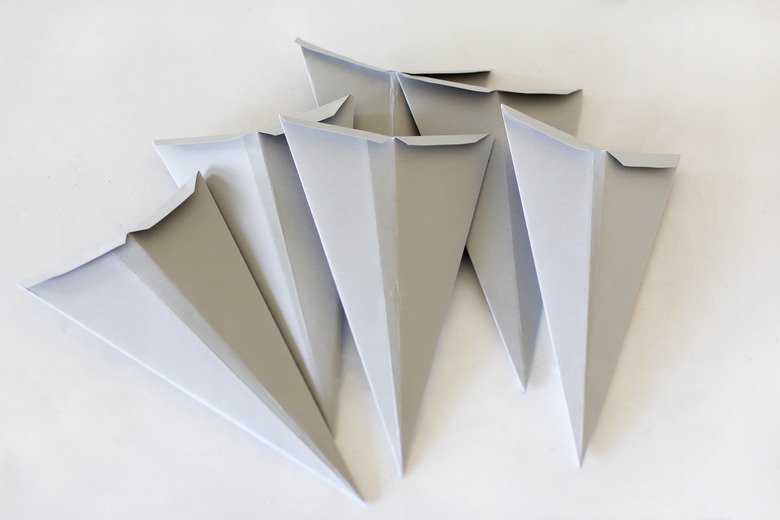
Step 13
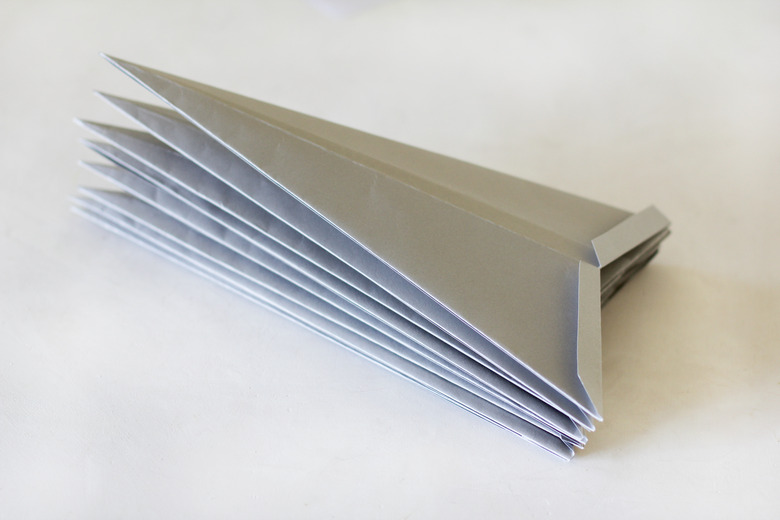
Repeat this process seven more times until you have eight star pieces.
 Trisha Sprouse
Step 14
Take one star piece, and place double-sided tape or glue on the 1/4-inch flaps, and then press another star piece (the side without flaps) on top of the flaps.
 Trisha Sprouse
Continue until you have all eight pieces glued together in a stack.
 Trisha Sprouse
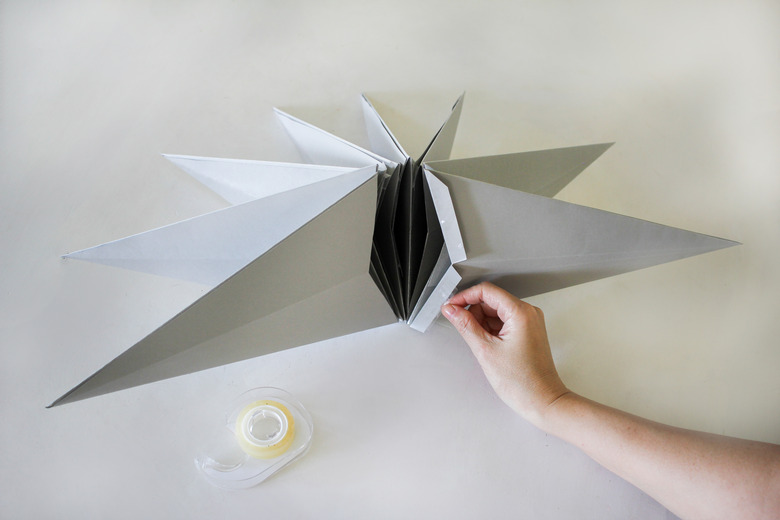
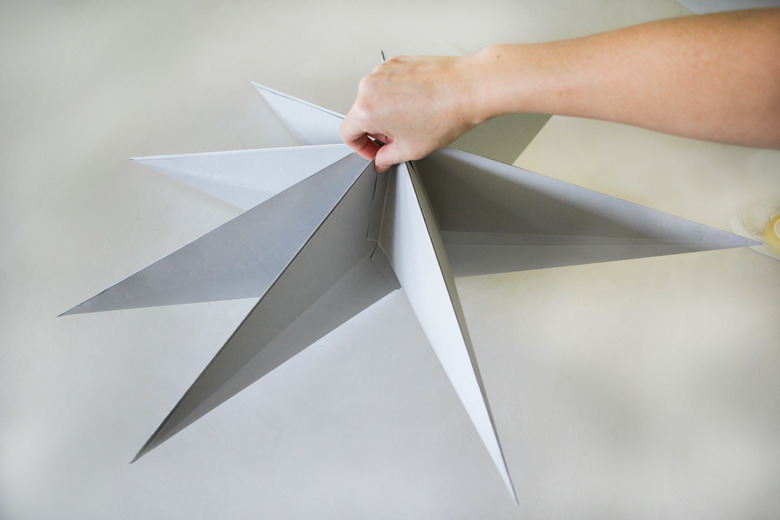
Step 15
Fan out the star pieces accordion-style and place tape or glue on the flaps of the last piece.
 Trisha Sprouse
Then adhere the last piece to the first piece.
 Trisha Sprouse
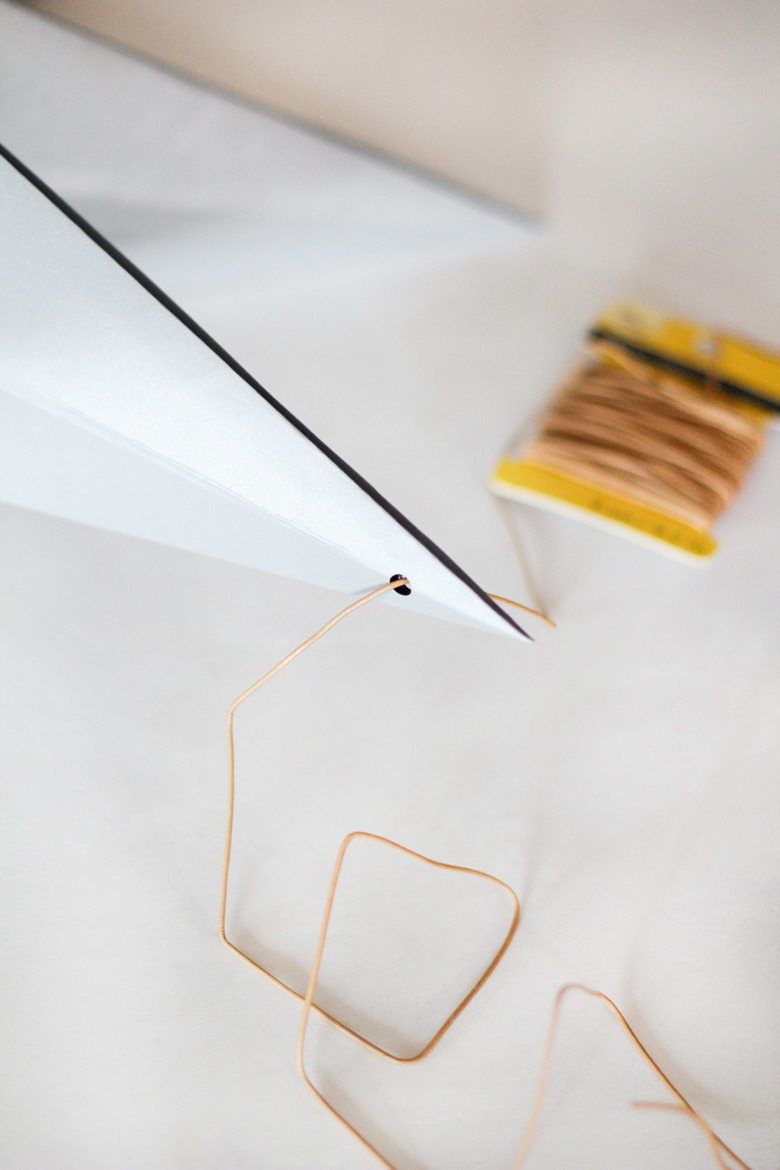
Step 16
Use a hole punch to make a hole at the tip of one of the star points. Thread leather cord, ribbon, or fishing line through the hole and tie it to a ceiling hook.
 Trisha Sprouse
We just love how beautiful these stars look clustered over a table.
 Trisha Sprouse
But they look equally stunning strung up in a window.
 Trisha Sprouse