Outlet Insulation: Stopping Drafts Around Outlets
Even if you have the latest and greatest when it comes to insulated doors, windows and walls, there may still be small drafts entering the house through gaps in the siding or foundation that can mean extra money spent on heating and cooling bills. Electrical outlets and light switches might be the last places you think of when it comes to preventing outdoor air from getting in, but both such locations are essentially holes in the wall, covered by flimsy cover plates. While you generally won't need to insulate every outlet in the house, those located on exterior walls are well worth your time, since insulating them is simple and costs just pennies per outlet.
Air Gaps Are Energy Drains
Air Gaps Are Energy Drains
If you've ever removed the cover plate from an outlet or light switch, you've probably noticed the void space in the wall that houses the electrical box. This empty, uninsulated space on an exterior wall makes it easy for air to flow into the wall cavity from the outdoors, and the cover plate alone does little to stop a draft. In the wintertime, you may even feel the cold drafts seeping in around outlet cover plates. Sealing outlets, along with all other similar forms of air leaks around your home—such as those around plumbing pipes, electrical conduits and windows and doors—could cut back on energy usage by as much as 20 percent.
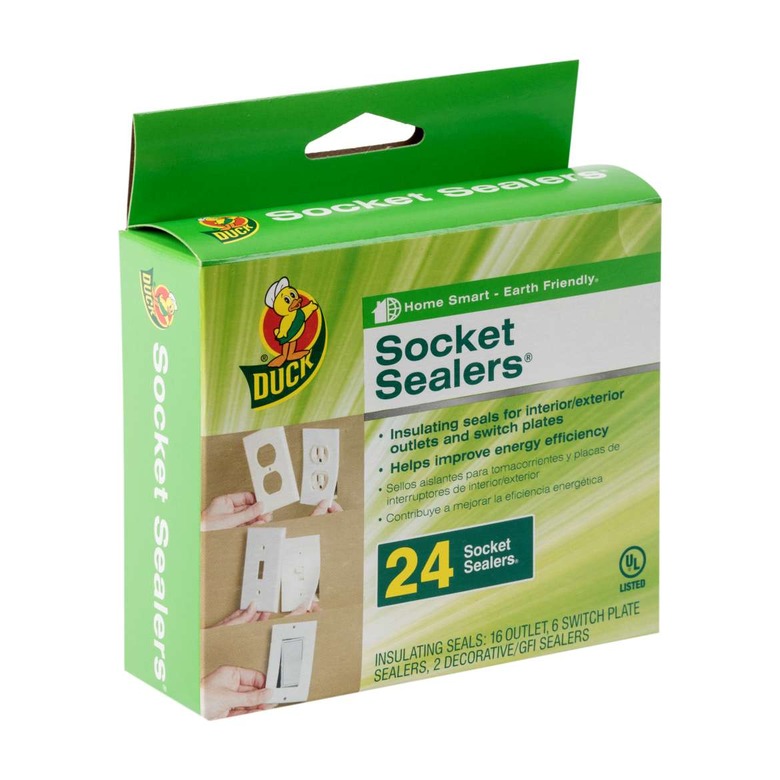
Getting rid of the drafts is a simple as insulating the space behind the cover plate as thoroughly as possible. The best ways to do so are with foam gaskets or a fire-retarding insulating foam.
How to Block Drafts With Socket Gaskets
How to Block Drafts With Socket Gaskets
Things Needed
-
Lamp
-
Slotted screwdriver
-
Foam outlet gasket
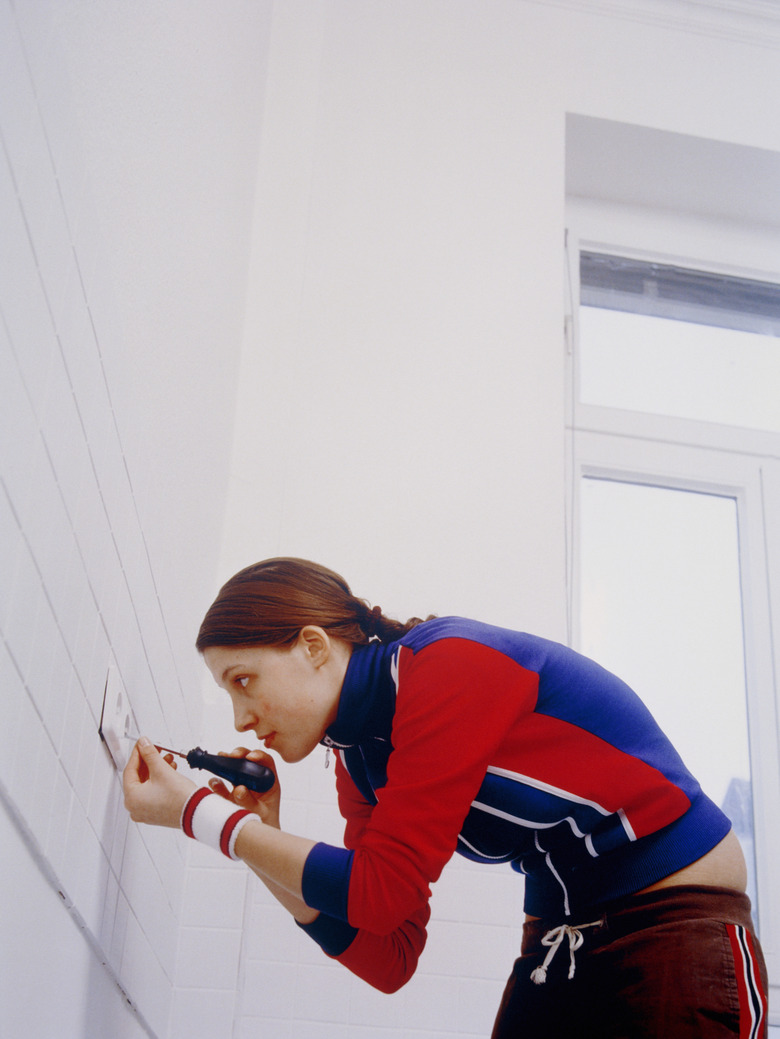
Although this is a simple project, it is still important to turn off the power whenever removing the cover plate on any outlet.
- Plug a lamp into the outlet and turn the lamp on. If dealing with a wall light switch instead, turn the switch on and note which ceiling light or device the switch operates.
- Locate the circuit breaker box in your house and turn off the breaker for the project outlet. You'll know you've chosen the right one when the lamp turns off.
- Unplug the lamp and remove the outlet cover plate using a slotted screwdriver.
- Insert the appropriate foam outlet gasket over the outlet, making sure to align it properly around the switch or outlet.
- Replace the outlet cover plate.
Tip
Purchasing the outlet gaskets in a multi-pack could save money. Count the exterior-wall outlets and switches beforehand to ensure the package you purchase has enough gaskets of the right size.
How to Block Gaps With Insulating Foam
How to Block Gaps With Insulating Foam
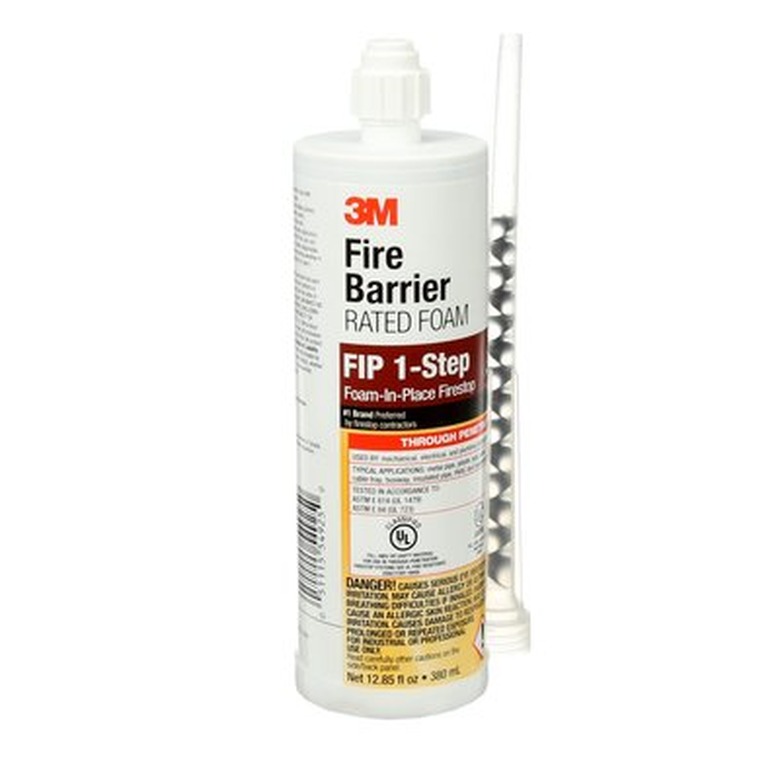
There are a number of expandable foam products available for blocking air gaps, but when insulating electrical outlets, its best to use an intumescent fire-blocking foam. Like other expanding foams, this one grows up to five time its volume when applied, so a little goes a long way. Besides its ability to block flames, this foam also helps keep outside air and sounds out of the house, too, assuming the walls are already well insulated.
Things Needed
-
Slotted screwdriver
-
Rubber gloves
-
Intumescent fire-blocking foam
-
Caulk gun (if using foam in a caulk-style tube)
-
Utility knife
Intumescent foam is better than foam gaskets when it comes to blocking drafts. It should not, however, be sprayed inside outlet boxes—only around the sides.
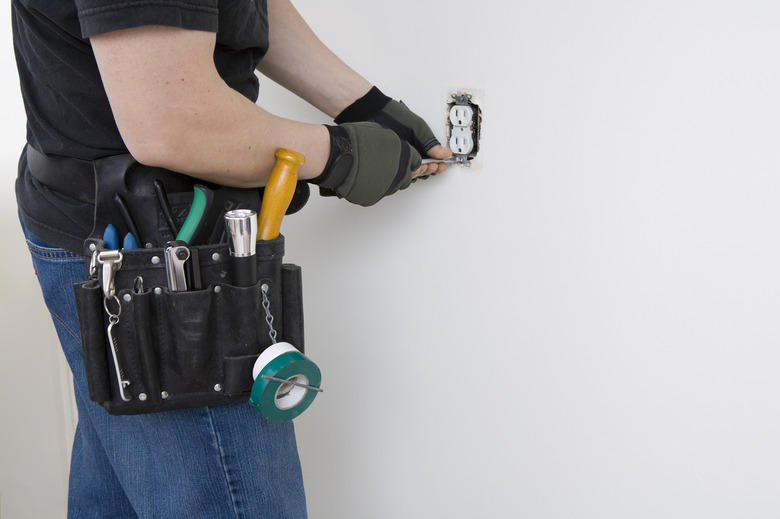
- Turn off the breaker that powers the outlet or light switch.
- Remove the outlet or switch cover plate with a slotted screwdriver.
- Insert the straw or application tip of the foam tube into the gap surrounding the outlet box. Spray or squeeze a small amount of foam into the gap, getting a feel for how much it expands before proceeding.
- Continue filling all the gaps with foam, but be careful not to get the foam inside the outlet box. Allow the foam to cure, based on the curing time listed on the package.
- Squirt insulating foam around the face of the outlet, blocking tiny gaps between the drywall and the perimeter of the outlet housing. Allow the foam to harden.
- Trim excess hardened foam with a utility knife so the foam is relatively flush with the drywall.
- Replace the outlet cover.
Tip
Along with blocking drafts, intumescent fire-blocking foam is also a great way to block rodent entry points where pipes enter the house. Walk around the house and look for any visible gaps or holes that could be points of entry for rodents and insects. Fill large gaps with steel wool first, then apply spray foam over the steel wool.