Container Gardening 101: How To Get Started

We may receive a commission on purchases made from links.
While designing a landscape is a lot of fun, many experienced gardeners will tell you that container garden design can prove even more interesting and rewarding. That's because container gardening gives you an amazing amount of flexibility that a traditional garden simply can't match (and bonus: it's great for small spaces in yards or balconies). When you plant in containers, you can move well-loved plants indoors for the winter, shift pots during the day for maximum sun and shade requirements or simply rearrange things when you want a new look. Container gardens also require minimal care; weeds and pests are rarely a problem, and given the smaller scale, you can solve any issues that do arise much more quickly and easily.
How to Get Started With Containers
How to Get Started With Containers
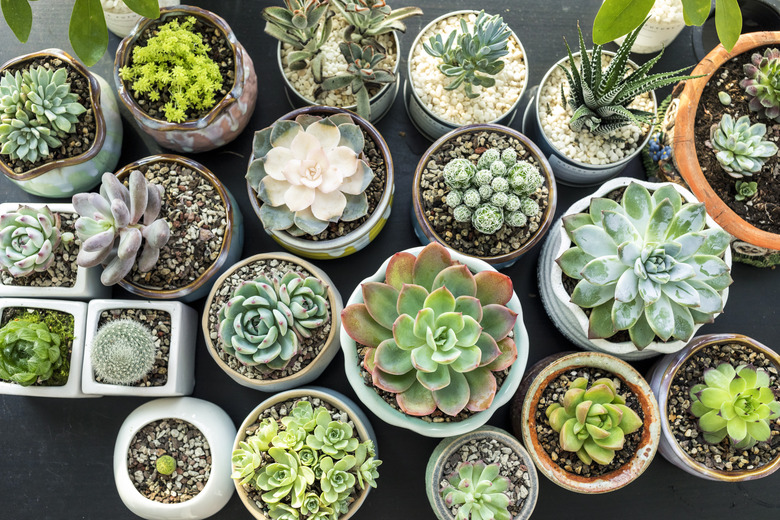
As you plan your containers, think beyond the stereotypical potted geraniums or violas in clay pots. Instead, make a statement by choosing interesting containers and carefully selecting unique plants. Consider grouping containers of different sizes with various types of plants (flowers, decorative grasses, succulents, herbs or even vegetables). Smaller container gardens can do double duty; they'll grow outdoors during the warmer seasons and continue to thrive indoors during the cold months.
Things Needed
-
One or more containers
-
Slow-release granular fertilizer (optional)
-
Plants
-
Newspaper or paper towels
-
Insecticidal soap (optional)
How to Begin a Container Garden
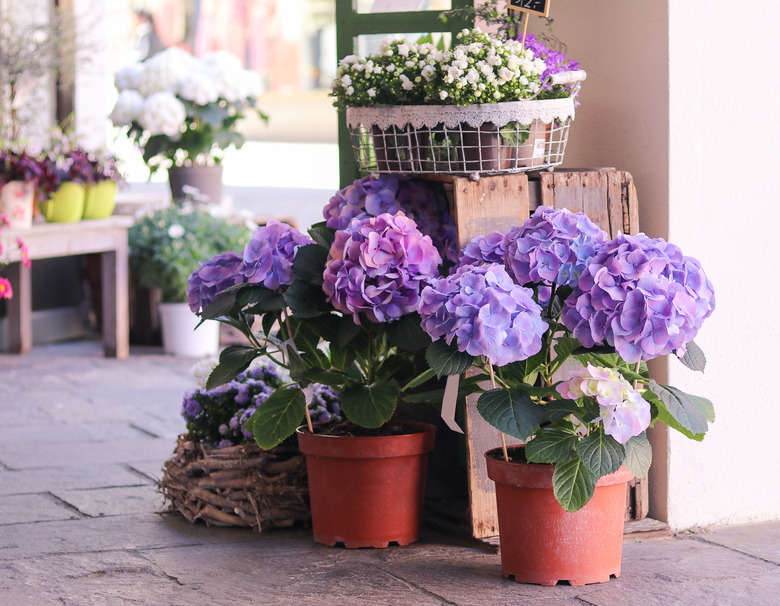
1. Choose Your Containers
There are, of course, practical considerations when choosing your pots for container planting, but remember to have fun — you'd be surprised at what an impact a beautiful container can have on your landscape. You can choose plain terra-cotta pots and vivid plants or fill bright and colorful pots with more muted-foliage plants. Any combo that you like will work, so get creative and make your container garden design as unique or sophisticated as you like.
- Choose pots made of materials that will work in your climate. Clay pots often break when exposed to freeze-thaw cycles, for instance, so don't choose them if you plan to overwinter your plants outdoors.
- Decide what type of container will work best for your space. If you have a small balcony, a window box or hanging basket won't take up floor space. If you have room, consider purchasing a pair of tall containers to frame a doorway or walkway.
- Consider the plants you plan to use. Your container must be large enough to accommodate the entire root ball of the plant with a 1-inch space at the top between the soil and the rim of the container. If you're planting multiple plants in the same container, make sure you choose a planter large enough to accommodate them all. Remember too that the larger the pot, the more slowly the soil in it will dry out.
- Be aware of top-heavy plants. Tall plants need a wide, strong base even if the plants themselves stay fairly lean. Too little stability in flower pots means plants that will topple over.
- Verify that your chosen pots have adequate drainage holes.
Tip
Large containers can get heavy in a hurry. Consider setting large pots on casters to make them easier to move.
 Tetiana Soares/iStock/GettyImages
2. Search for Soil
The right container is important, but the right soil is even more crucial. Succulents just won't perform well in heavy soils that are slow to drain. Plants that like wet feet, however, may struggle in soil that drains too quickly.
- Purchase the right potting mix for the plants you want to grow. Succulents require sandy soils that drain very quickly. Vegetable gardening blends are also available. Some vegetables, including root crops, like loose soil through which they can push easily. Other vegetables prefer denser, more nutrient-rich soils.
- Pick a name you know. There is often no harm in buying generic and saving money but tread carefully when doing so with soil. Bad potting soil can contain weed seeds, insect larvae and fungi or bacteria. You don't want these things to affect your plants.
- Find potting soil that contains a slow-release fertilizer if you can. These products will continuously feed plants for up to six months. If you can't find soil that includes fertilizer, buy a slow-release granular fertilizer to feed your plants according to their unique needs.
3. Bring Your Container Garden Design to Life
When you choose plants at a garden center, they will likely be grouped according to whether they grow well in full sun or shade. Pay attention to the water, soil and light needs of the plant varieties you choose, grouping together plants with similar care needs. Your plants will struggle if you try to plant a sun-loving cactus (family Cactaceae) and a shade-seeking coleus plant (Coleus scutellarioides, USDA zones 10-11) in the same container.
Although the ultimate design is up to you, a common strategy is to choose one "statement" or "thriller" plant that is especially tall, large or dramatic in color to be the focal point. Then, choose several filler plants that bridge the height of your tallest plant to the edge of the container. Also, choose plants that will provide a variety of color and leaf texture. Finally, many container gardens include one or more trailing plants or vines ("spillers") that cover the edge of the container and grow down the sid
- Pour potting soil from the bag into the container and gently tamp it down. Add enough soil so that when you remove the transplants from their nursery pots and set them into the container, the tops of the root systems will be just below the top of the planter.
- Add the plants, starting with the statement plant near the center and adding the other plants around it. Add additional soil between gaps in the plants. Gently tamp into place.
- Thoroughly water your new plants until water begins to run out the bottom. Container gardens often need water once a day in hot weather. You can check by inserting a fingertip 2 inches deep into the soil; if the soil feels dry, water thoroughly. Always add enough water so that it drains out the bottom, ensuring that the entire root system is cared for.
 DuKai photographer/Moment/GettyImages
4. Monitor Your Plant's Health
Container gardening is generally easier than in-ground landscape gardening, and weeds are rarely an issue. It's still a good idea to keep an eye on the health of your plants just in case.
- Look for yellowing and wilting leaves. These are often a sign that the plant isn't getting enough water. Conversely, it can also mean that a plant is getting too much water.
- Check the plants for mushy stems and an overall loss of vigor. Rotting plants that are mushy to the touch are probably being overwatered or are living in soil that isn't draining quickly enough.
- Examine the leaves for chewing holes, white webbing and tiny insects. If you see any, spray your plants with insecticidal soap. But before you spray, make sure that your target plant is not listed on the label as one that may be damaged by insecticidal soap.
- Pull weeds as you spot them. They'll likely be rare, but every once in a while, airborne seeds do deposit themselves in containers.