Your Cat Is Going To Lurve This Modern DIY Kitty Hammock
 Jeran McConnel
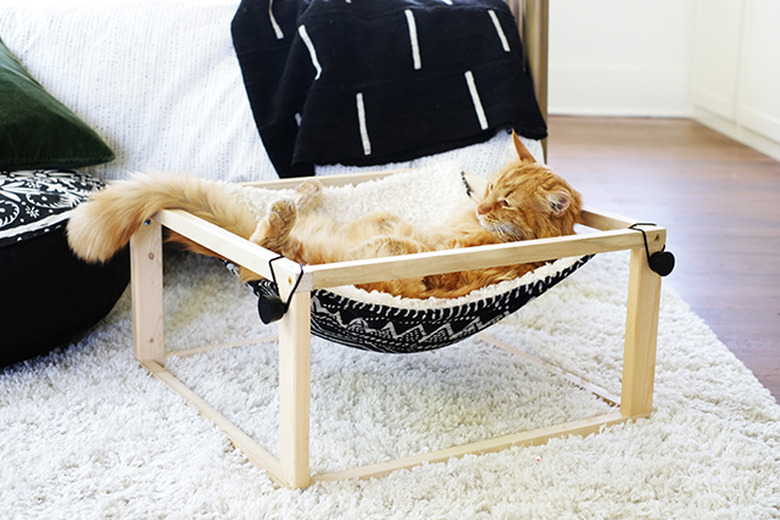
This DIY is for all you pet parents out there who want to give your cat a cozy place to lounge that matches your home's modern aesthetic. Picture this: a hammock bed that has a reversible cover, so depending upon the season, you can give your cat either a warm, fuzzy surface to cuddle in, or cool cotton to chill out on. Better yet, the reversible cover can easily be removed and thrown in the wash. Heads up, Kitty — you're going to love this.
(Psst — why stop there? We think that kitty needs this DIY modern daybed, too. It's too purrfect. Ba dum dum.)
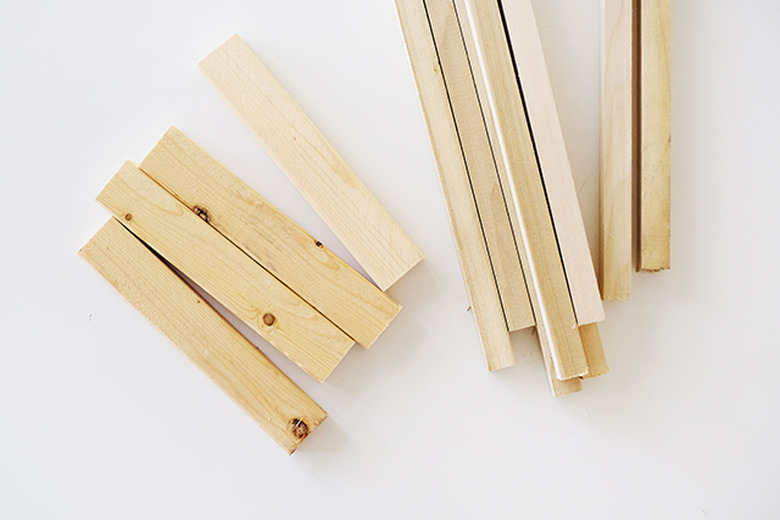
Things Needed
-
1/2-by-1/2-inch square dowel at a length of 13 feet
-
1/2-by-2-inch pine at a length of three feet
-
Wood glue
-
Pencil
-
Tape measure
-
Sand paper
-
1 1/8 inch wood screws, ( 16 )
-
Countersink drill bit
-
Cordless drill, drill bits, and screw driver bits
-
Screw driver
-
Saw (I used a drop saw, but a small hand saw could be used to cut these pieces)
-
Cabinet knobs, ( 4 )
-
Black hair elastics, ( 4 )
-
Two different fabrics, 2/3 of a yard for each (I used faux sheepskin and cotton mudcloth)
-
Sewing machine
-
Fabric scissors
-
Cat nip (optional)
Step 1
Start by cutting the wood pieces to length. You will need eight of the 1/2-by-1/2-inch dowel cut to 18 inches long and four of the 1/2-by-2-inch pine cut to 8 inches each. I used my drop saw to make quick work of the cutting, but if you don't have access to power tools, these lengths of wood can be cut quickly and easily with a hacksaw or hand saw.
 Jeran McConnel
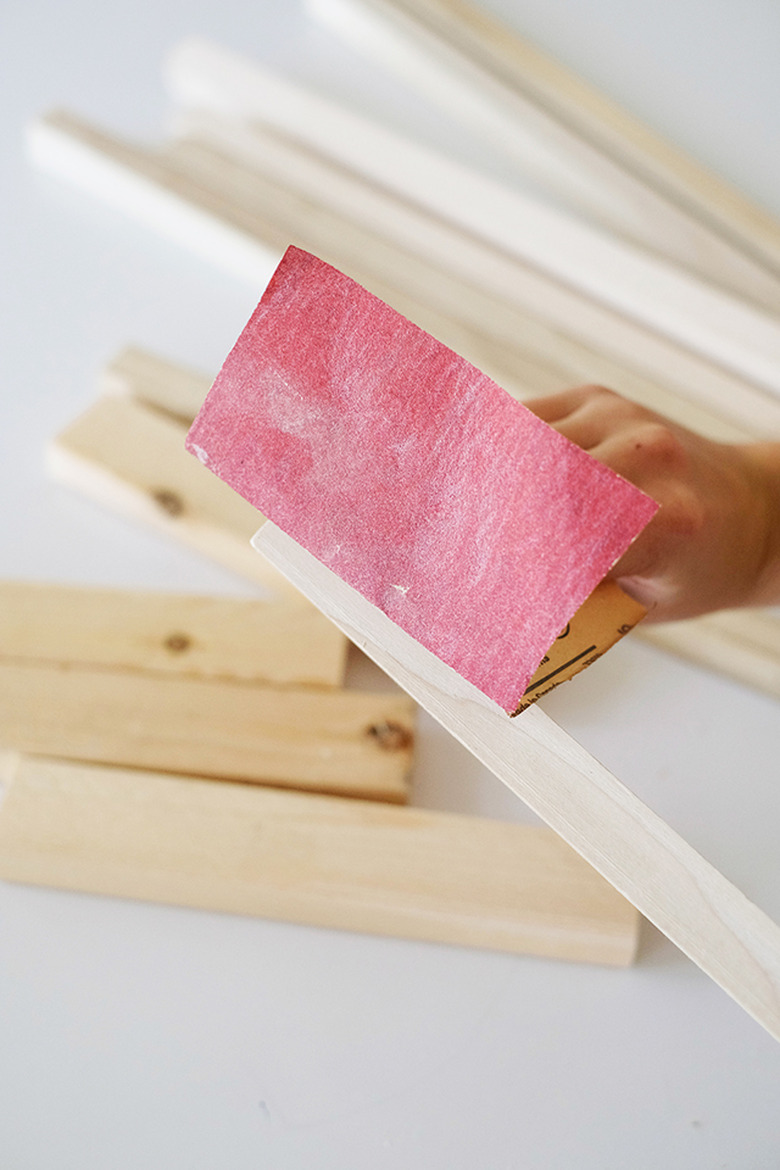
Step 2
Sand all the rough cut edges of your wood pieces.
 Jeran McConnel
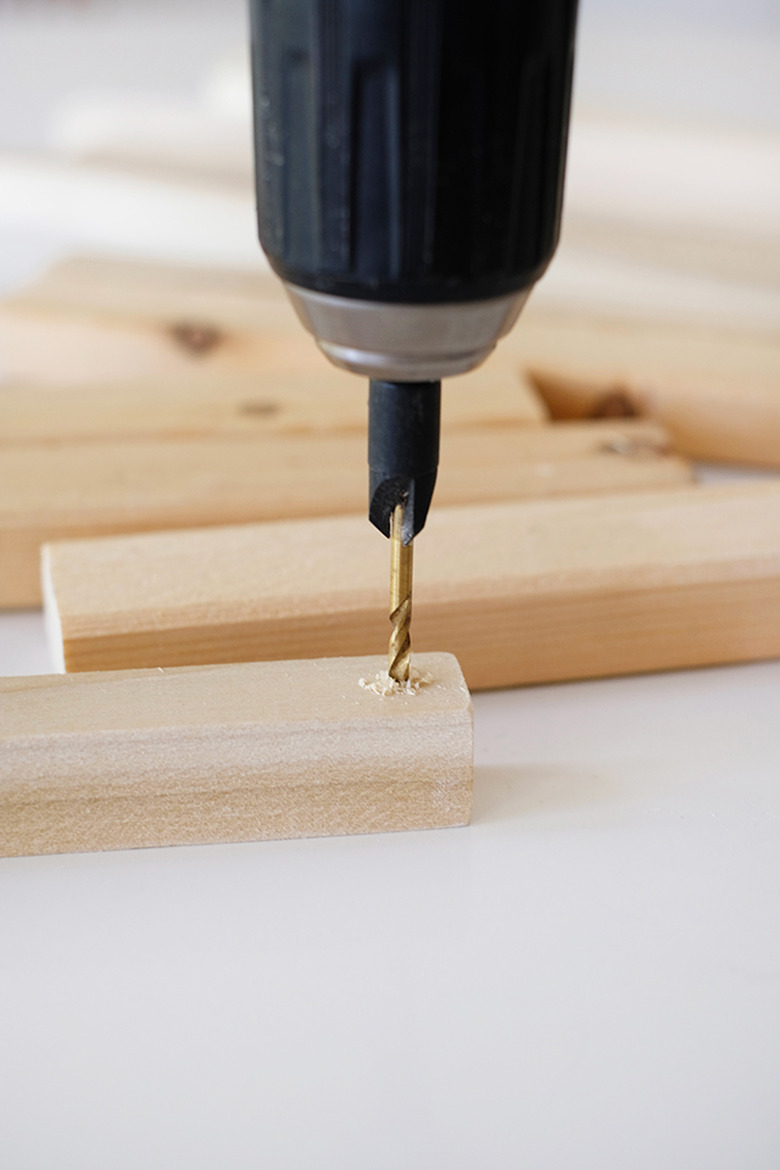
Step 3
You will start by preparing to assemble the top and bottom squares of the hammock frame. Each corner of the frame is secured with a wood screw. You will need to pre-drill out these points — this will prevent the wood from splitting when you screw in the screw. I went a step further and drilled out countersink holes for the screw head to sit snuggly into.
 Jeran McConnel
 Jeran McConnel
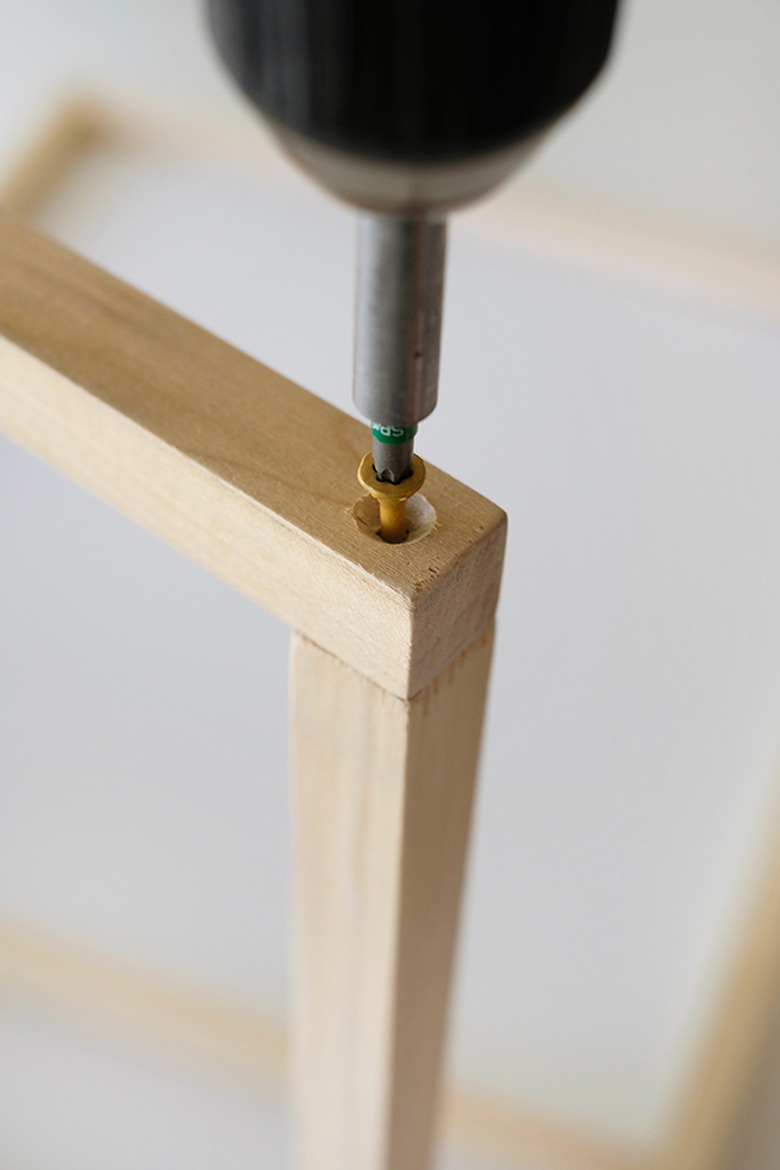
Step 4
Now that you have the two square frames for the top and bottom of the frame pre-drilled, you can now screw together the four sides of each of these squares. Apply a small amount of wood glue and then screw the pieces together. This can be done on your own (that's how I assembled this), but I also think it would have been handy having one more set of hands to hold pieces of wood perpendicular to each other.
 Jeran McConnel
 Jeran McConnel
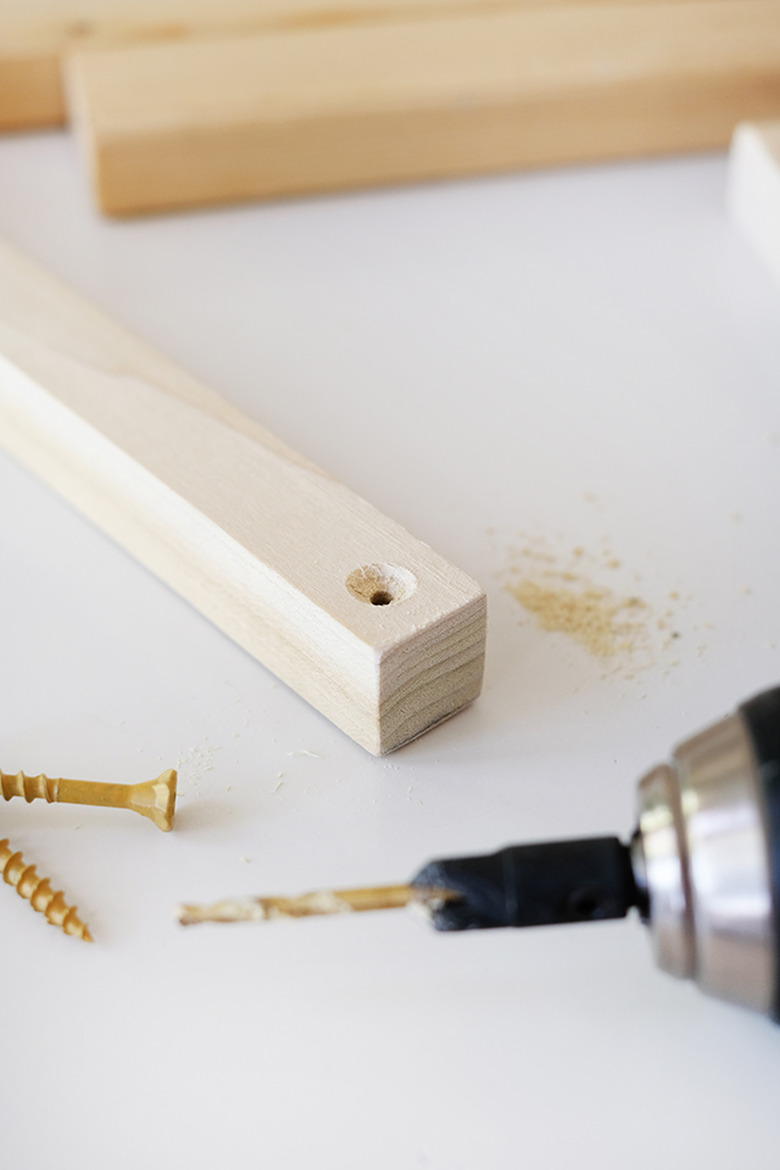
Step 5
Now you will attach the four 8-inch lengths of wood to the four corners of the frame. Just as in steps 3 and 4, you will need to mark out and pre-drill these holes, and also drill out a counter sink hole. You can see in the image below, this screw does not go right in the corner. It is screwed in about 1 inch from the corner so that the screw will not hit the other screw that is already in place. Attach the top and bottom frame. Remember to add a small amount of wood glue to the corner before screwing it together.
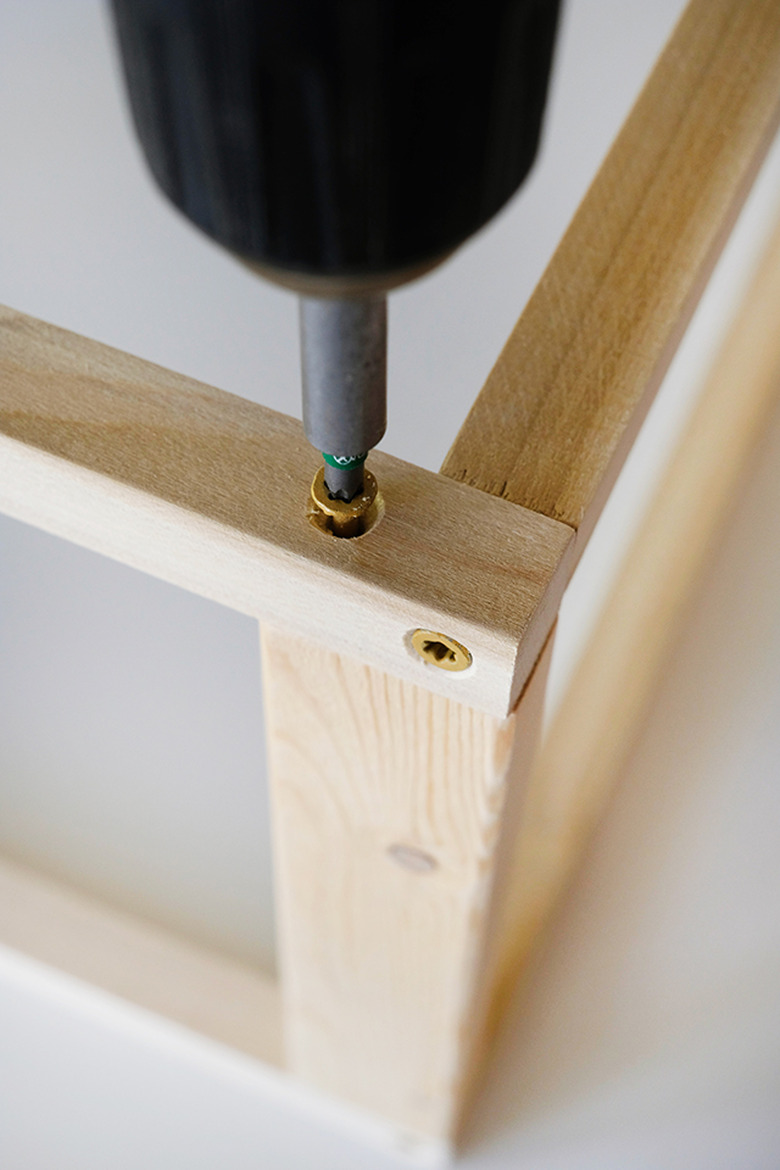 Jeran McConnel
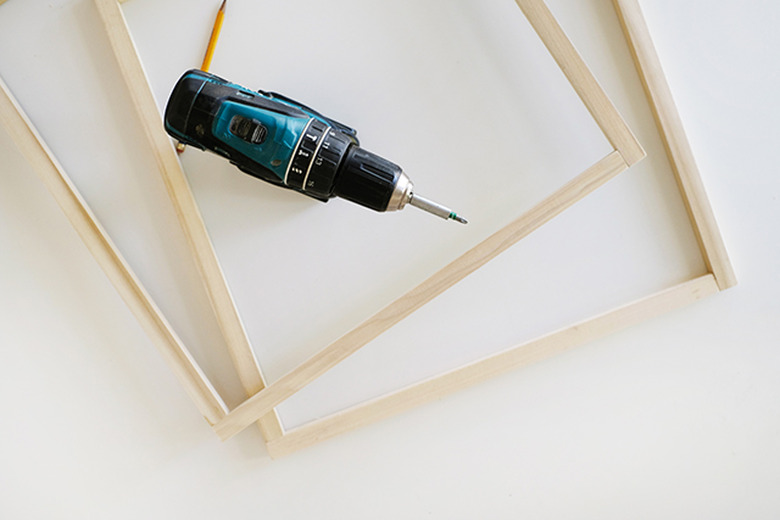
Step 6
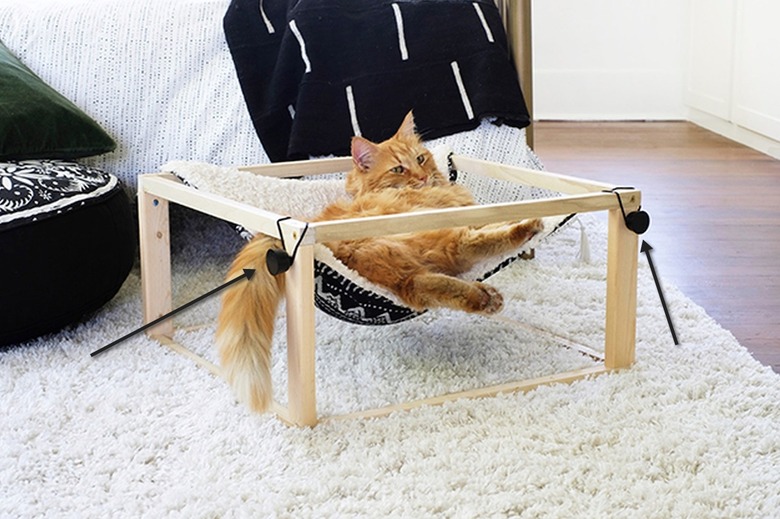
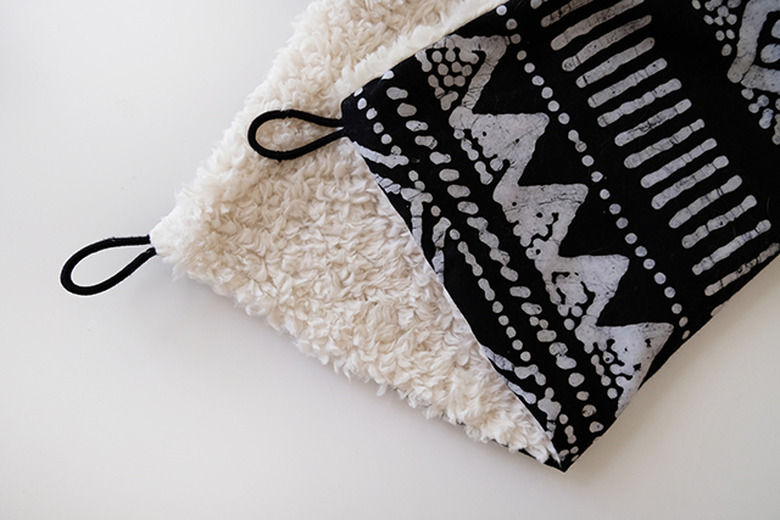
Drill out holes to attach the four drawer pull knobs near the top of the side bars. These knobs will hold the hammock in place.
 Jeran McConnel
Step 7
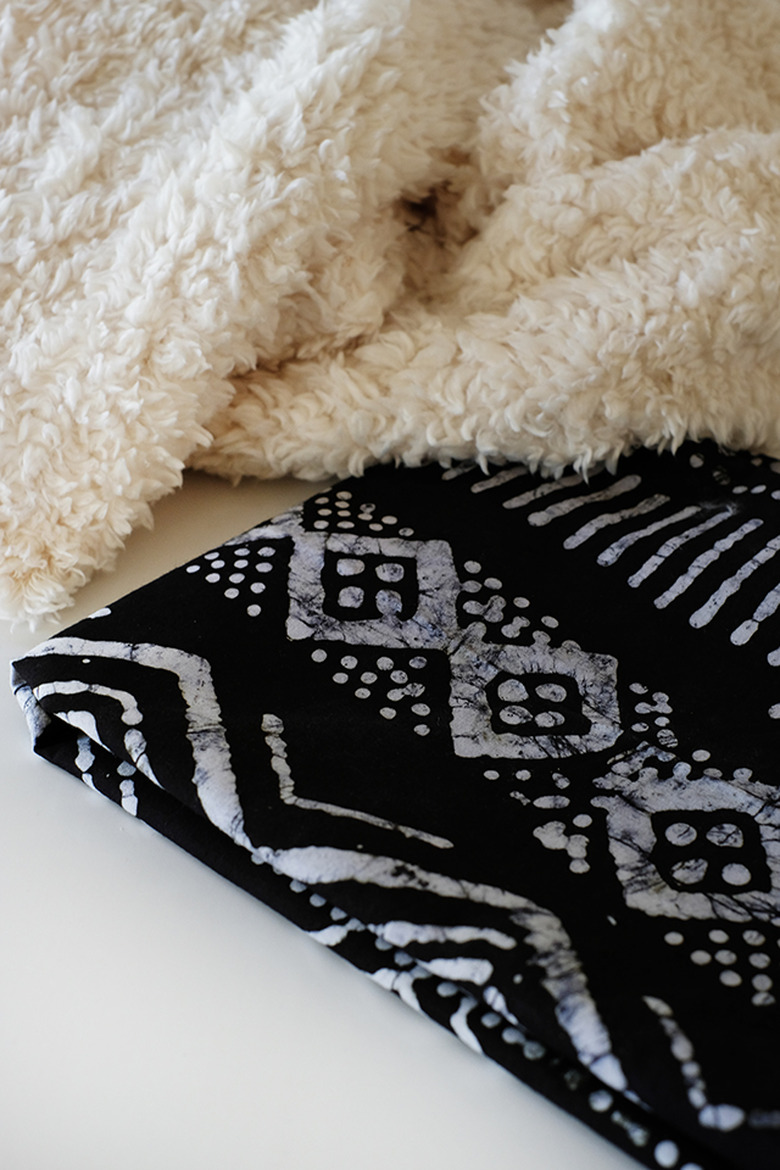
Now you are going to switch gears and move from power tools to the sewing machine. Cut two 19-by-19-inch squares of fabric. To give my kitty options, I made one side a faux sheepskin and the other side a cotton in a mudcloth pattern.
 Jeran McConnel
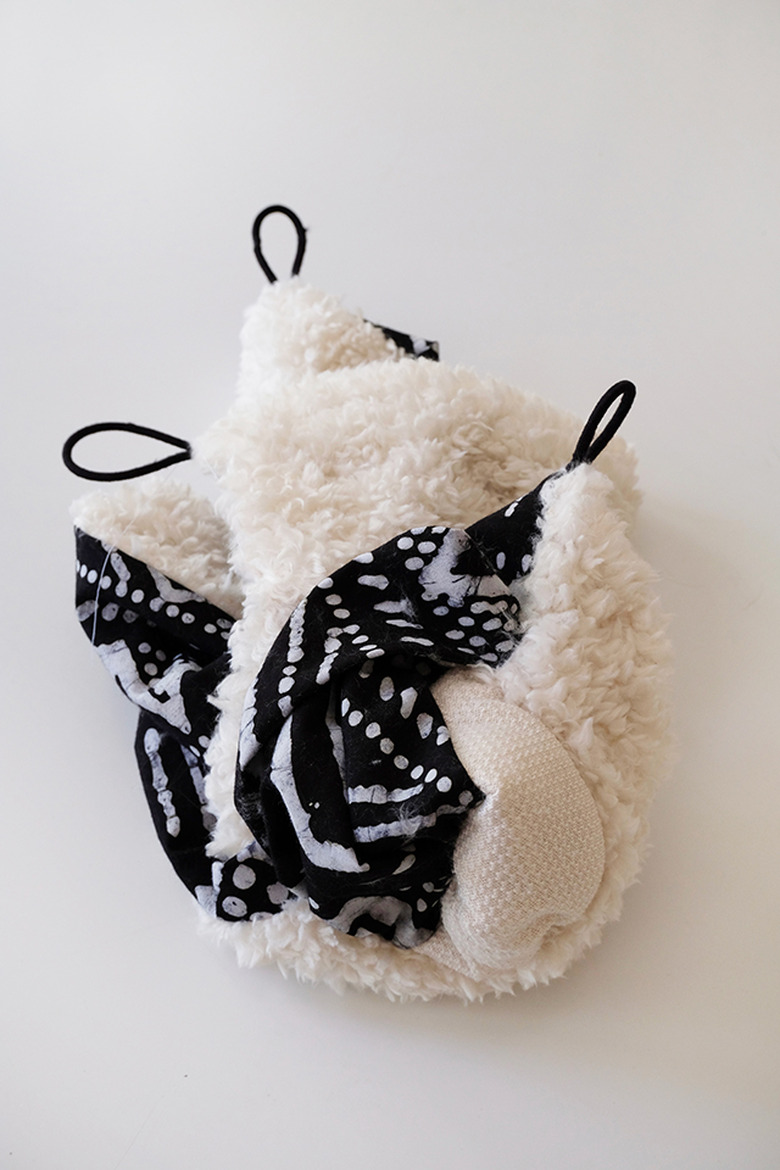
Step 8
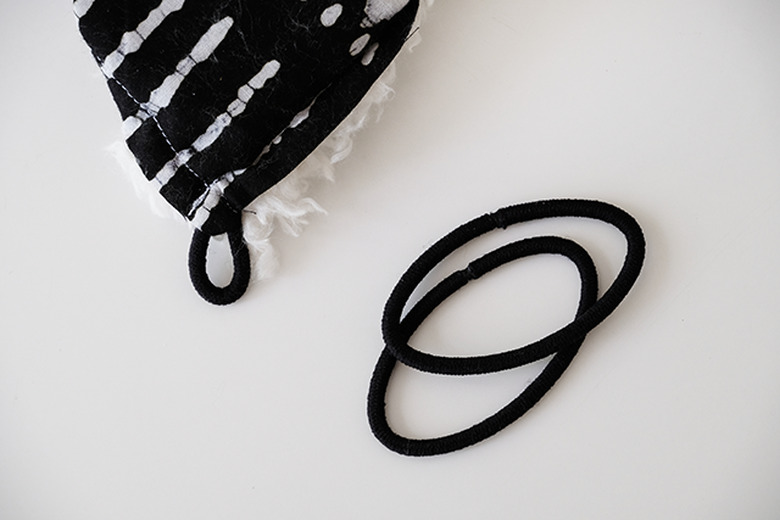
Face the sides you'd like to have on display together, and sew. In each corner pin a hair elastic and reinforce each corner by stitching back and forth at least three times over the elastic. Leave a 4-inch opening on one of the sides of the hammock.
 Jeran McConnel
Step 9
Turn the fabric right side out. Pin the opening closed, folding in the raw edges. Top stitch close the opening with the sewing machine.
TIP: Before you sew the opening closed, you may want to add a little cat nip. This will entice your cat to fall in love with the hammock quickly.
 Jeran McConnel
 Jeran McConnel
Step 10
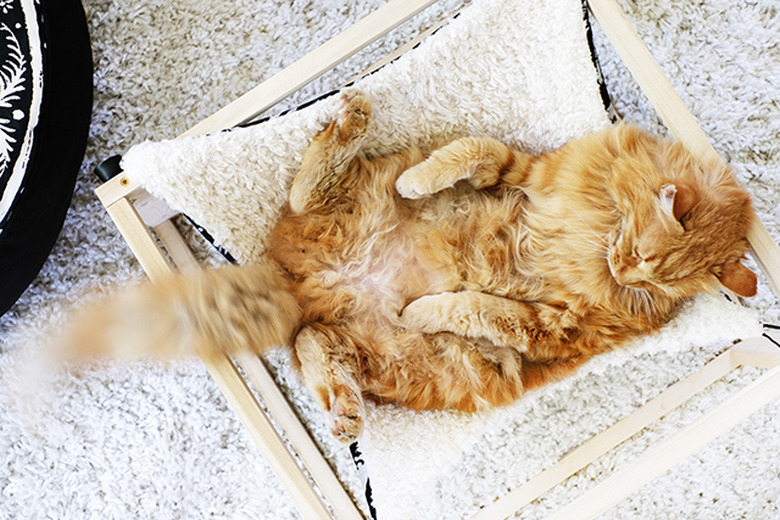
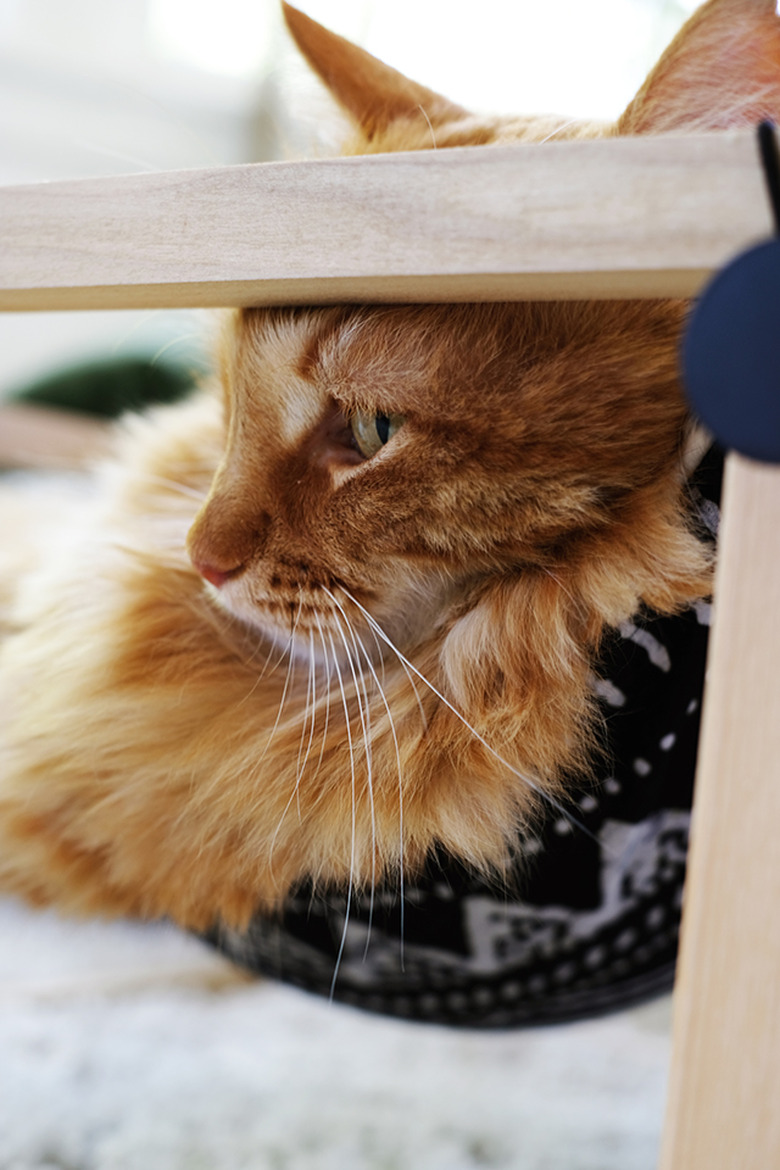
Attach the hammock to the frame and place in your cat's favorite napping spot.
 Jeran McConnel
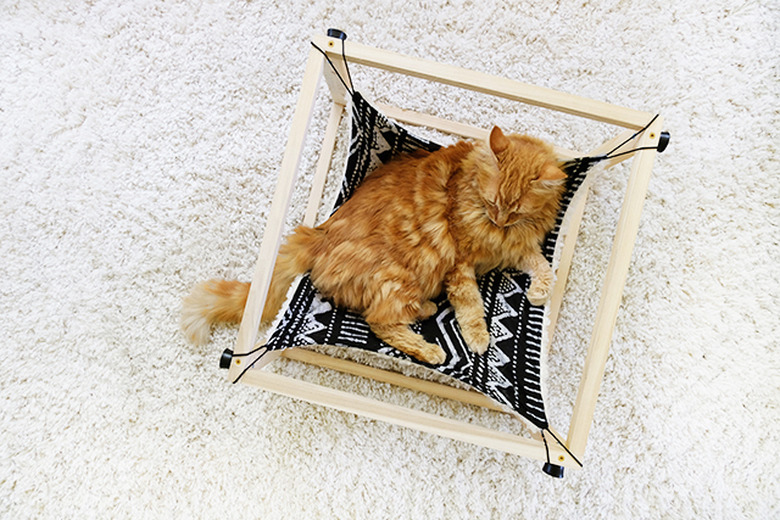
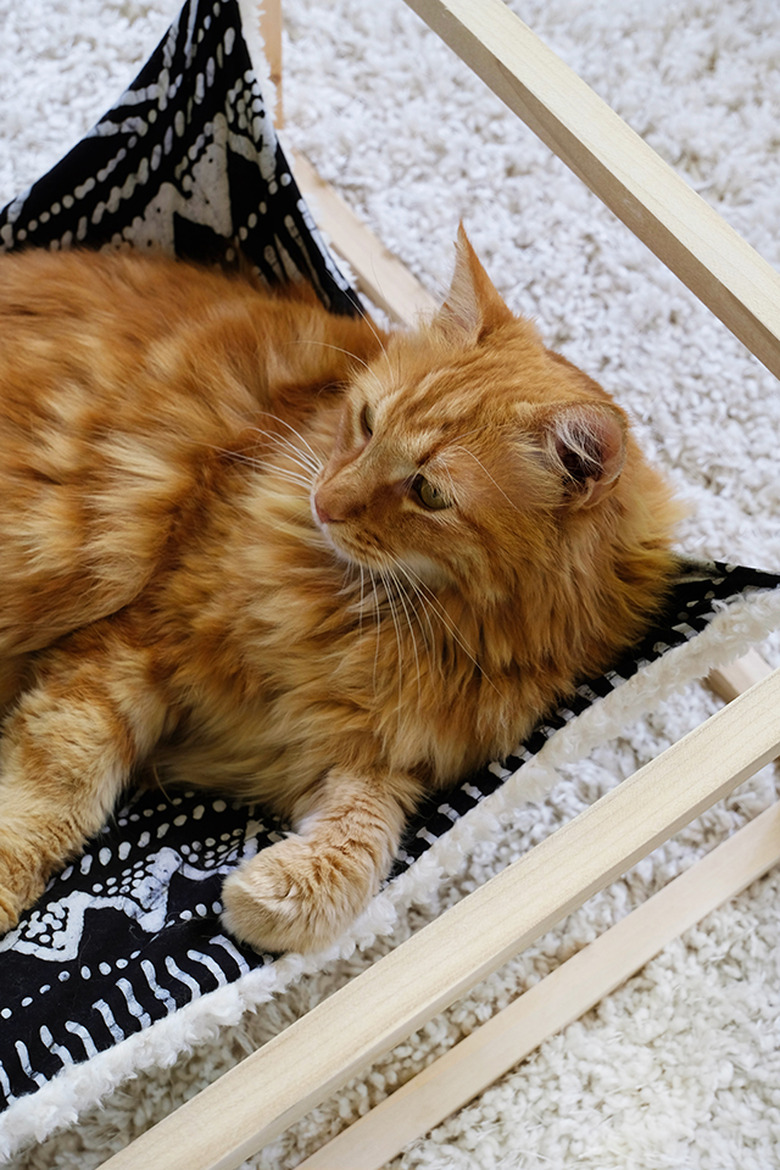
And as you can see, the hammock is a hit. (Just ask Pumpkin!)
 Jeran McConnel
 Jeran McConnel