Easy Furniture Repair You Can Do
Everyone has a piece of furniture around the house that could use some TLC. Whether it's a wobbly chair or table, a stuck drawer or a piece of wood veneer that won't stay put, the repair is usually easier than you think, so there's no real reason to put it off. A few small repairs call for special materials, but usually, all you need are a few basic materials, such as glue, tape and screws, and a basic tool set. Your toolbox probably already includes a drill with an assortment of drilling and driving bits, a multi-driver, a hammer, a tape measure, a pair of adjustable pliers and a saw.
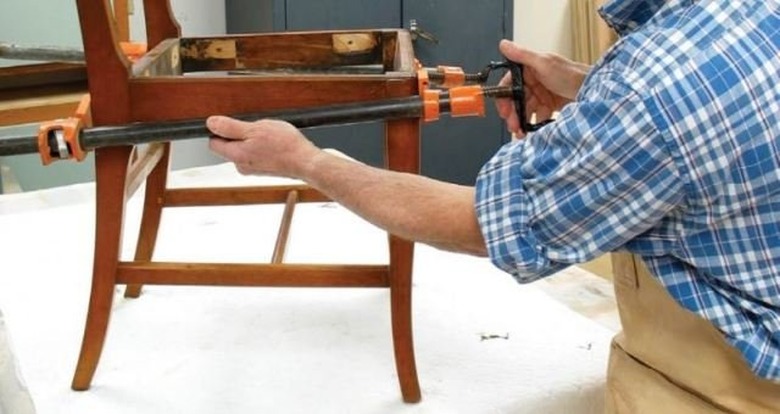
Repair #1: Steady That Wobbly Dining Room Set
Repair #1: Steady That Wobbly Dining Room Set
Dining room sets get a lot of use, and over tim, the joints will loosen up and make the table and chairs wobbly. Here are some methods for making your dining room set as good as new.
Things Needed
-
Adjustable pliers
-
Carpenter's glue
-
Syringe
-
Bungee cords or bar clamps
-
Drill
-
1/4-inch drill bit
-
1 1/2 -inch trim screws
1. Tighten the Table Legs
Locate the bolts holding the legs to the skirting that supports the table top. They are easier to see if you turn the table over, but you save effort easily enough by just crawling under the table. Tighten each of these bolts with a pair of adjustable pliers, and the table won't wobble anymore.
 Ken's Upholstery
2. Glue the Chair Legs
Turn each chair upside down on a workbench and put pressure on each leg to find the loose joints between the legs and the braces. When you find a loose joint, push on the leg to separate the pieces, then squeeze carpenter's glue into the hole, using a syringe. After you've taken care of all the joints in this way, wrap a bungee around all four legs to hold them steady while the glue sets.
3. Reinforce Chronically Loose Joints with Trim Screws
If leg joints won't stay put and are chronically loose, use screws to reinforce the joints between the chair legs and the braces that won't stay put. Drill a pilot hole through the outside of the leg and into the brace, using a 1/4-inch drill bit, then drive a 1/12-inch trim screw. Trim screws have small heads, like finishing nails. When you sink the head below the wood, the screw all but disappears.
Tip
If your table is wobbly because the legs are uneven, install adjustable foot pads. You can usually do this by drilling a hole in the bottom of each leg and tapping a pad into each hole. When you set the table upright, you can stop the wobble by screwing or unscrewing each pad to ensure that all legs reach the floor.
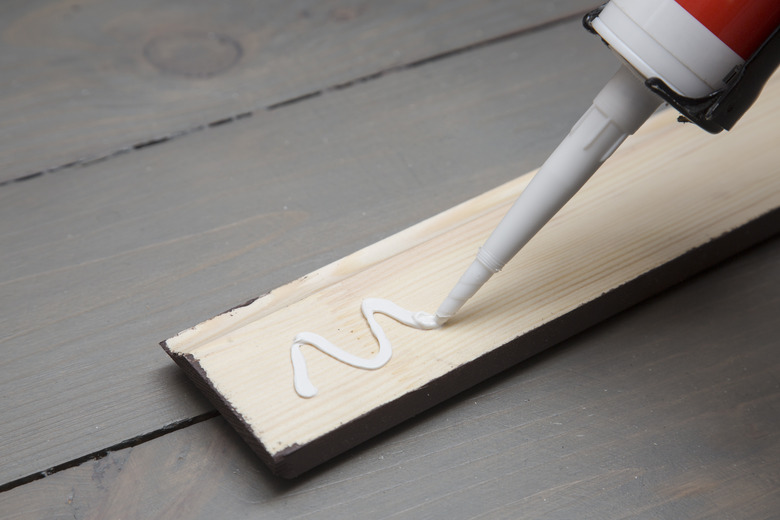
Repair # 2: Reset Loose Veneer
Repair # 2: Reset Loose Veneer
Most hardwood furniture is not solid hardwood at all, but is constructed with a fine hardwood veneer glued down over a less-expensive core material. Over time, the surface veneer may bubble or lift away from the core, especially around the edges. The fix is to simply reglue the veneer back down against the core.
Things Needed
-
Popsicle stick
-
Carpenter's glue
-
Sponge
-
Electrical tape
1. Prop Up the Veneer
Pry the veneer up gently with your finger to get it high enough to allow you to spread glue underneath it. Prop it up by sliding a key or a butter knife underneath and wedging the tool against the part of the veneer that is still attached.
2. Spread Glue
Apply carpenter's glue to the surface to which the veneer is attached, using a dull, flat tool such as a popsicle stick. You could also use an artist's paintbrush or a syringe. Be patient here and make sure to apply glue to the entire bottom of the loose veneer.
 ronstik/iStock/GettyImages
3. Tape It Down
Remove the prop and push the veneer down onto the surface. Wipe up excess glue with a damp sponge, then dry with a rag. Hold the veneer down with electrical tape. For extra holding power, wrap the tape around the edge of the cabinet or tabletop and to stretch it before sticking it down. Leave the tape in place overnight, until the glue dries.
Repair # 3: Fix Furniture Finishes the Easy Way
Repair # 3: Fix Furniture Finishes the Easy Way
Surface damage on furniture can usually be fixed rather easily with ordinary materials you have around the house.
Things Needed
-
Olive oil
-
Paper towels
-
#000 steel wool
-
Paste wax
-
Rag
-
Crayons
1. Get Rid of Water Spots with Olive Oil
Soak a paper towel with olive oil and set it on top of water marks caused by cups or mugs left standing on a table. The oil seeps into the finish and replaces the water, which is what is causing the discoloration. Leave the paper towel overnight for best results.
2. Buff Out Light Scratches
Remove scratches in lacquer or varnish finishes by rubbing vigorously with #000 (very fine) steel wool. When the scratch has disappeared, get rid of the abrasion marks by rubbing in some paste wax and buffing it up with a soft rag.
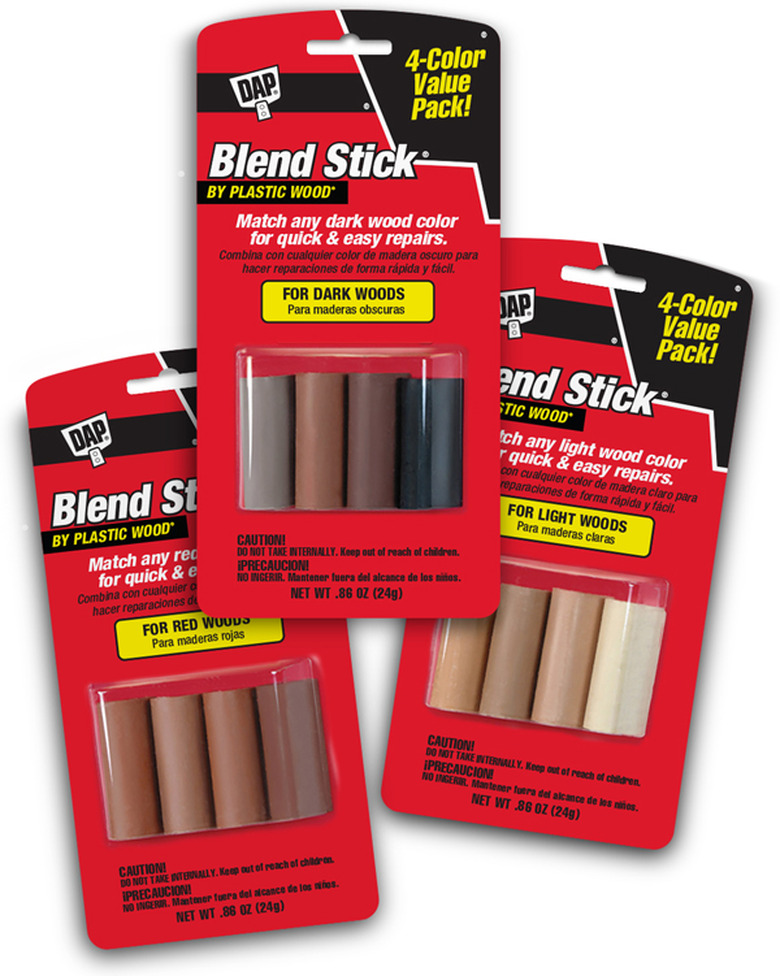
3. Camouflage Deep Scratches
Select a putty crayon from your collection that matches the color of the finished wood. Run the crayon crossways along deep scratches to fill them and restore the color. Finish up by buffing the area with paste wax. This easy solution is remarkably effective at hiding all but the deepest scratches.
 Dap
Dap
Repair #4: Get Stuck Drawers Working Again
Repair #4: Get Stuck Drawers Working Again
Struck cabinet doors are usually a matter of fixing loose metal slide hardware, or using wax to lubricate drawers that have wooden runners.
Things Needed
-
Screwdriver
-
Screws
-
Carpenter's glue
-
Candle wax or beeswax
1. Tighten the Glides
Pull out a drawer that is hard to open and test the glides for stability by pulling on them. If a glide feels loose, tighten the screws in the front and back of the drawer cavity with a screwdriver and the drawer will operate like new.
2. Tighten the Screws
Use your screwdriver to tighten the screws connecting the front of the drawer to the sides. If any screws are stripped, remove them and replace with a longer ones. If a drawer is chronically loose, remove the screws, separate the joint, apply some carpenter's glue and drive in the screws. Let the drawer sit for several hours before using it.
3. Wax the Runners
Improve the operation of drawers with wooden runners and wooden glides by running candle wax or beeswax along the runners on both sides of the drawer.
Repair #5: Straighten Cabinet Doors that Won't Close
Repair #5: Straighten Cabinet Doors that Won't Close
Cabinet doors that have sagged and won't close properly are usually caused either by bent or damaged hinges, or by screw hinges that have loosened.
Things Needed
-
Screwdriver
-
Epoxy wood filler
-
Putty knife
-
Rag
-
Pencil
-
Torpedo level
1. Remove the Hinges
Unscrew the hinges from the doors, take down the doors, then remove the hinges from the cabinet. Check for bent hinges and replace any you find with new ones.
2. Fill the Holes with Epoxy Wood Filler
Mix a small amount of epoxy wood filler with hardener and trowel it into the hinge holes on both the cabinet door and the cabinet frame, using a putty knife. Scrape off as much excess as you can, then use a rag to remove the rest. Let the putty set for 4 to 6 hours until it completely hardens.
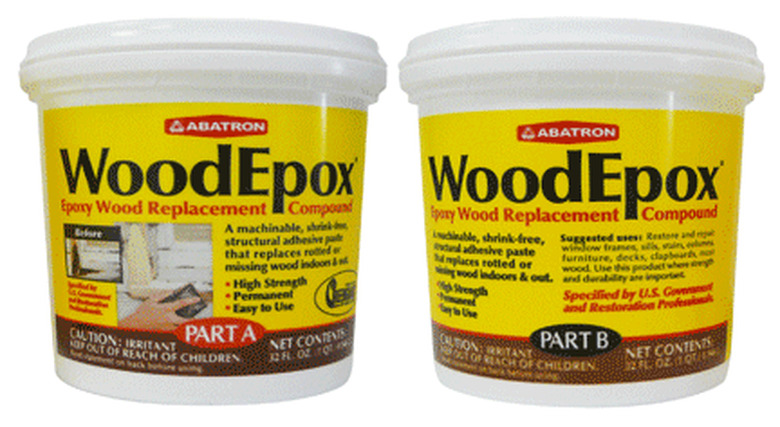 Albatron
3. Set the Hinges Back on the Door
Line up the hinges on the door and mark the positions of the holes with a pencil. Drill a pilot hole on each hole with a 1/8-inch drill bit, then screw the hinges back onto the door.
4. Hang the Doors
Hold one door in position on the cabinet and level it with a torpedo level. Mark the screw holes for the hinges, remove the door, drill a pilot hole on each mark, set the door back in place and screw the hinges back onto the cabinet. Repeat with the other door, being sure to leave a 1/4-inch gap between the doors.
Repair #6: Get Mouse Odors out of Cabinets
Repair #6: Get Mouse Odors out of Cabinets
Unpleasant though it sounds, once a cabinet has been infiltrated by mice, the rodent smell may linger long after the last mouse trap has been emptied. Fortunately, there's an easy fix for ridding your cabinet of these odors.
Things Needed
-
White vinegar
-
Rag
-
Baking soda
Deodorize the interior of particle board cabinets by soaking visible stains with white vinegar. Soak a rag with vinegar, set it on the stain and leave it overnight. In the morning, remove the rag and dust the area with baking soda.