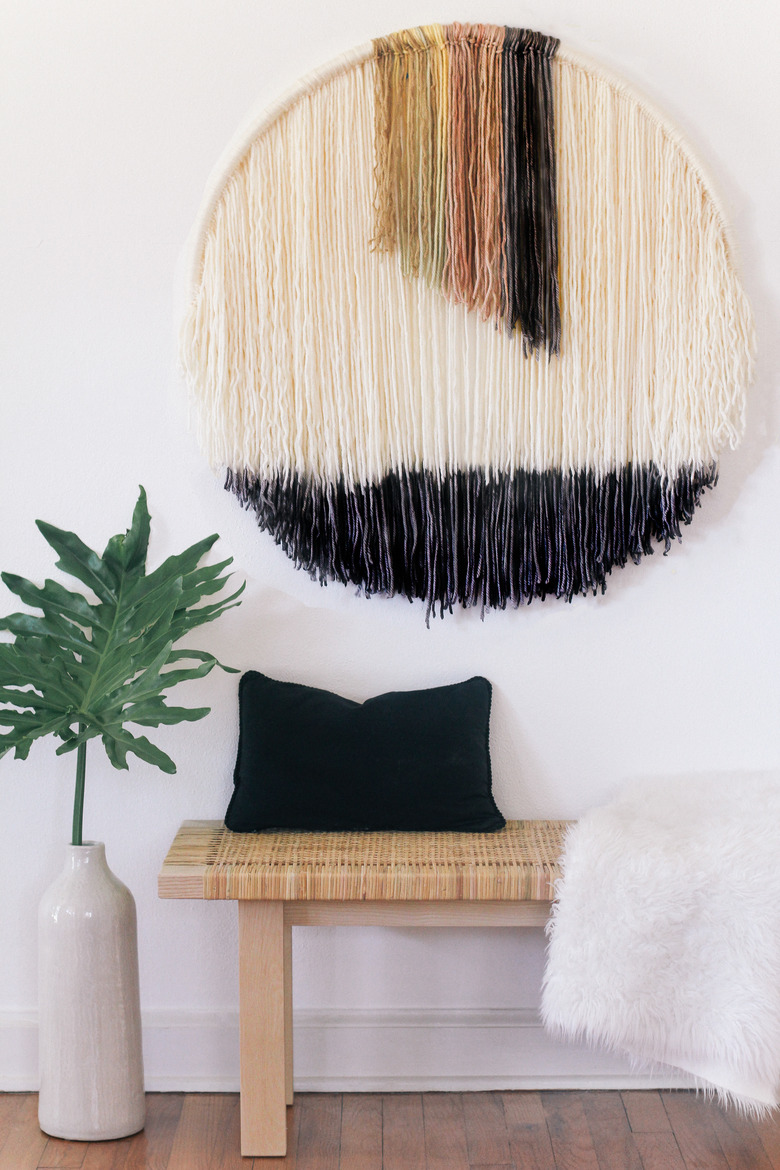
Easy-To-Make Hanging Wall Art Using Dip-Dye Yarn
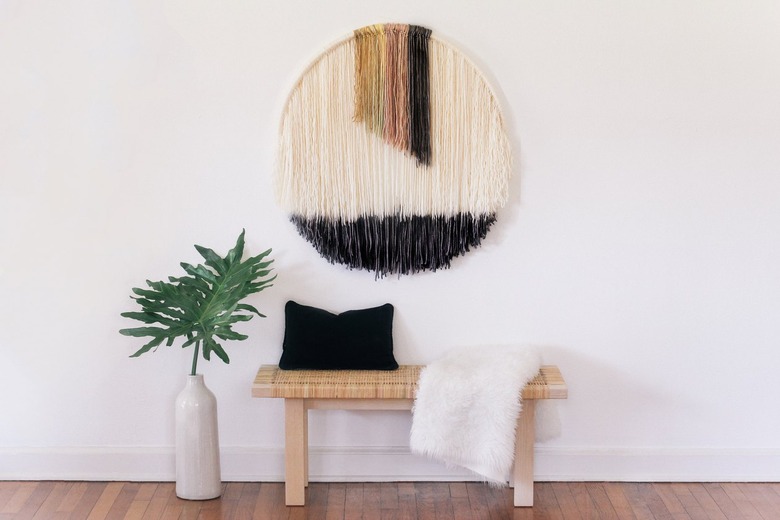
You won't believe what lies beneath this fabulous wall hanging — a hula hoop! That's right, we went back to our childhood roots to tap into the oversize art craze that is totally trending on Pinterest and Instagram right now. We didn't stop there, either. We also utilized the ever-popular dip-dye technique to achieve a beautifully muted, slightly ombre color palette. The result is an unbelievably chic piece of art that makes a dramatic statement wherever you hang it.
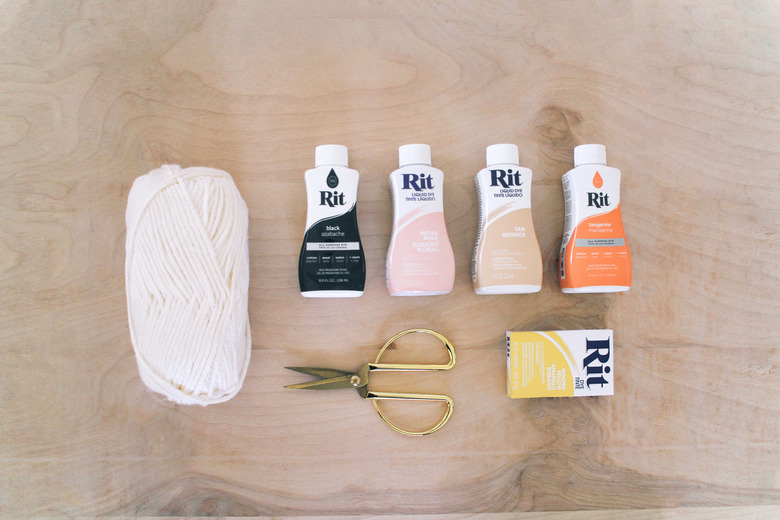
Things Needed
-
Hula hoop
-
Cream-colored yarn, 4 skeins
-
Tape measure
-
Scissors
-
Nail and hammer
-
Rit dye (black, tan, petal pink, tangerine, golden yellow)
-
Plastic buckets
-
Paint tray
-
Painter's tape
-
Plastic tarp
-
Rubber gloves
Tip: For the yarn, we used a bulky weight of 5. But you could use a heavier weight if preferred.
 Trisha Sprouse
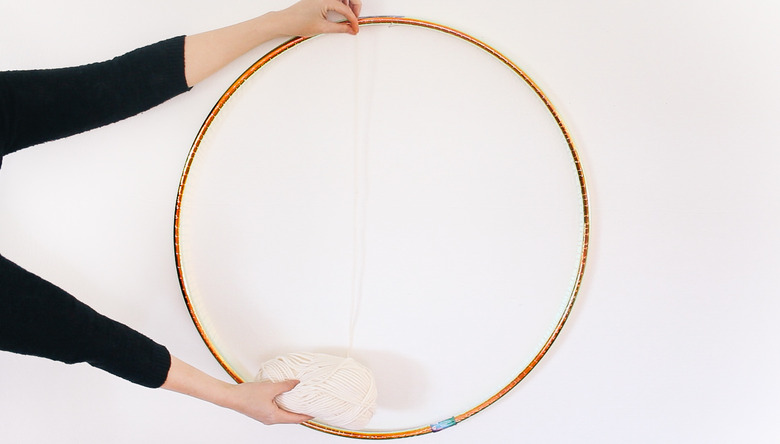
Step 1
Measure the diameter of your hula hoop. You'll want to double this measurement and then add 4 inches to determine what length to cut your yarn strands. For example, if the diameter of your hula hoop is 28 inches, then your yarn strands should be 60 inches ( 28 x 2 + 4 ).
 Trisha Sprouse
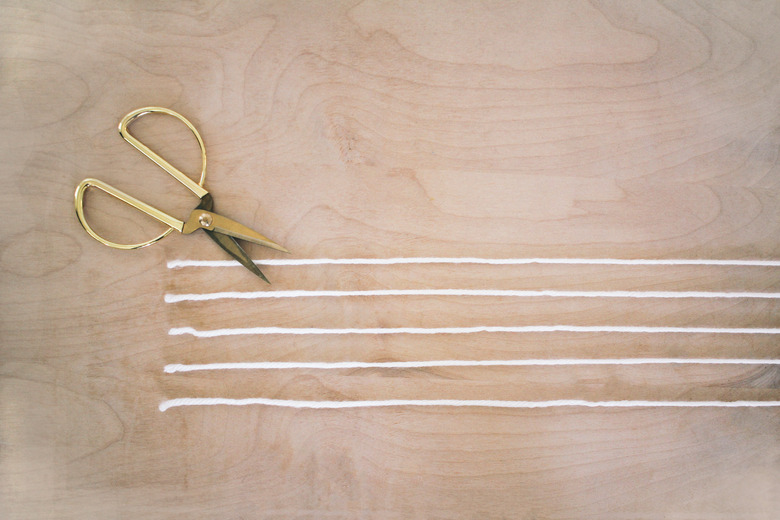
Step 2
Cut oh-so-many strands of yarn to the length you determined in Step 1. You'll likely go through at least four skeins of yarn to fill your hula hoop (depending on the size). It's easier to pre-cut all of the strings to the same length and trim into a circle shape afterward.
 Trisha Sprouse
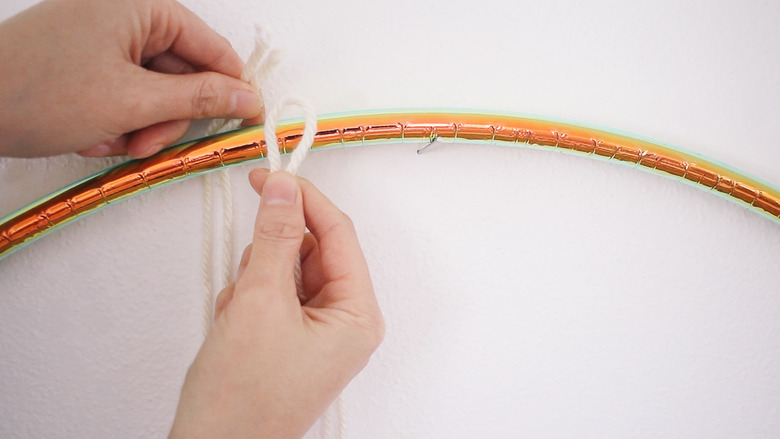
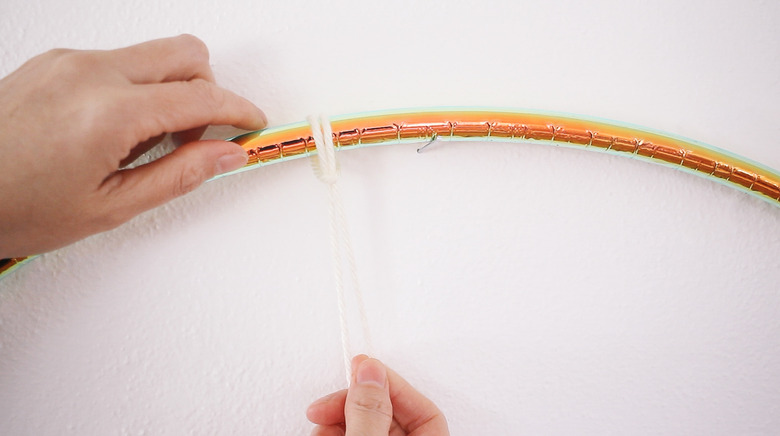
Step 3
Once you've pre-cut all of your yarn strings, start tying each one onto your hula hoop using a lark's head knot. Essentially, you fold your yarn string in half. Pinch the middle of the string to form a loop. Hold the loop in one hand on top of the hula hoop and slip the tails of the yarn underneath the hula hoop.
 Trisha Sprouse
Now, just feed the tails of the yarn through the loop and pull down. Let the strands dangle below the knot. You'll only need to tie yarn strands on the top half of the hula hoop, as the bottom half will be covered by the strands dangling over it. Continue until your hula hoop is covered.
 Trisha Sprouse
Tip: You can either hang the hula hoop on the wall while you work or place the hula hoop flat on a table. Either way, you're gonna be tying knots for a while, so queue up something binge-worthy on Netflix or Hulu to pass the time.
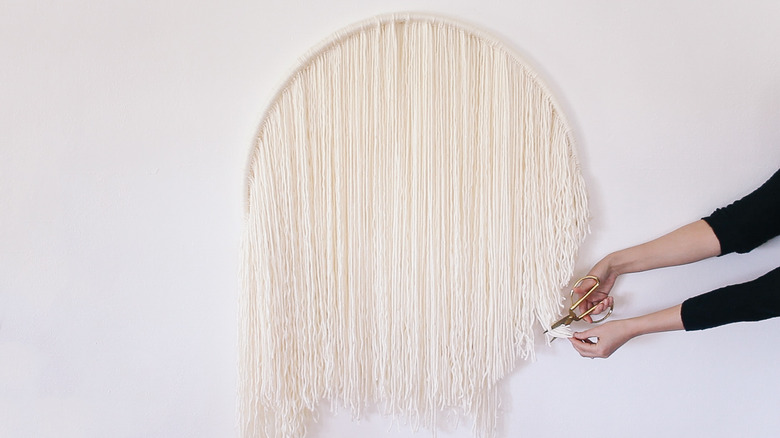
Step 4
Once you've tied enough yarn strands to cover your hula hoop, trim the bottom of the strands to follow the natural circular shape of the hula hoop. You'll want to leave at least four extra inches of yarn hanging below the bottom of the hula hoop so that it doesn't show through. It's best to trim less at first (as opposed to too much), step back, and then fine tune as needed.
 Trisha Sprouse
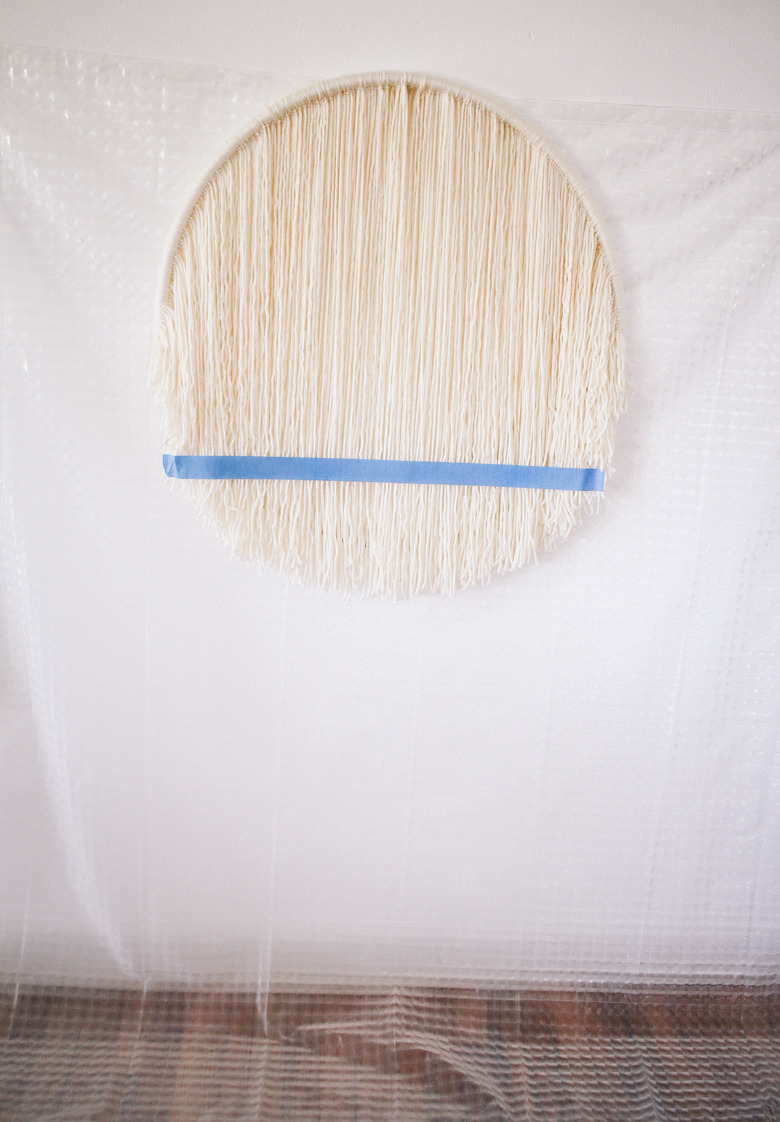
Step 5
Now comes the messy but fun part — dip-dyeing! Start by hanging a plastic tarp to protect the wall and let it drape down to protect the floor below (a cheap plastic shower curtain or tablecloth work, too). Hang your hula hoop on top of the plastic covering and use painter's tape to mark the area you'd like to dip-dye.
 Trisha Sprouse
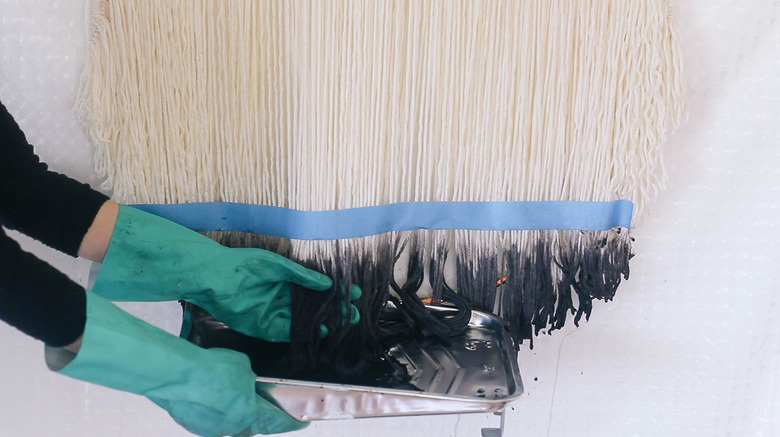
Step 6
Follow the manufacturer's directions to prepare the dye bath for the black dye and be sure to wear rubber gloves. Pour some of the black dye liquid into a painter's tray and bring it up to the wall hanging so that you can dip the bottom of the yarn strands into the dye. Work the dye into the fabric with your hands for a more saturated color. Continue dipping the strands into the dye until you reach the desired color saturation. Keep in mind that the color will fade and lighten a bit as it dries.
 Trisha Sprouse
Step 7
While the wall hanging is drying, prepare the dye baths for the other colors. Here are the recipes we used to achieve the colors in our wall hanging:
- Muted Coral: 1/4 cup petal pink + 1 tablespoon tangerine + 1 tablespoon tan + 1 gallon hot water
- Golden Yellow: half bottle golden yellow + 1 gallon hot water
- Tan: half bottle tan + 1 gallon hot water
 Trisha Sprouse
Step 8
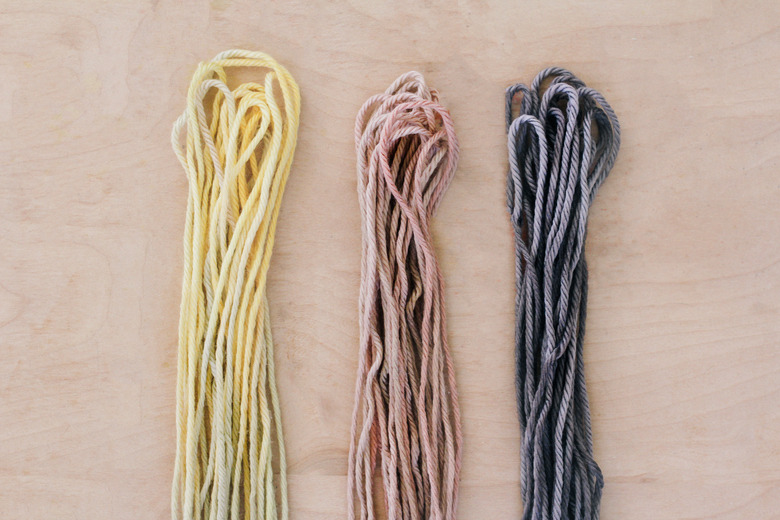
We used the same cream-colored yarn and dipped it in the dye baths to carry on the dip-dyed look throughout the wall hanging, but you could certainly just buy pre-dyed yarn in your desired color palette to save time and effort.
We submerged 12 strands of yarn (the entire strands) in the muted coral dye and left for three minutes. We then pulled them from the coral dye (wearing gloves) and immediately submerged the entire strands in the tan dye for about 30 seconds, holding them as they are submerged, to achieve a more desaturated color. Basically just a quick dunk!
We then folded the stings in half and dipped just the bottom of the tips of the strands back in the coral dye for 30 seconds, so that only the bottom tips would be a brighter pink and the middle part of the strands would be muted pink. This creates the ombre effect.
 Trisha Sprouse
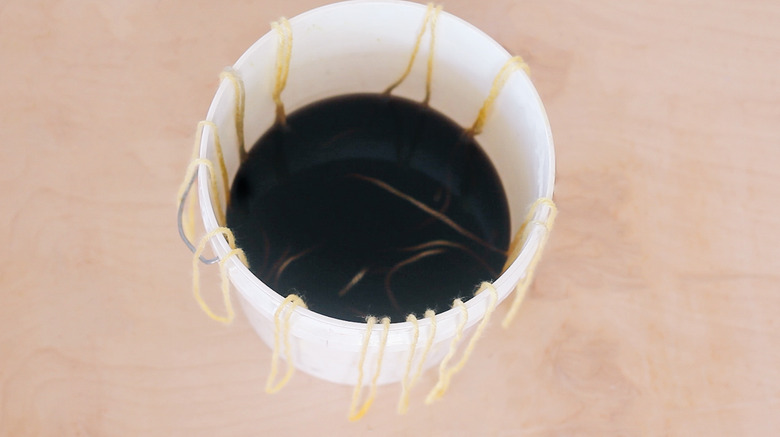
We then did the same with the yellow/gold strands: We submerged another 12 strands in the golden yellow dye for three minutes, and then folded the strands in half and placed only the bottom tips in the tan dye for about five minutes. (This is what you see pictured above in the photo of the strands hanging over the side of the bucket.)
Lastly, we submerged another 12 strands in the black dye for five minutes, and another 12 strands in the tan dye for five minutes. Let dry. To dry, simply spread the strands out flat on a plastic tarp and let them dry for several hours. No need to hang them up to dry.
Step 9
Once the various colored yarn strands are dry, tie the dyed yarn strands onto the hula hoop — directly on top of the cream-colored strands with the lark's head knot. We started with the tan strands, then golden yellow, then muted coral, then black. Trim the bottom of the strands into a diagonal line.
 Trisha Sprouse
Now you have a show-stopping #wallhanging to humble brag about on social. Tag us @hunkerhome on Instagram if you make one!
 Trisha Sprouse