How To Create Landscape Edging Using Angled Bricks
We may receive a commission on purchases made from links.
Brick borders can elevate your outdoor spaces. You can create landscape edging using angled bricks to give the garden a focal point or establish neatly defined borders around trees, beds or lawns. A sawtooth or angled brick edge is a fairly simple project for weekend warriors to complete in a day or two.
Tip
Dig a trench and use a guide with stakes and mason's line to create an even angled brick landscape edge in the garden.
Landscape Edging Tips and Materials
Landscape Edging Tips and Materials
Choose a brick that can handle the weather of your area. Concrete pavers and brick can typically stand up to harsh weather conditions. The angled landscape edging can be straight, curved or placed in an abstract pattern with alternating shades of darker and lighter brick.
The bricks can be placed back-to-back or side-to-side. Placing the bricks and leaning them on their sides with the top facing out will reduce the number of bricks you will need to finish the job. A side-to-side pattern will also cut down on the cost.
Installing a brick border requires a few basic tools, including a large garden spade, trowel, tamper, rubber mallet, stakes, and twine or mason's line. The project can be finished in a weekend. Choose a time when the weather is clear and dry.
Digging a Trench
Digging a Trench
The trench that the bricks will nestle into should be deep enough so that they can sit comfortably and solidly in the garden border through harsh winters and wet, rainy seasons. To prevent frost from heaving the bricks into a bumpy, mismatched line, the trench should be 4 to 5 inches deep.
Dig down about 5 inches so that the bricks settle easily and evenly into the trench. Place the soil that you remove in a mound behind the installation area or in a bucket or wheelbarrow to use as backfill. Pack the bricks into the trench so they stay firmly in place.
Installing Angled Brick Edging
Installing Angled Brick Edging
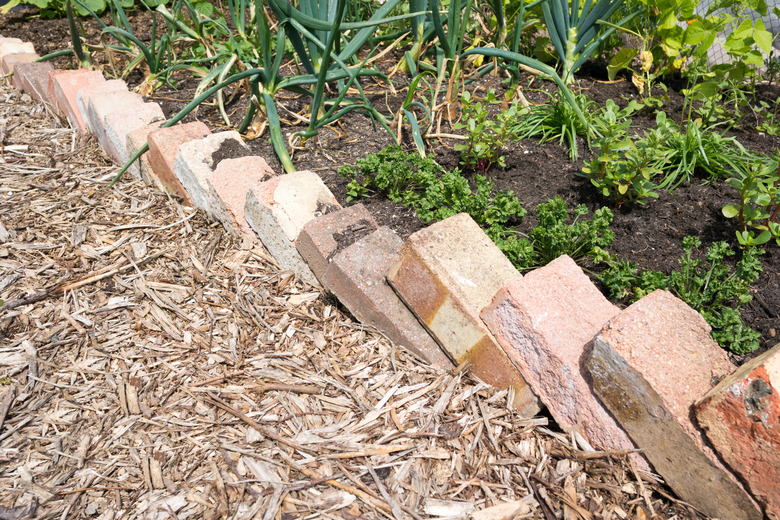
Use a trowel or a tamper to level the base where the bricks will sit. Place a brick at a 45-degree angle in the trench at a starting point. When working around a corner or where two angled ends meet, place a brick at a 90-degree angle. The bricks on either side will rest against the straight brick to continue the sawtooth pattern around the corner.
Place stakes at either end of the trench or at the corners or arches in the edging design. Run a length of twine or mason's line between all stakes at the height that you want the bricks to be once they are settled into the trench. The mason's line ensures the line of bricks stays even as you work your way down the trench.
Place bricks next to each other tightly to continue the uniform angle and height. Once all of the bricks are lined up and at the correct height and angle, backfill the trench with the soil you removed. Tamp the bricks gently with a rubber mallet to further stabilize the landscape edging. Use more soil to fill any gaps or holes that arise from tamping the bricks.