How To Hang A Toy Hammock
We may receive a commission on purchases made from links.
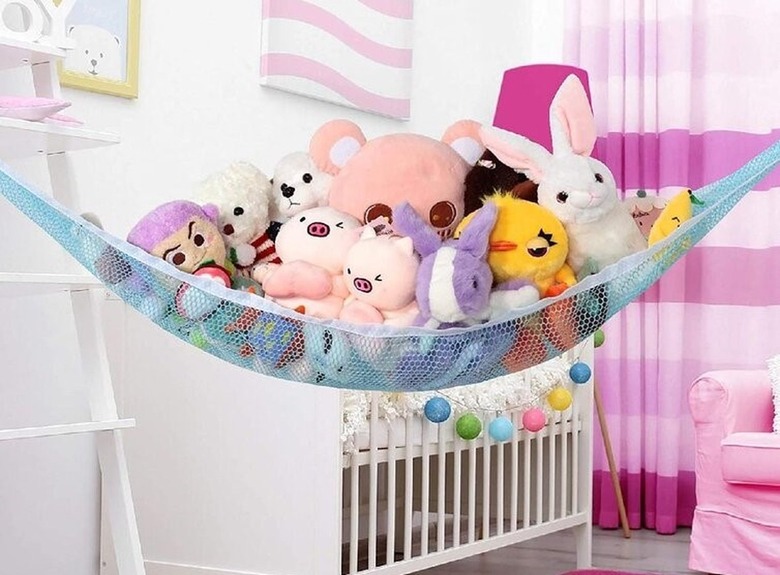
Anyone with kids knows that stuffed toys seem to multiply and appear from nowhere. Piling them at the foot of the bed or squishing them into a closet are two storage solutions, but a more stylish alternative that gets them out of the way is to make a toy hammock. They're really easy to make, and you may be able to put one together with supplies you already have at home.
Things Needed
-
6 feet of fabric (net works well)
-
String or ribbon
-
Scissors
-
Pencil
How to Make and Hang a Toy Hammock
1. Choose a Spot
First, identify the best place in your child's bedroom to hang the toy hammock. A corner is best, as the hammock will be able to hang nicely, but you could hang it along a flat side of wall in a pinch. Avoid areas above doorways, built-in cupboards, or windows. Don't place it too high, as the toys may get too squished against the ceiling. Consider whether you want your child to be able to get the toys down without your help or not. If you'd like them out of the way, hang the hammock at a height your child can't reach. Otherwise, hang it at a lower height so they can take them in or out as they want.
2. Prepare the Fabric
An ideal-size hammock for toys requires about 6 feet of fabric. This is approximate rather than an exact science. Net fabric works well because the small holes allow the toys to be seen when they're hanging. If you have a large silk scarf or another suitable soft or floaty piece of fabric at home already, then you can use this and not need to buy anything new.
Bunch the fabric at one end and make a loop about 7 inches from the end. Tie the loop with string or ribbon. Wind the string around the loop a couple of times so it doesn't come undone. Make sure there's a bit of room to slip your finger under the string because you'll need to fit the self-adhesive hook under the string later. Do the same for both ends of the fabric.
3. Mark the Hook Positions on the Wall
Hold your prepared fabric up to where you want the hammock to hang on your wall. Make a small pencil mark on each side of the wall where you want to stick the self-adhesive hooks.
4. Stick the Hooks to the Wall
Follow the instructions on the self-adhesive hooks packaging. These usually require sticking the adhesive tape to the hook first and then pressing the other side firmly to the wall to create a strong bond. It's a good idea to wait a while (up to 30 minutes) before hanging anything from the freshly stuck adhesive hooks.
5. Hang the Hammock From the Hooks
Hang each end of the hammock from the hooks. Catch the string you used to tie the fabric into the wall hook.
6. Place the Toys in the Hammock
Once the hooks have bonded to the wall firmly, fill the hammock with the stuffed toys. Be careful not to overfill the hammock, as you don't want it to collapse. However, self-adhesive hooks are pretty robust when they're mounted properly, so you don't need to be too cautious. Add a few toys at a time if you're concerned.