How To Fix A Jammed Heavy-Duty Stapler
We may receive a commission on purchases made from links.
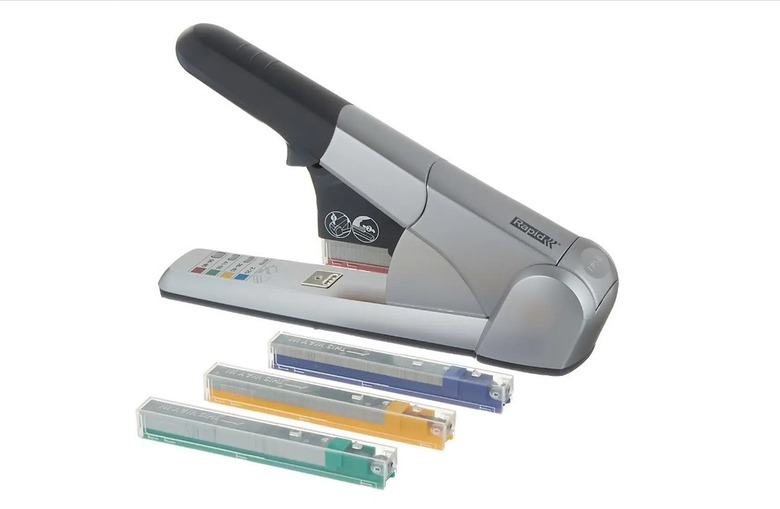
A heavy-duty stapler is a handy tool, whether you're attaching the pages of a large document, upholstery fabric to a wood frame, or paneling to wall studs. Whether it's a manual Rapid heavy-duty stapler or an electric or industrial model, troubleshooting stapler issues is a nuisance when you're in the middle of a project.
Stapler jams may occur when staples are the wrong size for the job, they're damaged, they're overloaded in the tray, and/or when multiple staples have become stuck in the head of the stapler. The jam must be removed to avoid damaging the stapler; then you can continue working on your latest project.
Open the Staple Tray
Open the Staple Tray
Pneumatic and electric staple guns must be disconnected from the power source to avoid injuries to your hands and eyes. Release the pressure and disconnect pneumatic staplers. Put on your safety gear, including safety goggles, before you begin. Locate the staple tray or magazine, which may be in the top arm, the front of the stapler, or accessed by a pusher rod on the back of the stapler.
A top-loading stapler may have staples stuck in the head or may be stuck in the down or "staple" position. To open the stapler:
- Pull up on the top arm of the stapler to open the tray.
- Look for a button on the back of the stapler or a tiny latch on the head just above the front of the staple tray if it doesn't open.
- Press the button or lift up the lever. You may have to use a small screwdriver or needle-nose pliers to push the lever up to release the tray.
- Remove the staples in the tray.
Rear- and bottom-loading staplers have a pusher or maintenance rod on the back of the stapler. To open one:
- Push the cover in and then down to unlatch it from the stapler body.
- Pull the rod out of the stapler.
- Tip the stapler so the staples slide out.
- Loosen and remove the screws on the side or bottom of the stapler. This may vary depending on the make and model. Set them aside.
- Remove the stapler tray from the bottom of the stapler.
Front-loading staplers may feature a magazine; press the button to release the magazine. Once the stapler is open and the staple tray is emptied, you can begin working on unjamming the staples that are still stuck in the stapler head.
Remove the Jammed Staples
Remove the Jammed Staples
Remove the jammed staples from the top side of the stapler tray using needle-nose pliers, a screwdriver, or another tool that fits into the slot. When clearing staplers, you may also have to pry one or more jammed staples from the bottom of the stapler head. Completely remove all staples from the tray or magazine and head.
Examine the tray and stapler mechanism before refilling the tray. Remove any debris and then clean it with rubbing alcohol and cotton swabs if necessary. After the stapler dries, lubricate it with a dry graphite spray or other lubricant recommended by the owner's manual to keep the stapler working smoothly. Reassemble the stapler and test the action before refilling it.
Refill and Test the Stapler
Refill and Test the Stapler
Refill the stapler with staples. Use the correct width, length, and type of staples for the job. A heavy-duty stapler may accommodate several staple lengths, but the width of the staples must fit properly in the tray, or it will jam again, assuming you can even load the staples into the tray.
Put one strip of staples into the tray from the top or load them into the back or bottom of the stapler. Do not add single staples; they are likely to jam. Close the top arm or insert the push bar and secure it. Do one or two test staples to ensure that your stapler is ready for use. Then resume working on your project
Prevent Staple Jams
Prevent Staple Jams
Preventing jams relies in part on using the right tool for the job. An office stapler, heavy duty or not, is unlikely to work as well as a heavy-duty stapler for wood when upholstering furniture or installing wood paneling on your walls.
When purchasing staples, make sure they are the correct size and type for your stapler. The width of the staples must fit into the tray, or the stapler will not work properly. An Arrow T50 requires 140-series staples with legs ranging from 1/4 to 9/16 inch long, while a Rapid HD220 heavy-duty office stapler uses 1/4- to 1-inch-long 23-series staples.
When choosing the length of the legs, the general rule is to use a staple with legs that are three times the depth of the material. When working with wood, such as 1/4-inch luan plywood (which is actually 7/32 inch thick), the staple legs should be at least twice the depth of the wood, or between 14/32 and 1/2 inch long. In the case of upholstery or other projects involving very thin materials, measure the depth of the material. If it is too thin to measure, begin with 6-millimeter-long or 1/4-inch-long staples.