How To Open A Tube Of Silicone 2 Rubber Sealant
We may receive a commission on purchases made from links.
Silicone 2 rubber sealant is basically just the silicone caulk with which you're probably already familiar. It's marketed by GE either as advanced window and door sealant or as kitchen and bath sealant. It provides excellent adhesion and a permanently flexible bond, and the company claims it resists mold growth for up to 10 years. It comes in squeezable tubes and in tubes that you use with a caulk gun.
Silicone caulk is extremely sticky stuff, and it's easy to make a mess while caulking if you don't know what you're doing. The key to getting a good bead that you can "tool" (flatten with your finger) with a minimum of waste is to open the tube correctly.
Aperture Width Determines Bead Width
Aperture Width Determines Bead Width
A tube of silicone caulk — or any other type of caulk, for that matter — has a tapered nozzle that is completely sealed when you buy it. Because it's tapered, the distance you cut from the tip of the nozzle determines the width of the bead. Cutting the nozzle 3/4 inches from the tip produces a bead suitable for most purposes, but you'll want to adjust this according to the width of the gap you need to fill.
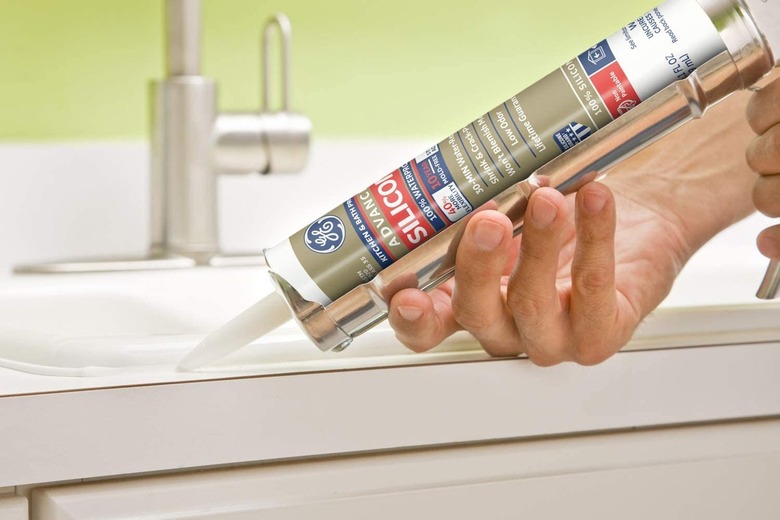
Gaps between fixtures and countertops in the bathroom or kitchen tend to be quite small and call for a smaller bead, so when caulking in these places, it's preferable to cut a little closer to the tip. When caulking exterior door or window trim, on the other hand, the gap is often very wide and requires a wider bead, in which case you should cut farther from the tip.
Cut the Nozzle, Puncture the Seal
Cut the Nozzle, Puncture the Seal
If you do a lot of caulking, you may want to invest in a caulk tube cutter, which makes a flawless cut with a single squeezing motion. You can also do the job with scissors, pruning shears, or a utility knife. Choose the desired distance from the tip and then cut at a 30- to 45-degree angle. An angular cut is important because it helps the nozzle direct the flow of caulk into the gap and minimize waste.
If you're using a squeeze tube, you're ready to start caulking after you cut the nozzle, but if you're using a caulking tube, you need to puncture the seal on the tube. You can do this with a long screwdriver, a 16d framing nail, or a 3-inch screw. Push the implement through the aperture into the nozzle until it contacts the seal and then keep pushing to puncture the seal.
Preserving the Contents of Partially Used Tubes
Preserving the Contents of Partially Used Tubes
After caulking, it's common to have some leftover material in the tube, and sometimes, it's quite a bit, so you don't just want to throw it away. Squeeze tubes are usually supplied with caulking tube caps, and all you have to do is screw the cap onto the nozzle to preserve the contents for up to a year.
Caulk tubes usually don't come with caps, so you need something to seal the nozzle after you're finished caulking. You can buy caulk saver caps that form a good seal no matter how wide you cut the aperture, and if you do a lot of caulking, you may want to invest in one or more of these. In most cases, however, a 16d nail or 3-inch screw will work just as well. Just make sure you remove the tube from the caulking gun to relieve pressure before you cap it.