The 5 Most Common Types Of Ceiling Texture
We may receive a commission on purchases made from links.
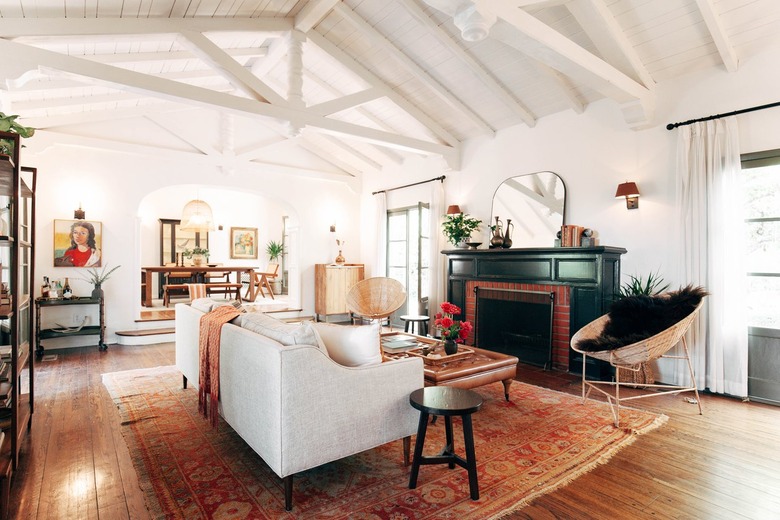
Most people imagine ceilings as either popcorn textured or smooth, but there are far more ceiling texture types than just popcorn. While people commonly only consider the texture of their walls, these ceiling textures can add a bit more personality to your home. Though popcorn sometimes has a bad reputation for being messy, hard to clean, and difficult to repaint, most of the alternatives do not suffer from these drawbacks.
1. Popcorn Ceiling Texture
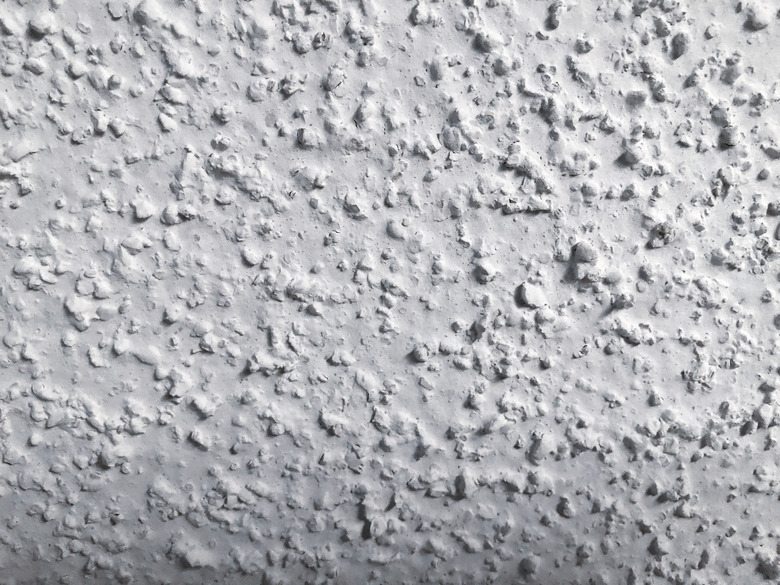
1. Popcorn Ceiling Texture
The popcorn ceiling texture is probably one of the most common finishes found in older homes due to its popularity that started back in the 1950s and continued well into the 80s. Since the popcorn finish had its shining moment in recent history, it is not considered a very fashionable choice when finishing your ceilings.
However, this texture is fairly simple to achieve if you wish to have a retro feel. It requires a coat of popcorn paint additive, which is bits of polystyrene particles that can be mixed into the paint. Simply apply to the ceiling using a paint roller or paint sprayer. If you are looking to remove the popcorn ceiling, be warned that older popcorn ceilings could contain asbestos and would need to be tested before continuing with the work.
2. Orange Peel Ceiling Finish

2. Orange Peel Ceiling Finish
Similar to the popcorn ceiling, the orange peel ceiling texture is a bumpy finish but smoother to the touch than popcorn ceilings. This finish can be achieved through a spray can that is applied to the ceiling. Once the texture has been applied to the ceiling, you need to prime and paint the ceiling to finish the job. Orange peel ceilings are a bit difficult to clean due to the small grooves found in the texture so it is not suggested for places such as bathrooms or kitchens.
3. Stippled or Slap Brush Ceilings
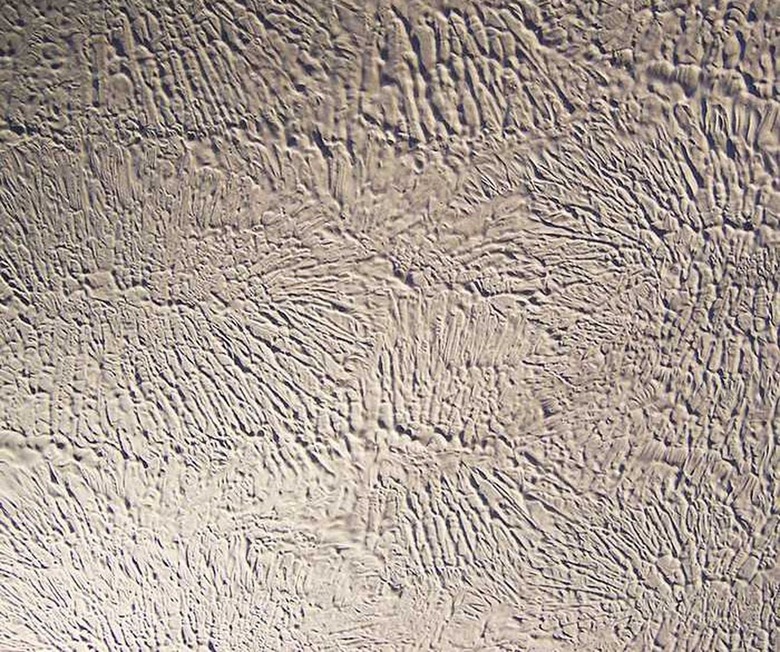
3. Stippled or Slap Brush Ceilings
The slap brush, or stippled ceilings, texture is one that takes a bit more time to create, but gives a very different texture than its competitors. Apply a premixed joint compound to the ceiling using a roller or paint gun and then proceed to press a slap brush into the mixture. Continue pressing the brush into the ceiling until the entire ceiling is covered. This is one of the methods with the messiest application, however, it has a finished look like no other.
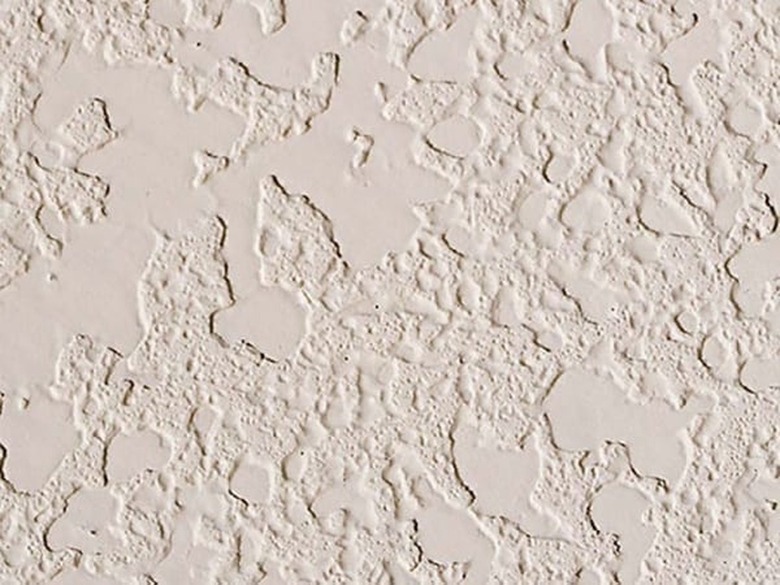
4. Skip Trowel Ceiling Texture
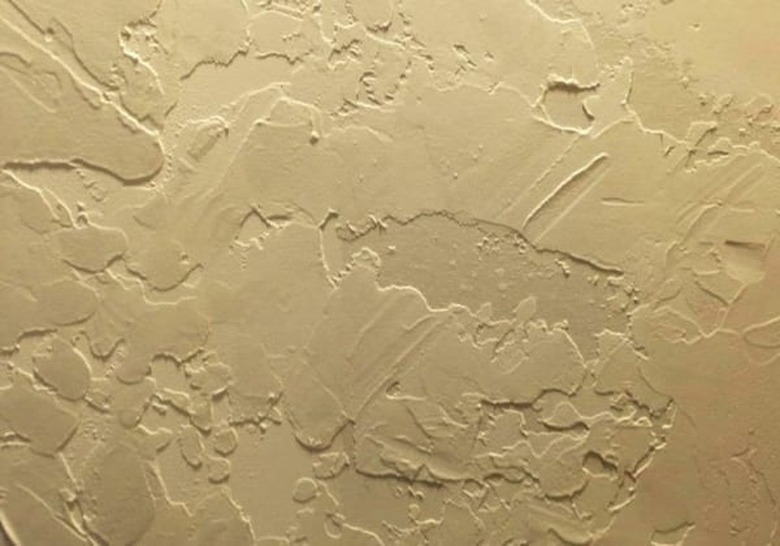
4. Skip Trowel Ceiling Texture
To achieve the skip trowel ceiling texture, all that is needed is drywall mud and a trowel. Apply a layer of drywall mud to the ceiling and go over it with the trowel before the mud dries. The more drywall mud applied to the ceiling, the more texture will appear once you push your trowel across the mud. The trowel will push the mud around leaving raised areas over the ceiling without any harsh edges or drips.
5. Knockdown Ceiling Technique
5. Knockdown Ceiling Technique
Similar to the skip trowel in texture, the knockdown ceiling finish is a blanket term to associate with any texture that has been "knocked down" to achieve the texture. The knockdown ceiling technique can be referred to as the spray knockdown or the stomp knockdown depending on how the initial drywall mud was applied. Once the mud mixture has been applied to ceiling it will form small drips that are then passed over with a drywall knife to knock down the drips flattening them to achieve the final texture.