How To Repair A Broken Drawer Front
The part of a drawer that you see is the facing, and it is almost always attached to a front panel that forms one of the sides of the drawer. The drawer facing may be made of oak, birch or some other quality material, but the front panel to which it's attached is made of the same budget material as the rest of the drawer, which is often particleboard or medium-density fiberboard (MDF).
When you need to fix the drawer front, you are either focusing on the facing, which may be chipped, cracked or otherwise damaged, or the front panel, which could be cracked, water-damaged or could have simply come loose.
Disassemble Facing and Front Panel
Disassemble Facing and Front Panel
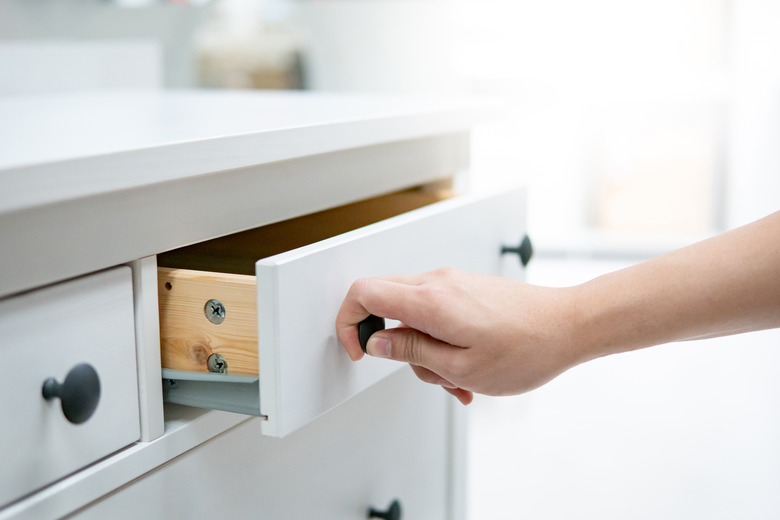
Open the drawer and look at the back of the front panel, and you'll see the heads of the screws holding the facing and the drawer handles. Remove these screws with a drill or screwdriver, and the handle and facing should come right off. If the facing stays put, it's glued, so use a hammer to pound a rigid putty knife between the facing and front panel to break the glue bond.
Once the facing is off, the easiest way to remove the front panel — assuming it's still in one piece and held with finish nails — is to tap the sides of the drawer to separate them from the front. If the front panel is broken, you might be able to pry it off without using a hammer. Be sure to check for screws and remove them before tapping or prying or your efforts will be for naught and could cause some damage.
Fix the Drawer Front Panel
Fix the Drawer Front Panel
More often than not, you have to replace the front drawer panel, because it's too chipped or damaged to support the facing. You might be able to find a drawer repair kit that has the size of panel you need, but if not, just measure the length and width of the panel and cut an identical one from suitable material with the same thickness using a circular saw or table saw. You don't have to cut it from the same material as the rest of the drawer, because it's inside the drawer where no one can see it.
The old panel may have a groove cut into it to support the bottom of the drawer. You can duplicate this groove with a table saw or circular saw by making one or two passes with the blade-cutting depth set to 1/4 to 3/8 inches.
To install the front panel using the method described on Table and Hearth, cover the side and bottom edges with carpenter's glue, unless the bottom is grooved, in which case no glue is needed there. Set the panel in place and drive finish nails through the side panels to hold it. You may also want to drive screws for extra security.
Repair the Drawer Facing
Repair the Drawer Facing
The drawer facing is visible, so you may want to replace it with a store-bought one or make new ones for all the drawers as part of a complete cabinet face repair. If you decide to make new ones, you can duplicate most designs with a table saw and a router, and you can make a finished product by sanding, staining and finishing or painting.
If the facing is cracked, squeeze carpenter's glue into the crack and clamp the crack shut with bar clamps until the glue sets. Minor repairs, such as chips and scratches, are easy to fix without even removing the facing from the drawer.
To reset the drawer facing, spread a little carpenter's glue on to the back, clamp it onto the facing with C-clamps, center it and drive at least two 1-inch screws through the back of the front panel to hold it. Install the drawer handle and the repair is done.