Instructions For Constructing A Concentric Reducer
We may receive a commission on purchases made from links.
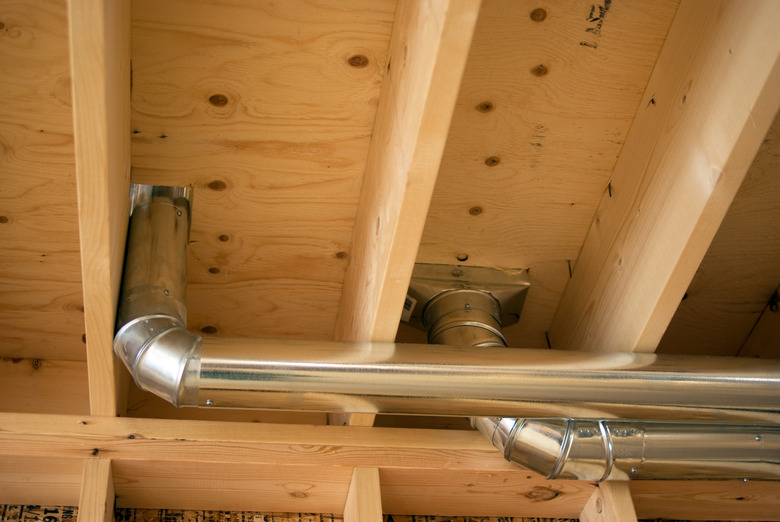
Ducts are a common feature of American building infrastructure, typically as part of heating, ventilation, and air conditioning systems. Large ducts, needed to deliver high volumes of air into a building, split into multiple, smaller sections that may supply only a few rooms. Engineers who need to join one part of a system to another often specify duct reducers to connect ducts of different sizes. A reducer, shaped like a truncated cone, tapers from a large, or major, diameter to a smaller, or minor, diameter. A concentric reducer is symmetrical about its centerline.
How To Construct a Concentric Reducer
1. Determine the Dimensions
Check the dimensions of the reducer you want to make. Use any unit of measurement, as long as all the dimensions are expressed in the same unit. Write down the reducer's major diameter, its minor diameter, and its length.
2. Subtract the Minor From the Major
Subtract the minor diameter from the major diameter and divide the major diameter by your answer. Note the resulting value. For example, if the major diameter is 8 inches and the minor diameter is 4 inches, the first answer is 4 inches and the resulting value is 2.
3. Calculate Height of Extended Cone
Multiply the resulting value by the length of the reducer and record your answer, which is the height of the cone that is formed by extending the smaller end of the reducer to a single point. For example, if the value you calculated is 2 and the length of the reducer is 6 inches, the height of the extended cone is 12 inches.
4. Gauge the Circle's Radius
Divide the major diameter by 2 and multiply the answer by itself. Multiply the height of the extended cone by itself. Add together these two figures and calculate the square root of the answer. Record the result. For example, if the major diameter is 8 inches and the height of the cone is 12 inches, the two figures are 16 and 144, respectively, and the result is 12.65 inches. This is the outer radius of the circle that you need as a pattern.
5. Divide and Multiply
Divide the outer radius by the major diameter and multiply the answer by the minor diameter. Record the result, which is the inner radius of the pattern. For example, if the outer radius is 12.65 inches, the major diameter is 8 inches, and the minor diameter is 4 inches, the inner radius is 6.33 inches.
6. Draw Two Concentric Circles
Set a drawing compass to the outer radius you calculated. Draw a circle on a sheet of heavyweight drawing paper. Set the compass to the inner radius and, using the same center as the first circle, draw a second circle. You should now have two concentric circles on the paper.
7. Calculate the Angle
Multiply the major diameter by 180 and divide the answer by the outer radius. Record the result, which is the angle in degrees that you will use to complete the pattern. For example, if the major diameter is 8 inches and the outer radius is 12.65 inches, the angle is 114 degrees.
8. Draw Two Radii
Draw a radius from the center to the outer edge of the larger circle. Use a protractor to measure the calculated angle, starting from this radius, and mark the angle on the paper. Draw a second radius at the marked angle, from the center to the outer edge of the larger circle. For example, if the calculated angle is 114 degrees, draw two radii with 114 degrees between them.
9. Cut Out the Pattern
Mark or shade the area between the two radii. Cut the inner circle out of the paper and cut around the outer circle. You should have a ring of paper remaining with two lines marked on it. Cut along the two lines and keep the marked piece, which is the pattern for the reducer.
10. Form and Trace the Pattern
Form the pattern carefully into the shape of the reducer. Check that the dimensions are correct. Lay the pattern flat on a piece of sheet metal. Draw around the outside of the pattern with a permanent marker. Remove the pattern.
Note: If you want to join the seam of the reducer with rivets, draw a small tab on the edge of the marked pattern before cutting the material. This provides an overlap that can be used for riveting.
Tip
If you do not have a suitable drawing compass, tie a piece of string around a pencil and push a thumbtack through the string at the required radius. Pin the string to the paper and draw the circle by moving the pencil around the thumbtack, keeping the string taut.
11. Cut the Reducer From the Material
Cut around the marked pattern with metal snips. Use appropriate personal protective equipment while you are cutting. Gently file any sharp edges with a fine metal file.
12. Shape, Clamp, and Rivet
Form the cut piece of metal into the shape of the reducer and clamp the edges of the seam together. Drill holes for rivets, then secure the seam with rivets fastened with a rivet gun. Remove the clamps.