Extending Home Gas Lines To An Outdoor Grill
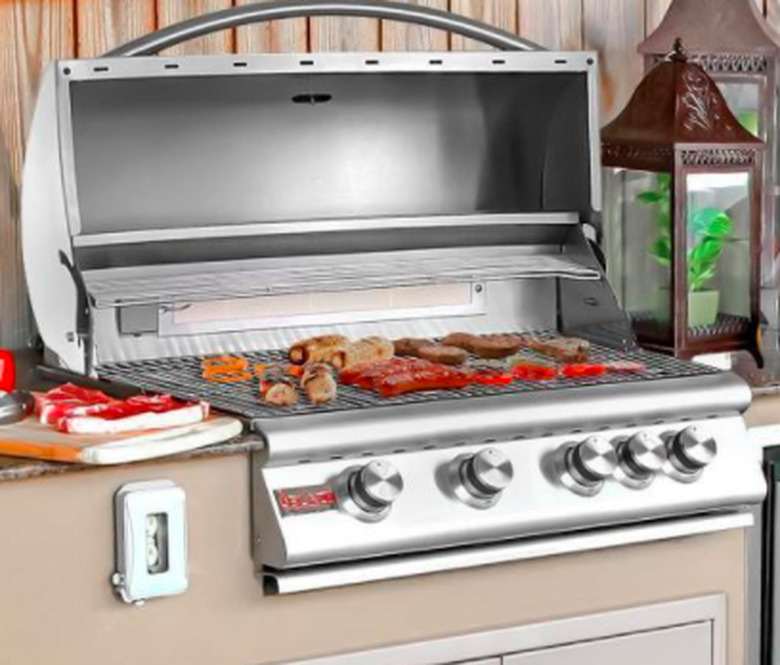
The outdoor grilling season sees many of us replenishing the portable liquid propane tank on an outdoor barbecue grill several times. This is not only inconvenient but also expensive. A good option is to have your home's propane gas line or natural gas lines extended outdoor to provide a place to plug into that fuel source. It's especially useful if you have a custom outdoor kitchen area where changing tanks is inconvenient.
Most people living in rural areas already use liquid propane (LP) gas as the fuel for their indoor appliances—water heater, gas stove, and perhaps a gas-power clothes dryer. Since most portable barbecue grills are already set up for propane gas, all that's needed is for you to have a service person come and extend gas lines to an outdoor stub-out and valve where you can connect your grill.
If your home is served by natural gas (NG), you will also need to have a service person extend the natural gas lines out to the area where you want to use your grill, then you will need to convert your propane grill to use natural gas instead. Many grill manufacturers over conversion kits that include new gas jets, a flexible gas hose, quick-disconnect gas fittings, and gas valve limiter stops. They usually cost less than $100 and are easy to install yourself. Warning: if the manufacturer of your grill does NOT offer a conversion kit, do not attempt to convert it yourself. In this case, it is better to buy a new grill already equipped with natural gas components.
Some professional plumbers are able to do gas work, or it may be done by a service person from the gas utility company. It is generally not a job for a DIYer, and may even be forbidden by law. Here are the steps a service person will use to extend gas lines outdoors to supply your gas grill:
Step 1
Determine where to tap the gas line. On the first visit, your service person will look for an appropriate place to tap into an existing gas line. Normally, this will involve finding a gas pipe run that's as close as possible to your deck, patio, or other area where you will use your grill. For convenience, the service person may choose to tap into the gas supply pipe at a point where there is already a T-fitting or elbow, as this makes for an easy spot to connect a pipe extension.
The service person will also take some measurements to determine how much pipe and how many fittings are needed. In most communities, gas pipes are made with a form of rigid steel pipe known as black pipe, which is connected with threaded fittings. Professionals often carry long lengths of black pipe as well as the equipment to cut and thread the pipe to fit, but if they don't, the pipe lengths will need to be cut and threaded to length at a hardware store.
If your community dictates that gas work needs a permit, your service professional will now apply for the permit to do the work, then schedule a time to return and do the installation once the permit is issued. Some plumbers or gas specialists may stipulate that the homeowner needs to make necessary permit applications. If so, don't bypass this step.
Step 2
Install a T-fitting. As a first step, the service professional will shut off the gas lines then will install a T-fitting to tap into the gas line. This can be more complicated than it sounds, since black pipe connections are made with threaded fittings, and the service person may need to disassemble some of the pipe run in order to install the T-fitting.
The service person will make these threaded fittings with Teflon tape or "pipe dope" to ensure an airtight fitting, and they may install a shutoff valve in the line just after the T-fitting in order to provide a convenient shut-off point should the pipe run ever need to be serviced.
Step 3
Run gas lines to the outdoors. Now, the service person will begin assembling the pipe run, extending it from the T-fitting through the outer wall of the house using various straight runs of pipes and elbows, as needed. Each fitting will be made with Teflon tape or pipe dope to ensure airtight connections.
Running the gas pipe to the outdoors will require that a hole is bored through the wall or the foundation, and the pipe will now be extended through the wall to a "stub-out" where the gas line will terminate.
The space around the stub-out pipe will be filled with rope caulk or another insulating material to seal the gap against air leaks.
Step 4
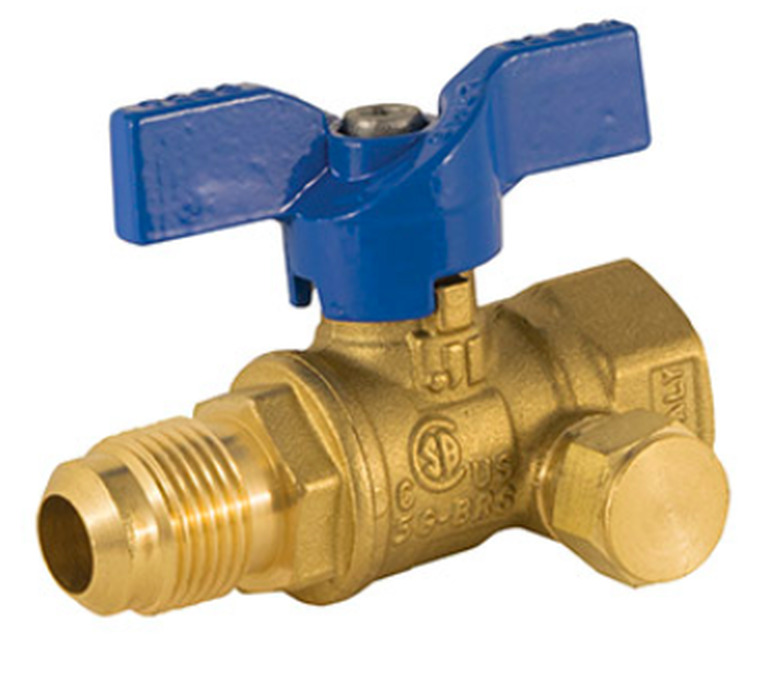
Install a gas valve. At the end of the stub-out, the service person will now install a brass shut-off valve, again using Teflon tape or pipe dope to ensure an airtight fitting. He will make sure the stub-out is terminated in a valve, as this will make it more convenient to detach the grill if necessary. Gas grills are sometimes connected directly to the stub-out pipe, but this is not good practice, and it may be against regulations.
Step 5
Have the work inspected, if required. If local Code regulations require gas work to be inspected, your service professional now will have a building inspector come and look at the work. If the professional has stipulated that the homeowner must arrange for the inspection, make sure to follow through and have it done.
Step 6
Convert the grill, if necessary. If you have an LP grill but want to use it with your home's natural gas lines, you will need to convert the grill—or abandon it and buy a natural gas grill.
Conversion of a grill can be, and often is, done by the homeowner, but only if a conversion kit is offered by the manufacturer. The essence of conversion is to replace the existing gas jet with a jet that has a different aperture size suitable for the different pressure and viscosity of natural gas.
Warning: Do not try to convert a gas jet on your own. While the internet is full of instructions on how to redrill an LP gas jet to make it suitable for natural gas, all grill manufacturers warn against this, and they may void your warranty if you attempt it. It is much better to buy a grill specified for use with natural gas than to make amateur alterations to the equipment.
Step 7
Testing the fittings. The service pro will now turn the gas back on and test all the fittings for leaks—either with an electronic gas sensor, or by spreading a liquid solution over the joints and looking for bubbles caused by leaking gas.
Step 8
 Brasscraft
Connect the grill with an approved flexible gas hose. As a final step, buy an approved gas hose to connect the gas valve on the stub-out to the burner connection on your grill. This flexible hose should be one specfically designed for gas—the best ones are made of stainless steel coated with polymers, and are suitable for either natural gas or propane.
You are now ready for a trouble-free grilling season.