Installing Tile Over The Shower Pan Liner
Installing tile on the floor of your shower gives it a sleeker and more aesthetically cohesive look than having tiled walls and a rubber shower pan. Tile is also much easier to keep clean and is not prone to staining the way rubber is. The other plus to tiling over the shower pan membrane is that you are not forced into a square or rectangular shower. Laying down tile on a shower floor is not difficult, and is a simple and effective way to give an older bathroom new life.
 irina88w/iStock/GettyImages
Basic Facts About Tile Showers
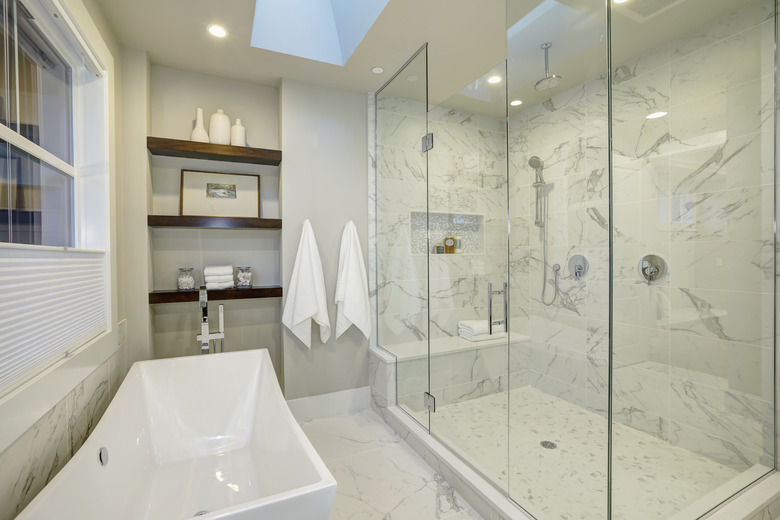
Basic Facts About Tile Showers
Most tile used in bathrooms is made of ceramic, which is strong, easy to clean and comes in a wide variety of sizes, colors and textures. If you have to cut tile to fit, make sure you have a tile cutter and safety equipment, such as goggles. When choosing your tile, keep in mind that if your shower has a central drain, your tiles cannot be larger than 4 inches square. Before building your shower, you must also make sure that the floor can hold the weight of the tile, the water and you. A full-tiled shower can weigh as much as 1,000 pounds all told, so have a contractor come and determine whether or not your floor will need additional support.
Tiling a shower floor involves the same basic steps as tiling anything else. Use spacers to keep the tiles even when you place them on the thinset, grout them with a grout float to fill the spaces between them, as well as help them adhere to the thinset and each other, wipe off the haze and let the grout cure as per the manufacturer's recommendation. Clean any remaining haze off of the tiles with warm water and a sponge and you are ready to go.
Shower Pan Liner Facts
Shower Pan Liner Facts
A shower pan is made up of mortar or mud, a waterproof liner, felt paper, tile backing, thinset, tile and grout. This is the most traditional shower floor construction, but it is also the most complicated, labor-intensive and heaviest type of shower pan to build. This type of floor must be graded slightly toward the center drain. Getting this slope exactly right can be a challenge to a beginning bathroom tiler, though there are grading forms available at construction supply stores. Some manufacturers offer linear side drains, rather than a center one, which can be used with both a curbed and curbless shower pan.
Installing a Curbed Shower Floor
Installing a Curbed Shower Floor
Many shower enclosures have a little wall of vertical tile, known as a curb, that is usually about 4 inches high and runs between the opening of the shower and the rest of the bathroom. This helps keep the water from the shower head inside of the shower enclosure. In homes with very young children, the elderly or anyone who has difficulty stepping over things, this can be a hazard. It also interrupts the visual line of the bathroom as a whole.
Installing a curbed shower pan requires a bit more expertise than simply laying a curbless shower on concrete slab flooring. But for those who prefer a more traditional shower design, it may be worth the effort.
Considering a Curbless Shower Pan
Considering a Curbless Shower Pan
For a sleek and modern look, a curbless shower slab on grade that slopes toward linear drains along the shower floor is your best bet. A curbless shower pan sits level with the rest of the bathroom, and works just as well with a fully-enclosed shower as it does with an open shower separated by a half-wall or curving, open wall. The advantages of a curbless shower are the lack of worry about someone tripping over the curb, as well as the visually pleasing line of sight. Generally, the disadvantages concern how much water will be able to escape the shower, though a graded shower pan helps considerably with this issue.