How To Put A Hose On A Hose Reel

A good quality garden hose isn't cheap. A long, 100-foot hose of top-quality materials can run $75 to $100, and the best way to protect your investment is by keeping it neatly coiled in a hose reel of some kind. Hose reels keep your hose from kinking, shield it from abrasions, and, more important, protect it from sunlight that can dry and crack the vinyl or rubber.
Still, any garden hose will eventually need to be replaced. When the hose begins to dribble and leak, there is a good likelihood it has developed cracks, or that its connections are no longer sealing correctly. When this happens, your best bet is to replace the hose with one of the new types made of supple, quality materials. While garden hoses can be repaired (sometimes) it's usually better to discard the old hose and install a new one.
Tip
Newer-style collapsible hoses can be used with hose reels. However, make sure you unwind the hose completely from the reel before turning on the water and allowing it to expand. When finished, turn off the water and let the hose collapse fully before winding it back up.
To remove the old hose from your hose reel and install a new one:
Things Needed
-
New replacement hose
-
Rubber washers (if needed)
-
Hose clamp (if needed)
-
Channel-type (adjustable) pliers
Step 1
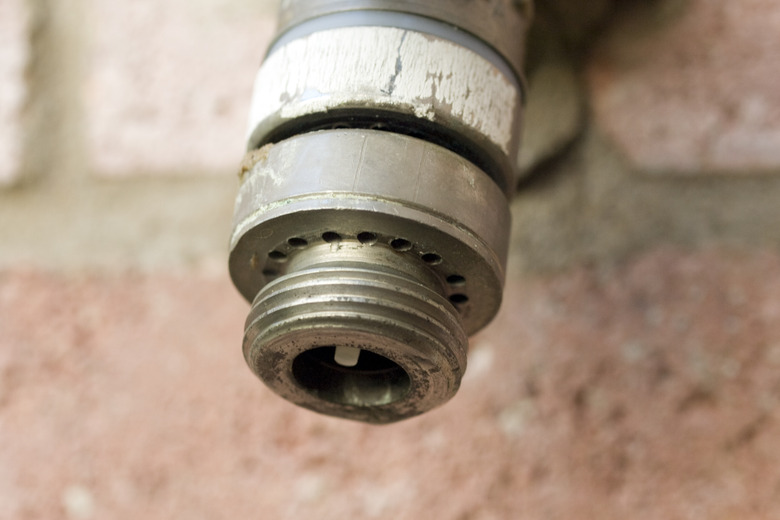
- Disconnect the hose reel from the faucet spigot. Inspect the hose spigot to see if it has a vacuum breaker attachment on it (see photo). If not, now is the time to install one. Vacuum breakers are required by Code as a safety measure to prevent contaminated water from back-siphoning into the fresh water supply.
- Move the hose reel to a driveway or somewhere on your lawn where water draining out of the hose won't be a problem. As you remove the old hose, the water inside the hose will flow out.
- When the hose is fully extended, the water coupling on the inner drum will be visible inside the hose reel. Disconnect the hose from this coupling, by hand, if possible. Or use adjustable pliers to do this.
- Unpack the new hose and straighten it out to eliminate the bends. Here is one time when placing the hose in the sun may help, as it will soften the hose and make it more pliable and easier to wind onto the hose reel.
- If you are replacing your hose reel at this time too, now is the time to assemble it.
Step 2
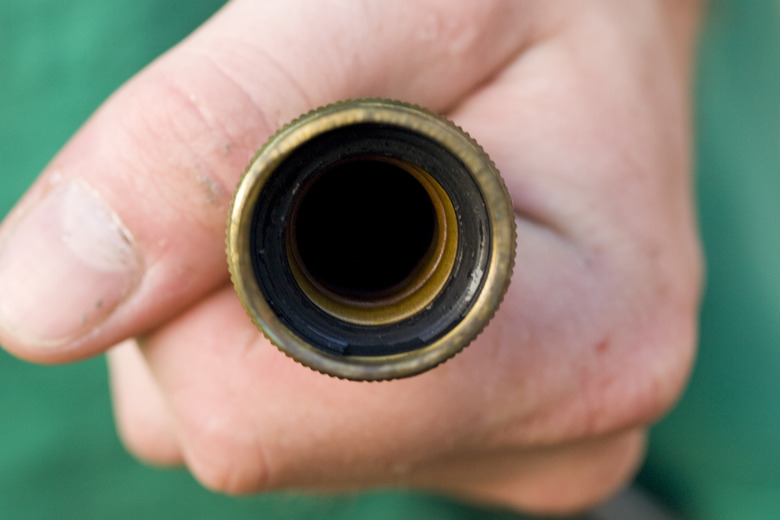
- On the female end of the new garden hose, insert the rubber or vinyl washer into the bottom of the hose coupling. This will provide the watertight seal against the coupling on the drum of the hose reel.
- If the hose reel has a guide opening on it, insert the female end of the hose through the guide opening.
Step 3
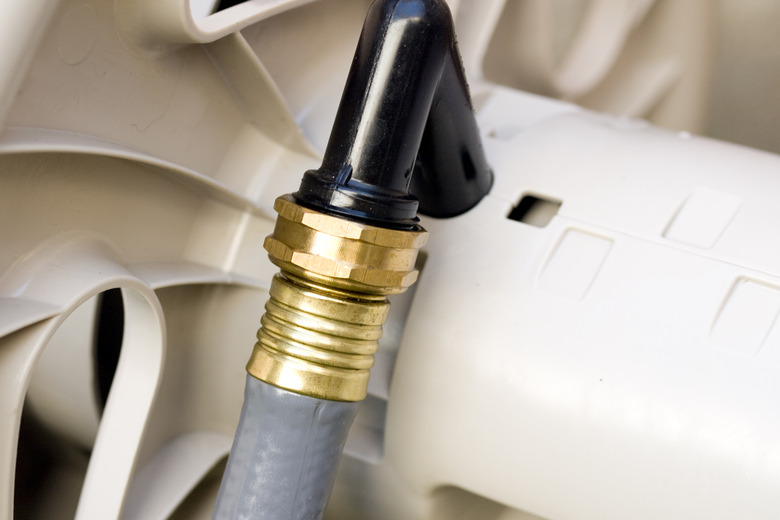
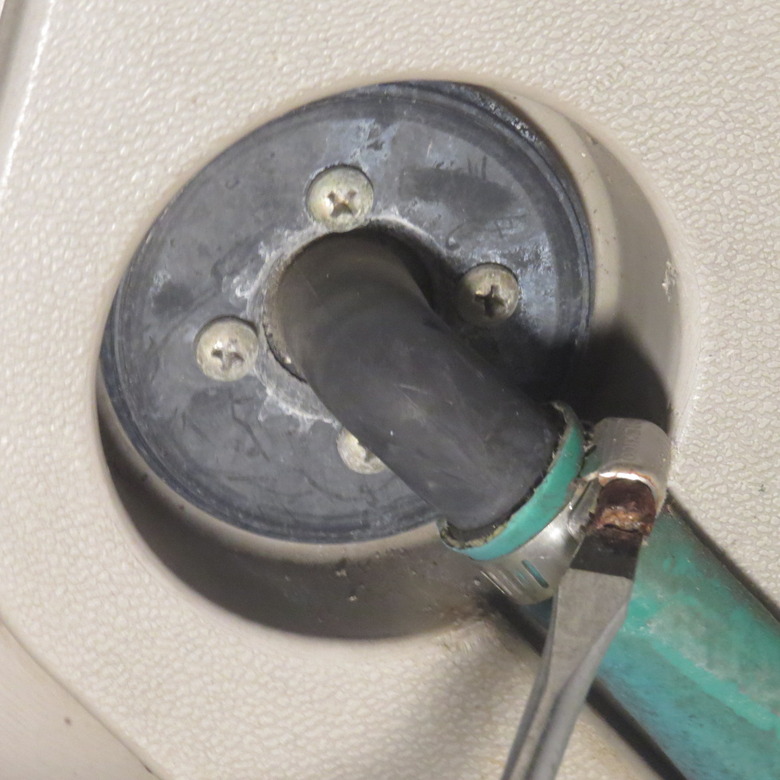
Thread the female end of the hose onto the water coupling on the inner drum of the hose reel. Tighten it firmly with channel-type pliers, but take care not to tighten so much that you strip the threads or break the parts. The water coupling is a plastic part, and it can be damaged if you exert too much force.
Step 4
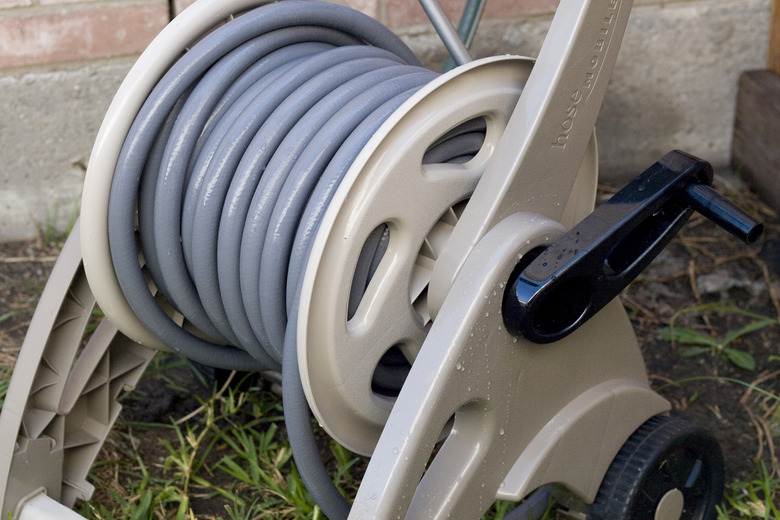
Begin to wind the hose onto the drum of the reel, taking pains to feed the hose back and forth across the drum in even coils. Normally, this requires clockwise rotations of the reel handle. Gripping the hose with one hand as you turn the reel handle with the other may help.
If you are installing the hose onto an electric hose reel, push the retraction button to wind the hose onto the reel.
Step 5
 Bryan Trandem
- Inspect the feeder hose that connects the hose reel to the faucet spigot. Make sure it is in good condition, without kinks or cracks.
- If the feeder hose uses female couplings, inspect the couplings to make sure they include rubber or vinyl washers that are in good shape.
- If the feeder hose attaches to the hose reel drum with a hose clamp, inspect it to make sure it is tightly clamped down around the nipple on the drum.
Tip
If possible, it is best to place a garden hose reel where it stays in the shade, or choose a model that encloses the hose. Sunlight dries a garden hose and leads to premature cracking and splitting.