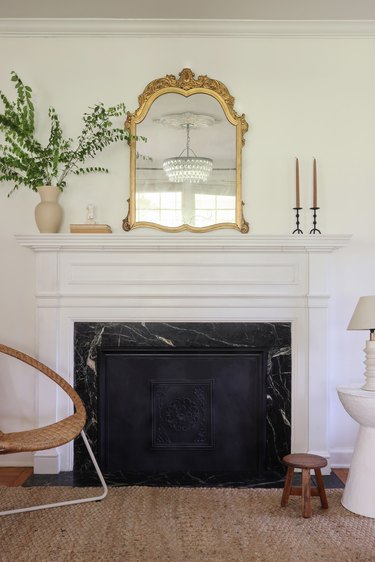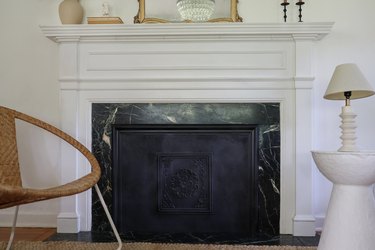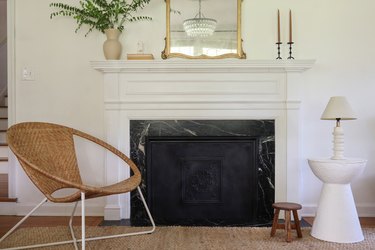
A fireplace is a fortunate feature to have in the wintertime, but during the hot summer months, it can be a total drain on your utility bill. Not to mention it offers those pesky warm-weather pests an all but open door into your home. By sealing things up, you can keep the cool air in while keeping the critters out. Likewise, it comes in clutch if you happen to have curious pets or small children. But just because it's a super functional item doesn't mean it can't also be super stylish. We designed this DIY summer cover to mimic the gorgeous cast iron fireplace inserts typically found in Victorian-era hearths, and we're just loving the NYC townhome vibes it adds to a space. You'll feel like you have an entirely new fireplace!
Things You'll Need
Brad nailer or hammer and finishing nails (optional)
Video of the Day
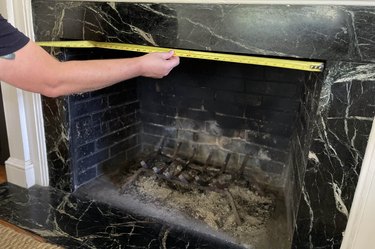
Step 1: Measure Your Fireplace Opening
Measure the height and width of your fireplace opening to determine what size you'll need to cut the plywood.
Video of the Day
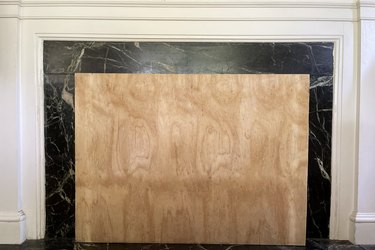
Step 2: Cut the Wood Pieces
For this tutorial, either cut the plywood panel to the dimensions of your fireplace opening, or have the hardware store cut it for you. Also, cut two pieces from the 2-inch-by-4-inch wood board that are the same height as your fireplace opening. Sand any rough edges.
Test fit the plywood to make sure it fits inside the opening — you want it to be a snug fit so that it actually seals out the bugs and keeps the cool air from escaping. If it's a little too snug and you have a hard time sliding the board completely into the opening, then you may have to sand the edges a bit until it fits.
Step 3: Attach the 2x4s to the Plywood
Measure and mark two inches in on each side of the plywood. Attach a two-by-four-inch wood board at the two-inch mark on each side (the skinny side of the board should be touching the plywood), drilling three evenly spaced wood screws through the plywood and into the two-by-four-inch board.
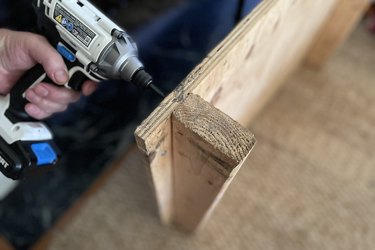
You should now have a fireplace cover that can "stand" up.

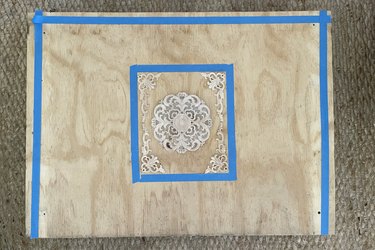
Step 4: Plan the Pattern
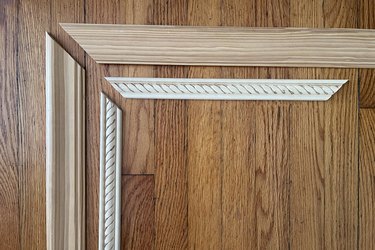
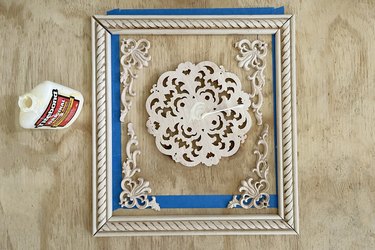
Lay the fireplace cover flat and arrange the wood appliqués on top in the desired pattern. Use painter's tape as a placeholder to evenly space the molding pieces, and mark the areas where the molding needs to be cut. We opted to put the thicker chair rail molding around the top and sides of the cover, and then create a smaller box in the center with the embossed rope molding.
Step 5: Cut the Molding Pieces
Cut all of the molding pieces to the sizes you determined. For a polished look, be sure to miter the corners to 45-degree angles using a miter saw.
Step 6: Attach the Molding and Appliqués
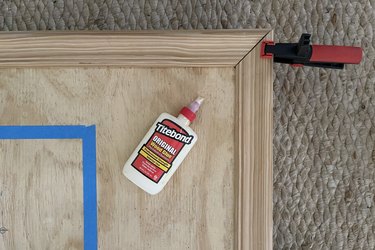
Spread a generous amount of wood glue on the back of the molding pieces, and glue them in place on top of the fireplace cover. Clamp them down and let the glue dry for at least 30 minutes.
For the more delicate trim and appliqué pieces, use a cotton swab to spread the glue on the backside, and then press them to the plywood. Place a heavy book on top of them while they dry for 30 minutes.
Step 7: Paint the Fireplace Cover
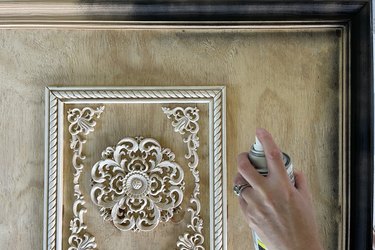
Remove the clamps and books once the glue has dried, and spray paint the fireplace cover with a black spray paint. Make sure you work in a well-ventilated area. Spray several light coats, a few minutes apart, for the best coverage. Let the paint dry for an hour, and then topcoat it with a clear gloss protective sealant.
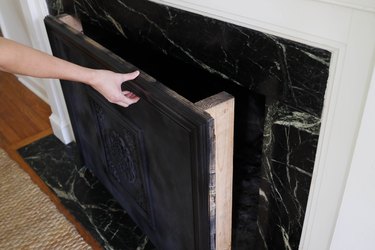
Step 8: Insert the Cover in the Fireplace
Once the topcoat has dried, slide the fireplace cover into the opening of your fireplace, and enjoy the stylish addition to your hearth! This DIY fireplace cover is a gorgeous focal point to your living room, dining room, or bedroom.