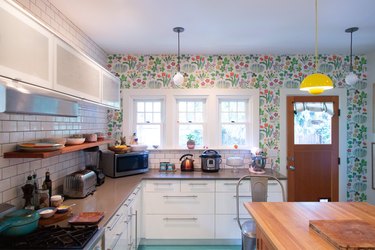
Laminate backsplash can be a good option for the kitchen area. It's a very low-maintenance material, and it comes in a large variety of patterns and colors. With no grout lines about which to worry, it's a good alternative to tile backsplash, and it is lighter and easier to cut than natural stone. Laminate sheets are available through home-improvement stores, and some of the laminate distributors will sell direct to homeowners for a reasonable price.
Benefits of Using Laminate Backsplash
Video of the Day
Laminate is usually used for counters, but it can also be installed as a backsplash in the kitchen space. Made primarily of paper and resin, it is nonporous, water-resistant and fairly easy to cut and shape. Laminate is also a low-cost option for backsplash that is still nice looking and practical. This makes it a perfect pick for kitchens that need to stick to a tight budget.
Video of the Day
Brand names like Formica have been around for decades, and they carry everything from simple, solid colors to faux-wood grains. High-pressure laminates, like those offered at Wilsonart, often have features like anti-microbial protection built right into the material. Some of the newer offerings you might see these days include imitation natural stones with veining and whimsical geometric patterns. The quality of laminate prints has gotten much better over the years, making them a real contender for the kitchen area.
A laminate backsplash cleans up easily if splashed with food or cooking spatter and doesn't need regular maintenance to keep it looking good. Most spots can be cleaned with a sponge and some dish soap and will look as good as new in just a few minutes. Although this material can scratch, when used as a backsplash, that isn't a common problem. Putting in a laminate backsplash is a good DIY project for homeowners because it doesn't require a lot of specialized expertise or expensive tools.

Drawbacks of Laminate Backsplash
Laminate is only moderately resistant to heat and can be damaged by hot pans and cooktop burners. Therefore, it is not suitable for the backsplash area directly behind a stove or cooktop. If you want to cover that area, you'll need to choose a more heat-proof material like tile, stainless steel or some types of natural stone.
While laminate is fairly easy to work with, any damage to the material cannot be repaired, including nicked edges, scratches, chips or burns. A backsplash is relatively safe from damage once it's on the wall, but when you're creating or installing the backsplash, once false move with the wrong tool can lead to unsightly permanent damage. Keep this in mind throughout the construction process and be particularly careful when working on the laminate edges with a router and file.
How to Install Laminate Backsplash
Step 1: Pull Out Switches and Outlets
Turn off the power at the electrical panel and make sure it is off by using a voltage tester to check the outlets and switches in the kitchen. Next, use a screwdriver to take off all the cover plates and set them aside. Finally, remove the remaining screws and pull the outlets and switches out of the box area. This way, you can slip the laminate template over them and attach to the wall easily later.
Step 2: Prep the Template and Wall
Make a template out of cardboard or paper. Measure the area, which for a full backsplash runs from the counter up to the bottom of the cabinets. Cut the template and don't forget to mark and cut out the outlets and light switches. Keep in mind that later, the laminate will need to be trimmed right to the edges of the electrical boxes to make sure the cover plate sits nicely over the material for a completed look.
Be sure to fix any issues with the wall. Clean the entire area and patch if needed. Make sure the backsplash area dries completely.
Step 3: Cut and Trim the Backsplash
Trace the template onto the back of a sheet of particleboard, plywood or 3/8-inch medium-density fiberboard (MDF) and cut to size with a hand router. This will be your backing material layer for the laminate. Next, rough cut the border of the laminate piece, leaving a 1/2-inch overhang that will be trimmed down once the two are bonded together.
Handle the laminate carefully and cut it with a scissors-like tool called a laminate cutter. There's no need to cut laminate for the sides of the backing material unless it will be showing.
Step 4: Bond Laminate to the Backing Material
Use a roller to coat the back of the MDF, plywood or particleboard with contact cement and then do the same with the back of the laminate material. Set both of these aside to dry for about 30 to 40 minutes. Next, bond the two layers together using dowel rods to help line up the two pieces without having them touch. When ready, remove a few dowels at a time and begin making the final contact. Use a J-roller to work the pieces together gradually and to create the final bond.
Step 5: Trim and Sand the Backsplash
Use a router with a flush trim bit to carefully take off the 1/2-inch overhang on the laminate so it is flush with the backing material. For electrical boxes, drill a hole in the center and then cut out the shape with the router. The outside edges of the laminate will be very sharp. Use a fine-tooth or laminate file to slowly dull it down, making sure not to saw aggressively or pull up the laminate. Try not to take off too much, and work the material at a 30- to 45-degree angle.
Dry fit the backsplash to check everything and make sure there are no tight spots. Be careful when fitting it around your outlets and switches. Use a sanding block on any problem areas and be sure to sand parallel on the flat edge, moving across the length of the panel. Keep in mind that laminate can chip easily, so go very easy on all your sanding and filing.
Step 6: Mount, Brace and Caulk the Backsplash
Run generous beads of construction adhesive along the wall side of the backsplash and carefully fit it into place. Use a grout float to press the laminate in and to make sure the glue makes good contact with the wall. Continue smoothing along the entire surface of the laminate while maintaining solid pressure to get the best fit possible.
The adhesive takes approximately 24 hours to dry. While it sets, you'll want to brace the backsplash so it stays fully in place, especially at the ends. Heavy-duty, double-sided tape can be used to hold beveled pieces of wood in place as an angled support from the countertop to the backsplash area. Once these are removed, run a bead of caulk along the top and bottom and in corners to seal up the backsplash material. These materials are not waterproof like the laminate, so they need to be protected from water and moisture.
Step 7: Install Extension Rings
The backsplash is now deeper than the electrical boxes, and they are surrounded by a flammable backing material. This means you'll need to put in extension rings to compensate. The power should still be off, but it's a good idea to double check it with your voltage meter. Slip the extenders over your outlets/switches and into the box. Remount both items at once using the screws to hold them in place. Attach the cover plates and turn the power back on.
Cleaning Laminate Backsplash
Laminate backsplash doesn't need regular maintenance to keep it looking good. If it does get dirty, use mild soap and water to wipe the surface. If this doesn't remove the spot or stain, a household cleaner can be used sparingly, but only use as much as you really need. The International Surface Fabricators Association recommends trying a glass cleaner or a product like Formula 409 or Fantastik. They also suggest staying away from products containing bleach or anything that doesn't have a neutral pH.
- International Surface Fabricators Association: Further Information on the Manufacture and Installation of Laminate Countertops
- International Surface Fabricators Association: Caring and Maintenance for Laminate Countertops
- Wilsonart: High Pressure Laminate
- Popular Woodworking: Laminate File: A Woodworking Hand Tool You Didn’t Know You Needed
- Fine Homebuilding: Gluing a Backsplash