

An Old Embroidery Hoop + Chicken Wire = An Easy DIY For A Beautiful Suncatcher
We may receive a commission on purchases made from links.
The internet loves an upcycle, and sometimes a clever, fun repurposing DIY goes viral on social media. Such is the case with a joy-filled craft that's been making the rounds, which involves an old embroidery hoop and chicken wire. It might not sound like much, but put them together with the wire nested between the hoops, attach glass beads or crystals to the open wire hexagons, and you have a gorgeous suncatcher to brighten your day.
The premise of this popular DIY is straightforward, especially if you have any beading or jewelry-making experience. But even if you've never worked with bead before, we'll share alternative ideas for simplifying the process. We liked this in-depth tutorial by YouTube user KristenFaganArt, but there are many videos out there with fun ways to customize, streamline, or embellish your suncatcher.
First, gather your supplies. You'll need an embroidery hoop, either repurposed or purchased new from the craft store or online, like the Dplolng 6 Inch Faux Wood Embroidery Hoops (two-pack) for $6.99 on Amazon. While you can use a traditional wood hoop, the style with the flexible concave-edge inner ring will make it easier to affix the wire. Additionally, grab a small roll of lightweight crafting chicken wire — a scrap piece is also fine, but make sure it's not too heavy duty to bend around the hoop. You'll also need small needle-nose pliers, memory wire cutters, and beading supplies, including head pins, 5mm jump rings, and glass beads. Or, you can make your life easier and select pre-wired beads or a suncatcher kit that contains most of the supplies you'll need for the project in one package, like the Anxingo 400-Piece DIY Suncatcher Kit for $18.89 on Amazon. Now you're ready to create your own DIY embroidery hoop chicken wire suncatcher.
Securing the chicken between the embroidery hoops
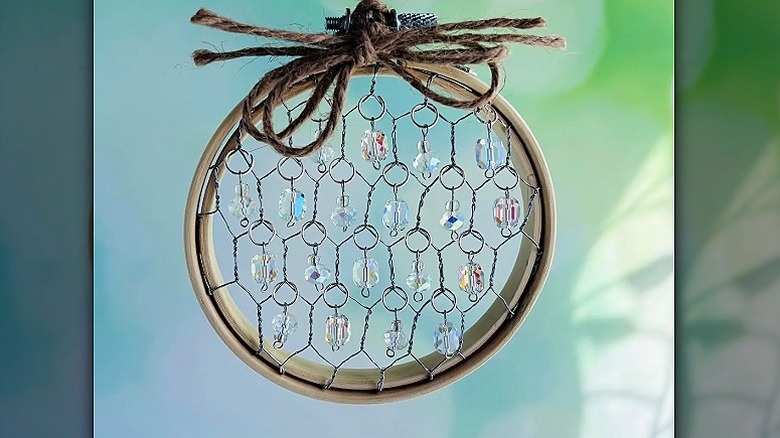
To begin crafting your DIY upcycled suncatcher, lay the center ring of the embroidery hoop flat on the chicken wire. From the notoriously hard-to-wrangle wire roll, use your wire cutters to cut a smaller piece — larger than the hoop — so it's easier to work with. Next, it's time to further trim the chicken wire to a circle only slightly larger than the inner embroidery hoop, cutting each wire so it extends only about a ½-inch beyond the hoop all the way around. This may take a little time, so be patient and be sure to hold your ring in place so it doesn't wander. You can always trim off more later, but if you cut it too small, you'll have to start over.
Once your wires are cut, use needle-nose pliers to bend the end of each excess wire around the hoop, pinching it snugly. Each wrapped piece of wire will help keep the chicken wire in place. If you're using a flex hoop, the ring will have a groove you can bend the wires into. For a traditional wooden hoop, just bed the wire flush against the flat hoop. If a wire extends too long beyond the side of the hoop, cut off the tail with the wire cutters.
Once all pieces have been bent into place and tightened against the hoop, slide the larger outer hoop over the top of the inner hoop, tightening if necessary, to hide the ends of the wires and lock everything into place with a nice neat edge. Orient your hoops so that the elongated hexagons on the chicken wire are vertical, as are the twisted intersections with neighboring hexes. This will give you the tallest openings to hang the beads.
Beading your chicken wire hoop suncatcher
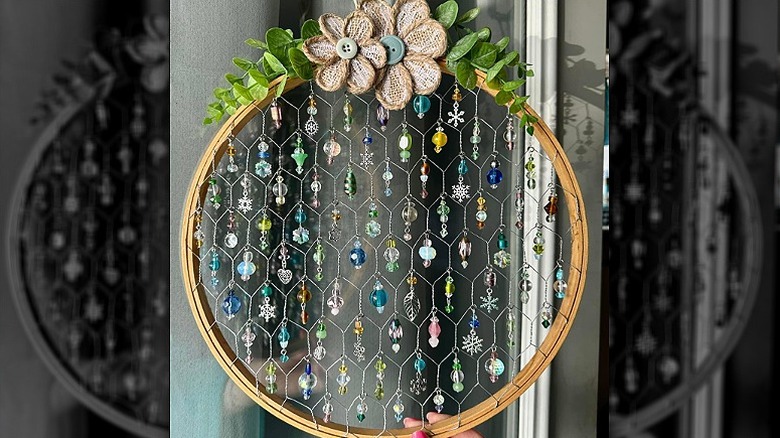
Now that your chicken wire insert is secured between the embroidery hoops, it's time to begin beading. While the YouTuber chose an assortment of colorful glass beads, you could also use a single color bead, beads with a fun decorative shape, strands of smaller beads, or opt for clear crystal prisms for maximum rainbow refraction all over the walls. Disco party, anyone?
For those more well-versed in jewelry making, you can wire the beads from scratch by inserting a bead onto a head pin and using your needle-nose pliers to create a hanging loop above the bead like on YouTube. Once it's nice and compact, use wire cutters to snip off the excess head pin tail. If this level of beading is above your skill level or just honestly sounds too tedious, you can absolutely simplify things by buying pre-wired beads/strands with loops already integrated. Then you can skip ahead to attaching them with jump rings (or even fishing line for ease).
Next, open a jump ring a little with your pliers and slide it onto the bead loop. Then insert the jump ring onto one of the vertical twisted chicken wires at the top point of a hexagon so the bead hangs in the opening. Use the pliers to pinch the jump ring closed again, fastening the hanging bead to the chicken wire. Repeat this for every full shape until the hex grid is full of sparkle. Lastly, grab a decorative piece of string, twine, or ribbon, attaching it to the top of the hoop or decorative hanging ring (if applicable) with a basic Lark's Head knot. Hang your new suncatcher in front of a window to catch and reflect the light throughout your home.