

Ditch Your Boring Wall Art: A More Unique Way To Decorate With Vintage-Inspired Charm

If you want to make your interiors look lived-in, empty walls are a no-go. So, in a bid to lend them a little personality, you may hang up the first wall art you come across. However, if you're no longer a fan of the basic "live, love, laugh" frame gracing your living or bedroom, consider a more unique way to decorate your walls with vintage-inspired charm. Simply get a few A4 size sheets, paint them however you like, fold them accordion-style, and glue them end-to-end to DIY giant paper fans for your walls.
Though repurposing Japanese fans (even their DIY versions) as wall art isn't a particularly novel idea, you can bring some drama to your dinner gatherings with this inspiring dining room wall decor idea. Or, hang it above your bed if you're tired of the same 'ol gallery walls, and use it as a clever bedroom wall decor idea to make the most of that blank space. Plus, this DIY is 100% customizable, meaning you can change the background color and design so it matches (or complements) your room's decor to a T. You can embellish it however you like. Better yet, you don't need a lot of supplies for this wall art. Just get a couple of sheets of plain paper (five to eight should do the trick), some paint, one or two paint brushes, a handheld hole puncher, some glue, a roll of ribbon, and you'll be golden. With that said, keep in mind that this is a time-consuming craft. And the more detailed and elaborate you make your fan, the longer it'll take you to DIY. So, be sure to block a few hours (particularly if you're a novice) when attempting this wall art idea.
How to turn plain sheets of paper into giant decorative fans for your walls
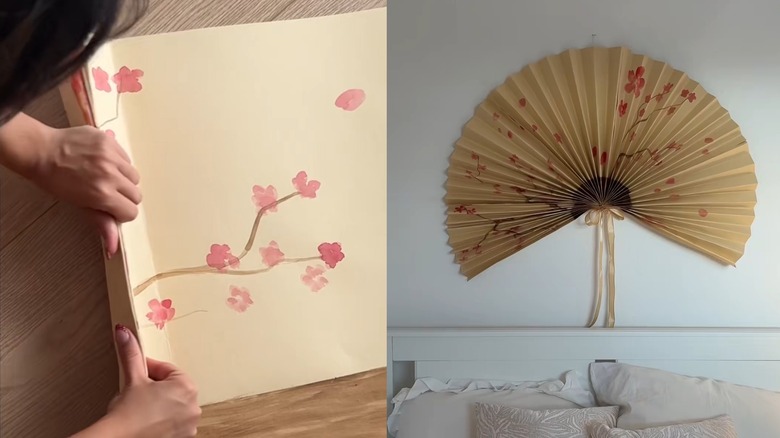
The first thing you want to do is decide on your fan's design. Do you want something abstract? Or, would you rather try your hand at drawing something definitive (think cherry blossoms or a starry night)? If you find it difficult to pick a theme, you can combine both these ideas and do something a bit more generic but still pretty, like your favorite flowers drawn along the folds of the fan.
Once that's decided, lay down your sheets on a workbench, mix your paint, grab your brush, and let your inner Picasso free. You can go for a detailed design or rely on freehand strokes to turn those blank papers into something fancy. If you don't have faith in yourself as a painter or would rather not display your fifth-grade level craft on your empty walls, spray paint the sheets in a solid shade and call it a day. Just ensure you pick a color that goes with your walls.
Either way, after your sheets are dry, start folding them accordion-style. While you can do wide folds to speed up the fan-making process, don't go beyond 1 to 1 ½ inch folds if you want an intricate look. When you're done, arrange them side-by-side and begin gluing them end-to-end to bring your wall art alive. Finally, get your hole puncher and punch small holes toward the bottom of your giant fan. Make sure you get all the folds or the finish will be slightly wonky. Thread some ribbon (satin will look best) through them and tie its ends gently to resemble a bow. Finally, use a few self-adhesive strips or hooks to mount your giant paper fan wherever you like.
Ways you can customize your giant paper fan
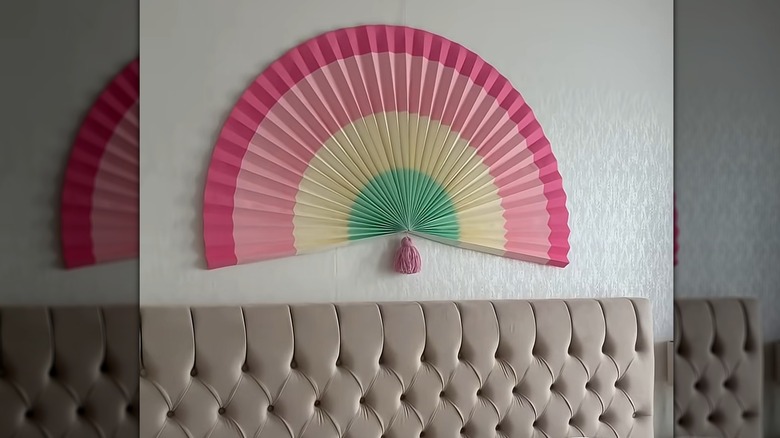
If you don't want to hang something with beginner-level drawings on your walls but also don't want to mount plain paper fans, use colored paper in a solid shade or glue a few small papers together for a rainbow effect. Alternatively, attach small pieces of neon-colored paper to the bottom of your regular colored sheets if you want a striking idea to fill the empty space on your large wall. And if you don't have A4 sheets handy, feel free to use wrapping paper (the basic brown ones you get with your packages will work, too — just paint them well to hide their origins) or cardstock. However, if you'd like your fan to sport fancy designs without dealing with paint, print out your favored designs on A4 sheets and glue them together.
You can also personalize the bottom portion of your fan. Generally, you'll see a bow-shaped ribbon hanging below the folds. But you can easily thread it through with pretty tassels for a boho vibe (glue them to a large wood bead for a high-end finish). If you want a rustic finish, substitute the ribbon with some thin jute twine. Similarly, a string of pearls will lend your fan an elegant look. To that end, you can even add a thin layer of ribbon to the top of your fan. When you're happy with how it looks, play around with lighting for maximum impact. Try warm ambient or multi-colored task lighting, and see how your fan looks at different times of the day before finalizing either one. And if you're dealing with a narrow wall, mount your giant fan vertically instead of horizontally.