

She DIYs Beautiful Outdoor Stairs On A Steep Slope With Railroad Ties
Anyone who has built a staircase on a hillside understands the challenges. This job requires extensive shovel work in sometimes rocky soil to clear a path for the stairs. Then there are the treads themselves. How do you make wooden treads stay where they are, and how do you prevent them from rotting out in a few years? Bluecollar_babe, who showcased her attractive hillside stairway on YouTube, solved the issue by using old railroad ties and securing them with rebar. While using them in the garden can lead to issues, the preservatives they have make these ties rot-resistant.
An impressive creative decision she made was to repurpose the rocks she dug up. Rather than tossing them, she stacked them along the sides of the pathway to make a border, pouring dry concrete mix over them and watering them down to make them hold together. The borders were exactly 3 feet apart, so when she cut the railroad ties to that length, they fit snugly inside the pathway. To secure the railroad ties, she drilled holes and drove rebar through them and into the ground.
Standard railroad ties are 7 inches high, which is just about the right height for a stair riser. Bluecollar_babe started placing them at the bottom and, as she ascended, she eyeballed where each next one should go. She left space between the back side of each tread and the one after it and filled the space with concrete.
Railroad ties make stair making easy
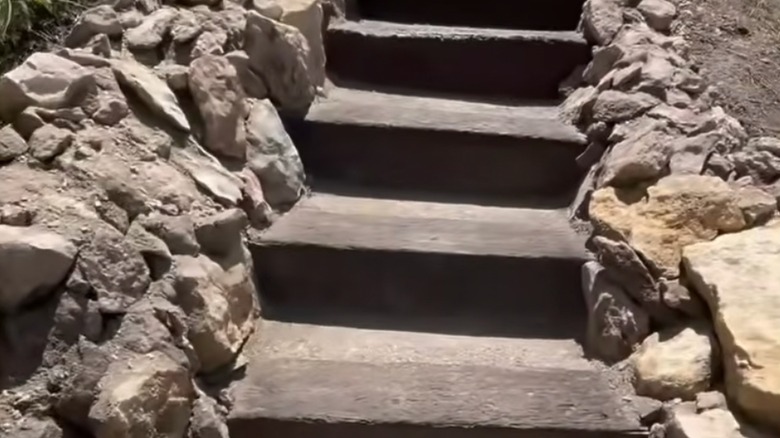
Stairs can be more difficult to use, and potentially dangerous, if you aren't careful with stair tread and riser calculations. For example, you should make the treads at least 10 inches wide, and railroad ties are only 9 inches. To address this, Bluecollar_babe added concrete behind each tie, which made the total width of each tread well more than that 10-inch minimum. The concrete not only made the staircase safer and more comfortable to use — it also helped keep the railroad ties in place while providing stabilization for the rock border.
You should also keep the variation in height between steps no more than ⅜ inches. This makes the steps predictable and less likely to trip someone. Bluecollar_babe didn't mention measuring the stair risers, but because of her design, measurements weren't really needed. She made each tread level (with the help of a 4-foot level), she brought the concrete behind each tread flush with the top of the tread, and she placed each successive tread at the same level as the concrete. That guarantees a 7-inch rise, because that's also the height of a railroad tie.
While knowing how to mix concrete can be useful, Bluecollar_babe saved a lot of time by not premixing it. Instead, she poured it dry from bags into the spaces behind the treads, tamped it down with a hand tamper to get it level and at the proper height, then watered down the entire staircase with a garden hose. Once the concrete hardened, it formed a smooth, flat surface without troweling.