

Smart DIYers Use Loose Rocks As A Durable Alternative To Plastic Benches — Here's How

Plastic benches are great, but they can deteriorate, become brittle, or even ruin the aesthetics of a beautiful garden setting. In order to build something a little sturdier, DIY enthusiasts have started putting rocks inside metal cages and adding a wooden bench on top of them. This is called a gabion bench. It combines the appeal of a stone wall with a more comfortable wooden seating area.
Stone-filled gabion baskets can also be used to build durable retaining walls, although a bench should only double as a retaining structure if it has been designed to withstand the pressure of the soil behind it. Gabion benches are heavier and less portable than wooden pallet alternatives. The stones also make it possible for DIY enthusiasts to match the bench to pathways, borders, or walls. However, the project isn't maintenance-free. The cage has to be rustproof and the wood has to be weather-resistant.
Before you go ahead and purchase the material you should determine the exact location that the bench will be situated. Once you fill the bench with stones, it will be hard to move — maybe even impossible. The ground should also be flat and solid enough to carry the load of the bench.
How to build a rock-filled gabion bench
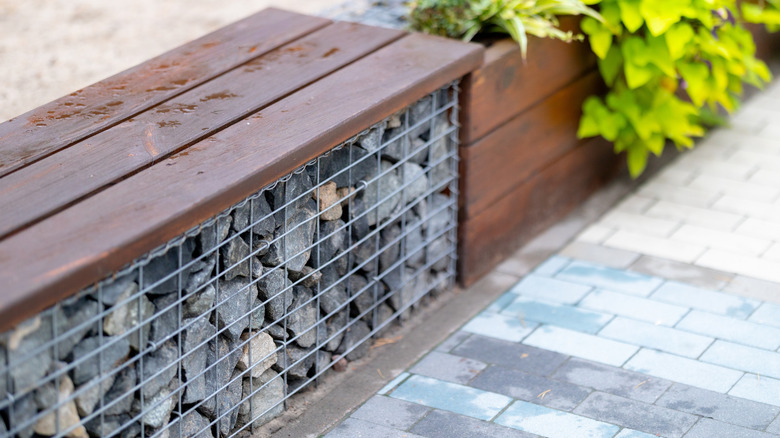
Assembly techniques may vary depending on the materials and type of seating you're building. This is a quick, generic step-by-step guide to building a simple gabion bench. First, select the right size gabions (or cages) so that they are at a comfortable height when a wooden board is installed on top. Pick frost-resistant stones bigger than the mesh holes in the cage and select the color and shape to suit your design.
Create the empty wire gabions by making a t-shape with sturdy wire mesh, and close the sides of the wire cage using tying wire, clips, or ties to make a square or rectangular basket. Leave the top open for now so you can fill it with rocks. Place them on a flat, solid base before filling — remember you likely won't be able to move it once the gabion is filled. Some designs use one long basket, others use two separate cages. If you're using two baskets to hold the seat, make sure there's an equal distance between them and that they're parallel and level. Add the stones slowly and evenly, putting attractive rocks close to the visible mesh. Install all the internal braces as you work to tie together the opposite sides and prevent bulging. Use sturdy wire to secure the lids.
Next, cut the wooden board to size and sand its surface, edges, and corners to remove rough areas and splinters. When selecting the seat, look for a wood suitable for outdoor furniture. Treat all sides and the cut ends with an exterior wood finish designed to resist moisture and sunlight and allow it to dry fully before installation. Then, affix the bench seat to the top wire of the gabions with pipe clamps. Check that the bench is sturdy before sitting on it. Inspect it periodically to make sure it's still safe, and enjoy your new seating area.