

She Reuses Terracotta Pots For A Cuter Way To Add Lighting To The Backyard

We may receive a commission on purchases made from links.
If you have a tower of old terracotta pots in your garden shed that you're not quite sure what to do with, this adorable DIY might be for you. Turn an old plant pot into a ladybug that glows after dark with an easy-to-follow tutorial from Blessings Craft Therapy. She paints the pot and flips it upside down such that it becomes the insect's shell, before inserting a solar stake light through the drainage hole on top. And suddenly you have a cute garden sentry to check up on your plants after the sun goes down — no outlets or wiring required! Plus, you can make as many as you want, and even fill your garden with an entire ladybug family.
Before you paint anything, start by choosing your solar light, as the stake needs to be slim enough to pass through the hole in the bottom of the pot. Little lanterns like the Gigalumi solar lights come with nice slender stakes that will fit through most drainage holes, and will look cute perched on top of your ladybug. In addition to the lights and paint, you'll need a paintbrush, a paint pen, and something like the Marvexi round sponge brushes, which make it easier to create neat circles for the ladybug's spots. You'll also want to seal the pot before you paint, since terracotta is porous and can readily absorb moisture, which will seep through and lift off your paint over time.
Creating your ladybug lights
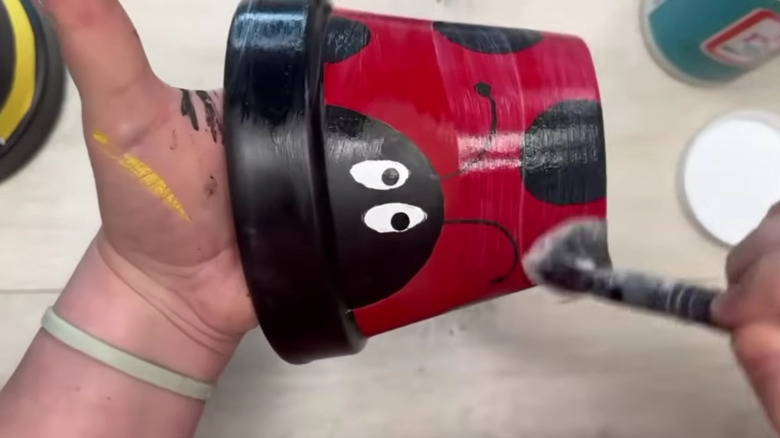
Once the pot is fully dry, cover it in a base layer of red paint, then add black spots with a sponge across what will be the shell. Next, paint a black band around the rim and add a black semicircle to make the head. Finish with two white circles for eyes within the black semicircle, then draw on the pupils and a pair of antennae with a paint pen. Once everything is dry, finish with a coat of sealant to lock in your paint job.
When your ladybugs are fully painted and cured, it's time to insert the stake solar light, which should slide right down through the drainage hole until the panel sits on top of the pot like a cap. Of course, the lights only work if they're able to charge properly, so you'll need to position your pot somewhere it will get plenty of sunlight, and won't get caught in a shadow cast by nearby trees or fencing. One manufacturer's instructions recommend giving a brand-new light about 12 hours of full sun with the battery tab removed before its first use, which helps preserve battery life. But check the instructions on your specific lights to ensure proper handling.
When it comes to positioning your ladybugs, there are other things to consider in addition to maximum sun exposure. The effect works best if you create multiple ladybugs out of differently sized pots, and cluster them in little groups of different sizes. If you're hoping to use them for slightly more practical purposes, you can also position them like little sentries along your garden path to light your way to your front door. Or, place them strategically near the foot of your steps or any other potential trip hazards in your yard.