Don't Toss Old Plastic Cups: Turn Them Into A Chic DIY Vase
We may receive a commission on purchases made from links.
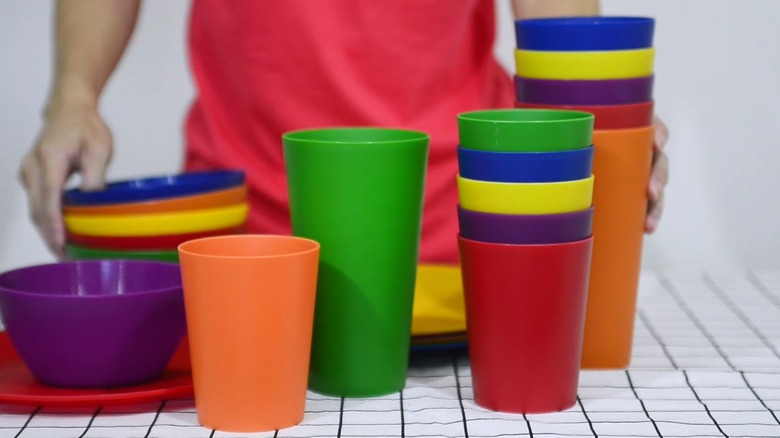
Nearly every household has a set of standard plastic cups, and where they came from is usually a mystery. If you have nicer drinkware sets on hand, the plastic ones are likely sitting unused and taking up space in kitchen cabinets. It may be tempting to toss these unwanted cups, but before you do, consider a chic DIY that gives them a second life in your home. Miguelito'sDIY on YouTube shared an easy yet creative method that turns modest plastic cups into a stylish piece of decor.
This DIYer turned a pair of cups into a chic vase for centerpieces. Their simple shape and lightweight material makes them easy to customize to fit various interior styles, including modern, contemporary, elegant, and retro-inspired rooms. Add creative accents to make them an exciting piece of decor, or keep embellishments minimal for a sleek look. Pair this idea with other chic centerpieces hiding around your home to create a one-of-a-kind display on a countertop, table, or decorative shelf.
In addition to their stylish design, this DIY vase idea is incredibly budget-friendly. The pair of old cups is potentially free. Even if you stop by the thrift store to pick some up, the two would probably not cost up to a dollar. The only other necessary materials are hot glue, a can of spray paint, and dollar store embellishments. The embellishments seem superfluous but are necessary to hide the visible seam between the combined cups.
How turn old plastic cups into a stylish vase at home
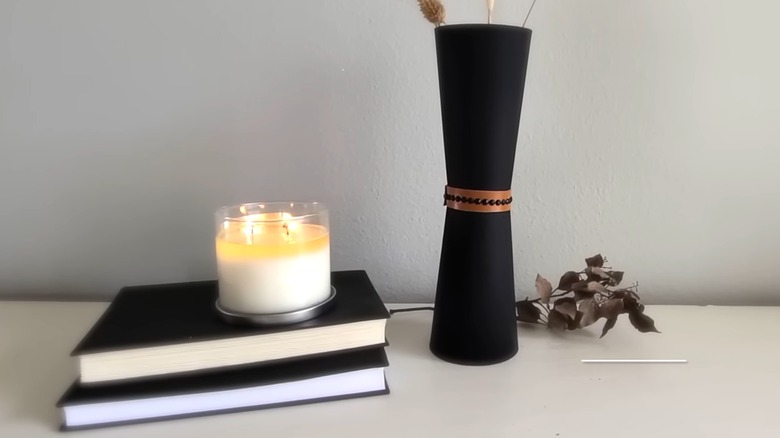
Before starting this DIY, ensure the plastic cups are mold- and grime-free. Only some types of plastics are dishwasher-safe, so be sure to check the wash instructions before tossing them in an automatic washer. When the cups are clean and dry, hot-glue the bottoms together to make a hourglass-shaped vase. Hot glue only about 10 minutes to fully cure, then you can safely spray paint. The original DIYer chose an matte black to give the vase a sophisticated vibe but you can go eccentric with a very bright neon green, or even give it a stone-like look with Rustoleum Stone Creations Spray Paint.
The next step is to mask the seam between the cups. Miguelito'sDIY glued black stick-on rhinestones to a leather strip then wrapped it around the middle. This added depth to the vase while keeping to the neutral, modern theme. Follow this method or make your cup less contemporary by using alternative materials. A colorful satin ribbon will have a brighter, elegant touch, or a strip of lace will provide a more classic, homey vibe instead.
Once these steps are finished, it's time to style the vase. If you love the original DIY, emulate their idea with a nearby stack of books, a candle, and dry foliage. However, you can also fill the DIY vase with more vibrant summer flower arrangements you'll want to display in a vase all year. Since the cups are sealed, you could even use them to display real flowers. However, keep in mind that this vase doesn't have much weight to it. Ensure not to overfill it, and stick to just a few flower stems rather than a full, lush bouquet.