Elevate The Elegance Of A Room Instantly With One Quick Upgrade Under $50

We may receive a commission on purchases made from links.
Designer-Coded is where real interior designers detail their tricks of the trade to style their homes for less. If you're looking to craft a high-end aesthetic on a real-world budget, you've come to the right place.
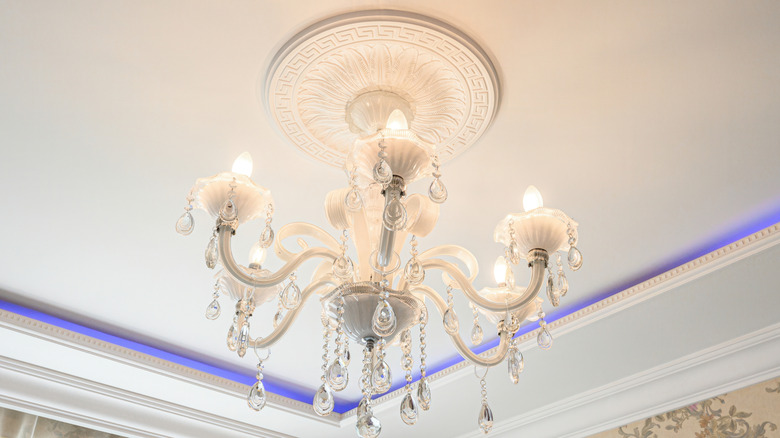
People spend so much time and energy decorating their walls to ensure their personal style shines through. However, there's one "wall" that I, as an interior designer, often see people inadvertently ignore: the fifth wall, or the ceiling. Frequently left as a flat white rectangle, too many rooms miss an opportunity to add architectural character, texture, and design value. One of the easiest, cheapest, most impactful ways to incorporate all of this in one project? Add a ceiling medallion to your room's main light fixture.
These circular embellishments were a sign of wealth in historic homes. They were made to disguise the ceiling connection and soot damage of overhead oil-burning light fixtures, formerly a luxury in and of themselves. Though they faded from favor as architectural styles became less ornate, I've seen medallions experiencing a modern renaissance. Today, many homeowners appreciate the elegance, sophistication, and visual interest they give to often-neglected ceilings. Though the medallion has historic origins, the trending modern traditional style blends elements of both aesthetics and is a natural fit for incorporating a medallion. Additionally, there are modern-leaning and transitional designs with less ornamentation available to fit a wider range of styles.
Originally made of plaster, modern technology has introduced lightweight alternative materials to make medallions more installation-friendly and affordable. This means you can easily upgrade your space for about $50. Paint your medallion to match the ceiling or trim for tone-on-tone elegance, or choose a distinctive accent color for a statement moment. Alternatively, there are pre-finished metallic and color options, meaning you can skip the finishing step altogether. For those ready to elevate their fifth wall, I'll break down all the ins and outs of selecting and installing a ceiling medallion.
Choosing the perfect decorative ceiling medallion
When shopping for a ceiling medallion, you may find limited options at your local hardware store or salvage shop. But you'll have more control over the overall look and sizing by ordering exactly what you want online. I personally like to shop Ekena Millwork (direct or on Amazon) for a wide, affordable selection of designs and sizes. There are certainly other vendors with excellent options as well.
To choose the best medallion for your home, there are a couple of considerations to ensure it fits and looks right beyond just loving the aesthetic. The first is making sure that the medallion you choose is designed to work with the existing light canopy (the piece that sits against the ceiling to cover the electrical connections). All medallions will have a maximum canopy diameter listed. So measure the one on your fixture at its widest point across the middle to make sure it's compatible.
Secondly, pay close attention to medallion sizing. Similar to selecting rugs, if you buy something too undersized, it will lack visual impact and balance thanks to the diminutive scale. So, I always favor the approach, the bigger, the better! It's also important to consider the size and the type of the light fixture. I generally avoid using a medallion less than 18 inches in diameter unless it's for a small flush or semi-flush mount style fixture. For a larger chandelier, you'll want to select one over 24 inches in diameter (or bigger!) to keep it in proportion and exude some serious wow-factor. The larger medallions will be more expensive, but the extra design impact is worth the price tag.
Methods for installing a decorative ceiling medallion
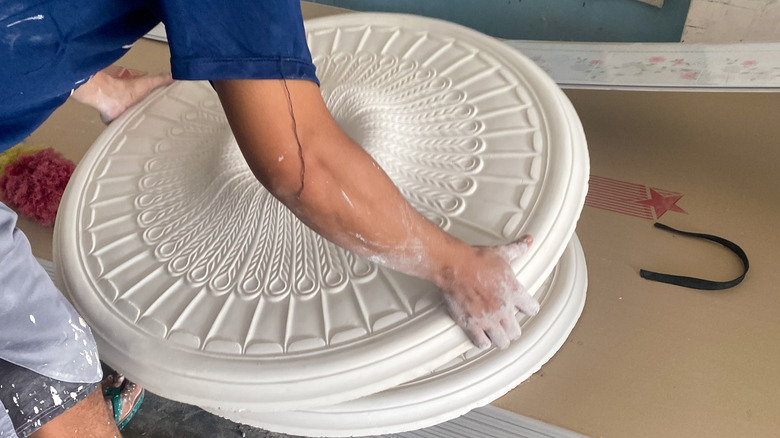
When it comes to installation, there are two types of ceiling medallions to choose from, depending on your comfort level with wiring a light fixture (or paying an electrician to do it). The first is a traditional one-piece medallion designed to be installed between the ceiling and light fixture canopy. To install, you (or your hired pro) will need to cut the power (always double-check that it's really off with a voltage tester) and remove the light fixture. Run a generous amount of construction adhesive on the back side of the medallion. Thread the fixture's electrical wires through the center hole of the medallion and press the embellishment firmly against the ceiling, finished side down, so it's centered over the junction box.
If any extra adhesive leaks out of the sides, smooth it out with your finger or a damp cloth to remove it. Use finish nails or screws to secure the medallion firmly in place. Caulk any nail or screw holes, and run a bead around the perimeter of the medallion for a seamless look. Then, reinstall the light fixture with the canopy flat against the medallion.
For those unwilling or unable to mess with wiring, there are also two-piece medallions designed with half-circle pieces to surround the canopy without the need for fixture removal. After ensuring the middle hole of the medallion is large enough to fully accommodate the canopy, apply the adhesive and finish nails in the same way as above, pressing each half together to form a full circle around the canopy. Caulk the two seams between pieces before finishing to effectively disguise the break.