Declutter Coats From A Crowded Entryway With This Cool Scrap Wood DIY

Home decor that's more cool than useful is nothing new, but when an item is really nifty and also happens to be essential for any home, why bother with anything else? Bonus if it's also something you can DIY for a few bucks, like Instagram influencer genevavanderzeil's flip-down coat hanger contraption which, like most hallway wall hooks, will multiply your available storage.
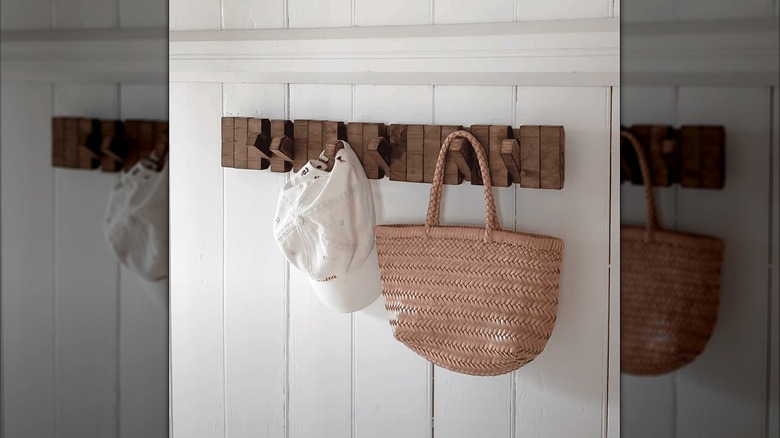
The project is, at heart, a row of wooden coat hooks that flip down when you need one and flip up (because, cool) when you don't. This version is made from a single board that genevavanderzeil says was about to be scrapped ("More proof to never ever throw anything away!" she says in her post), and it's a good way to hang hats, coats, purses, leashes, and whatever else is cluttering up your home's entryway. If you don't already have a place to hang coats, or if your coat hooks are spread over an irrationally large area, this might be the project for you.
There are many versions of this project across social media — from quickie rustic projects like genevavanderzeil's to incredibly involved, multi-material, ultra-modern takes — so there are a lot of ways to get this project made. However, you really can't go wrong with this simple approach. You can even make a couple of tweaks depending on which tools you have and what you're using the rack for.
Making your own flip-down hanger
Following genevavanderzeil's approach, start by making all the wood segments, which are identical in length. About one-fourth of the pieces are ¾ inch wide, and the remaining pieces are 1 ½ inches wide. She used a router to make bevel cuts along the length of what becomes the backside of one board and creates the pointy bits at the top that you'll hang things on. You could do this on a table saw instead of a router. Either way, the finished board looks vaguely trapezoidal in profile. She then cut each individual segment from the board using a circular saw. It would be less nerve-wracking to do this work with a miter saw or a table saw with a crosscut sled where you can better control your cuts.
Only the narrower pieces of her design flip down. The rest are attached to a thin board that's then mounted to the wall, providing support for whatever you hang there. Many designs alternate large and small pieces, but genevavanderzeil spaces hers irregularly. The point of this seems to be that it gives you more room to run a piece of dowel, on which the moving segments will pivot, into more stationary segments on each end. And perhaps to add some unexpected uniqueness.
Perhaps you've already envisioned the nightmare of trying to line up all the straight, perpendicular holes you're drilling so you can run a dowel through all the pieces. So drill your holes through multiple moving segments at a time, and partway through the stationary segments, ideally using a drill press and a table or some stop-block arrangement to make hitting the same mark every time easier. Attach all the pieces to the backing board, joining them with small dowel segments.
Some tips for a successful flip-down project
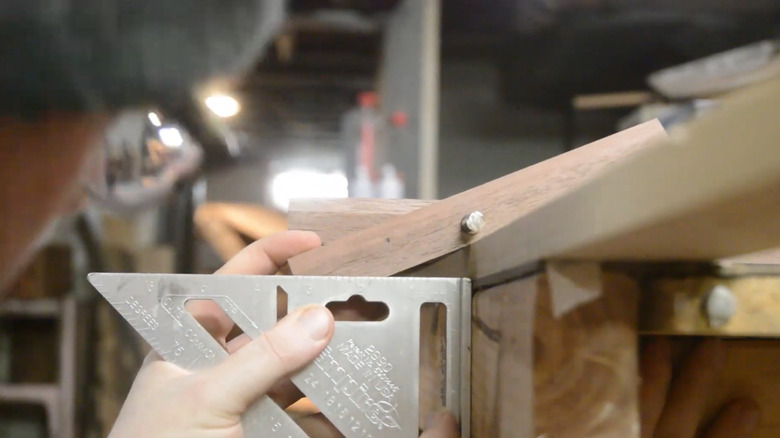
You might be — or at least should be — wondering how you'll know where to drill your dowel holes in relation to your bevels and, for that matter, how much of a bevel to add where the moving segments will rest against the wall. There are a few ways of tackling this problem, but the simplest and most flexible is to eyeball the pivot location, about a third of the board's length from one end. Slide a dowel through to temporarily secure the moving piece. Then, with your backing board underneath for proper spacing, use a speed square to mark where the moving segments should rest against the wall, as shown in the image above.
Cutting the bevels consistently and, if you have a drill press, matching the pivot hole position correctly every time is a matter of using resting each segment against stop blocks while cutting or drilling. If you bevel your segments as a single board before cutting it into segments, you will have no concerns about consistency, since you're just making a single cut.
You'll also need to pay a little attention to grain and its impact on strength, which is often a confusing matter. The important thing to keep in mind is that you want to create your segments, particularly the moving ones that will hold weight, so that the wood grain runs parallel to the length of the segment rather than in a bunch of bands across the segment. That's called short grain, and will result in a weaker hanger that might snap under any load. Also, consider using hardwood to give yourself a little more insurance against splitting and breaking.