Encourage Bluebirds To Visit Your Yard With A Simple Nesting Box You Can DIY
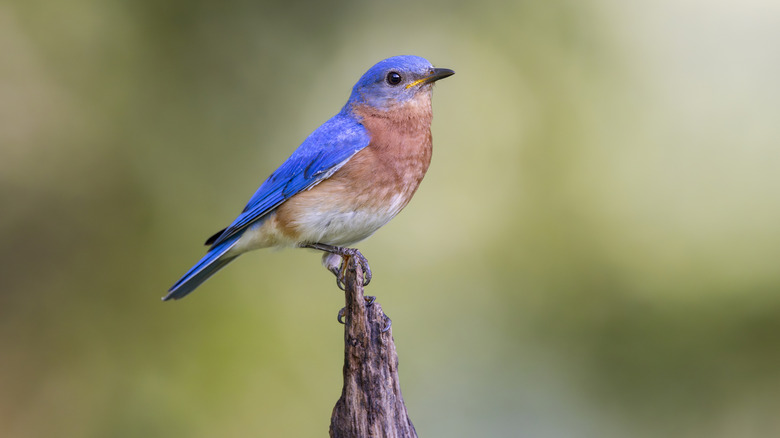
Bluebirds are predictable when it comes to what they like — offer it to them, and you've got a good shot at getting them to visit your garden. Three species of these enchanting little birds are native to the United States: mountain, western, and eastern. Each species has slightly different preferences, but, in general, they like to live on open grasslands with scattered trees and shrubs. In the spring and summer, they feast on insects; in the winter, they mostly eat berries and seeds. Offer the right foods and create a bird-friendly garden that mimics their natural environment, and you're sure to see more of these colorful birds.
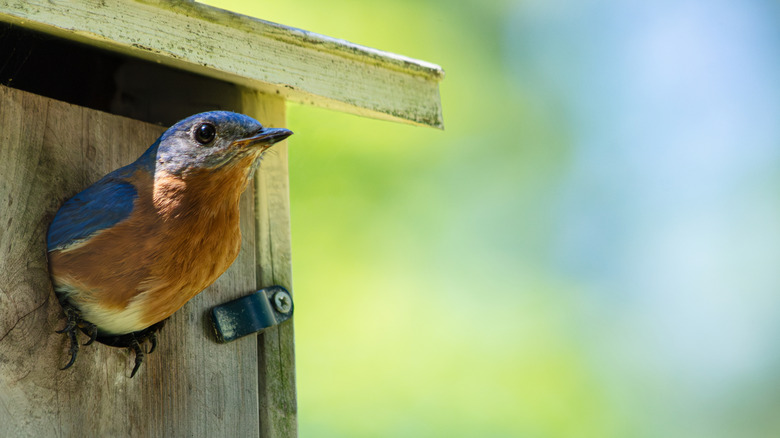
Bluebirds are also secondary cavity nesters. This means that they like to build their nests in tree cavities that formed naturally or were created by other animals, rather than excavating one themselves. If your environment is set up properly and the right foods are available, a great way to attract more bluebirds is to offer a cavity for them to nest in. Building a bluebird nesting box is a fun DIY project that can be done quite simply. All you need is wood, a hammer and nails, a saw, and a plan.
How to cut your birdhouse from a single board
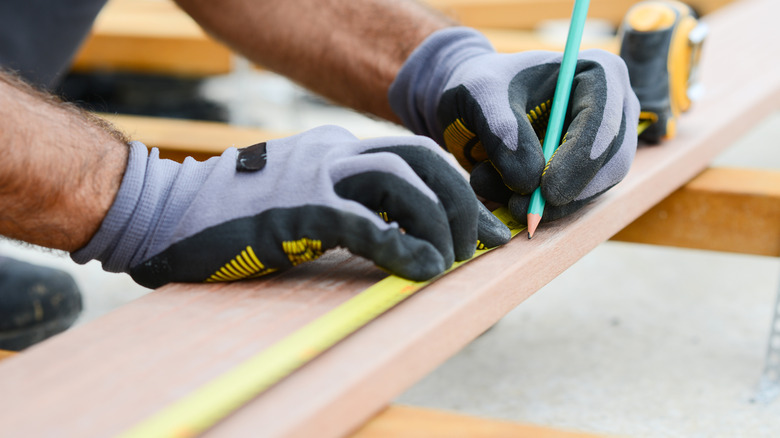
The basic steps of building a bluebird nesting box are always the same, regardless of what kind of bluebird you're trying to attract. From there, however, a few key details may differ, so it's important to identify what species of bluebird you have in your area. According to a simple nesting box plan shared by Cornell Labs, you'll want to start with a piece of lumber that is ¾ of an inch thick, 6 inches wide, and 6 feet long. Cypress, redwood, or cedar boards are the best choice for nesting boxes because these materials resist rotting and are weather resistant. You will then need to use a saw to cut your board into six pieces, each 5½ inches wide, with the following lengths: 13½ inches, 8¼ inches, 4 inches, and three 9-inch pieces. This is easiest with a miter saw, though a simple hand saw with a miter box will also do the job.
The 13½-inch section will become the back of your nesting box, while the 4-inch piece will be the floor. The 8¼-inch piece will be used as a roof, and the three 9-inch pieces will be used as the front and sides of the nesting box. Next, you'll need to drill a hole about ¾ inches down from the top of one of your 9-inch pieces. This will be the entrance for your birdhouse. The size of the hole depends on what type of bluebird will be using the box: eastern bluebirds need an entry hole that is 2¼ inches in diameter, mountain bluebirds need 1⁹⁄₁₆ inches in diameter, and western bluebirds need a hole that has a 1½-inch diameter.
Assembling your birdhouse
Before assembling your nesting box, there are two more steps you will need to follow. The first is to drill drainage and ventilation holes. For drainage, drill four holes into the piece you cut for your floor. Then, drill two holes on the top of each side for ventilation. On your back piece, you can also drill a hole at the top to use for hanging your completed box. The next step is to sand the edges until they're smooth. After that, you can use a hammer and nails to put the pieces together. The nails you use should be aluminum, copper, galvanized, or stainless steel, and they should be ribbed or twisted. This will keep them from rusting or pulling loose over time, ensuring your hard work lasts for years to come.
Begin by nailing the front and one side together at a 90-degree angle. Then, attach the floor and nail on the back. The floor should be recessed at least ¾ of an inch from the bottom of your box to keep water from flooding it. Next, slide the roof into place and nail it shut. The final piece will be a pivoting access panel that can be lifted up to clean or check the nesting box. Using your saw, trim the panel by around ¼ of an inch. This will provide room at the top for the panel to swing open smoothly. Then, you can attach the access panel with two pivot nails at the top. The bottom can be held shut with a single nail or screw. Or, if you want easier access, you could install a simple latch to keep the pivot door closed. Finally, once your nesting box is complete, try out a few foolproof ways to attract birds to your garden – and step back to enjoy the show.