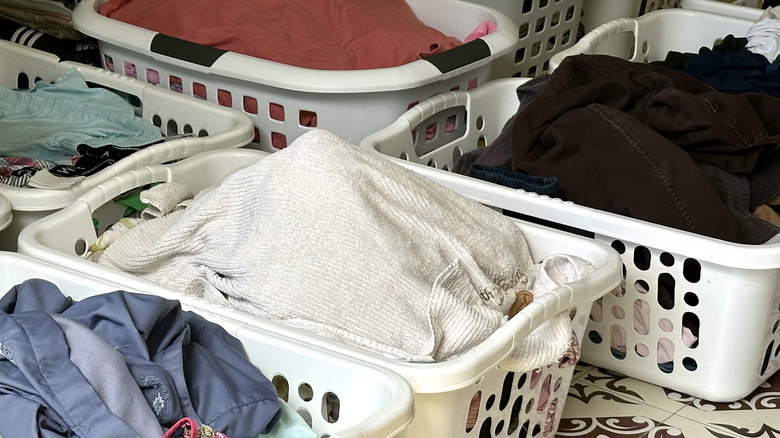
Ditch Laundry Basket Clutter With This Genius DIY Tiered Organizer
We may receive a commission on purchases made from links.
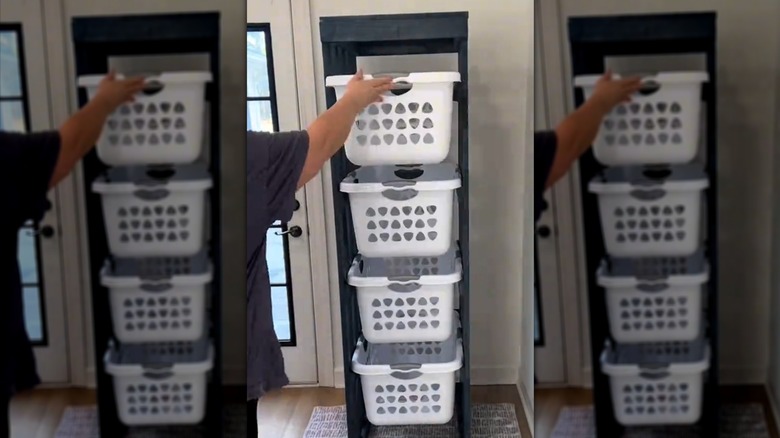
Early in his TikTok tutorial on creating a vertical organizer for laundry baskets, @peregoyhomestead asks, "If you're not organizing your laundry this way, then what are you doing?" He makes a good point. Using a tiered organizer like this lets you sort laundry but keep four baskets in about the same footprint as a single laundry basket. It's a useful project, and even rises to the level of life-changing laundry room storage and organization ideas.
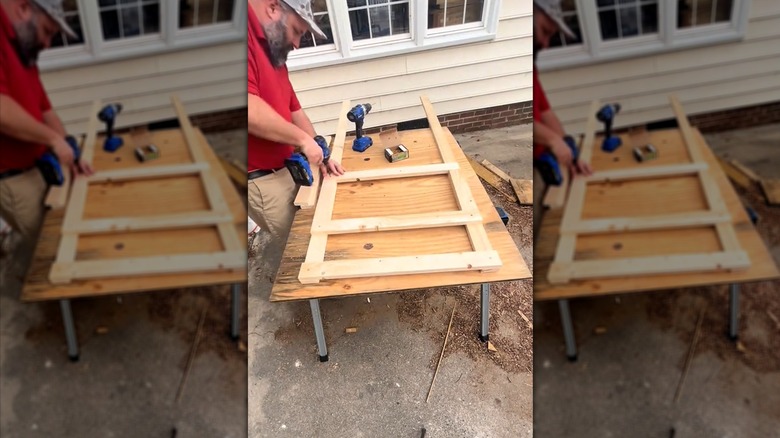
The TikToker manages it with 15 or fewer 1-by-3 boards (one commenter says 12), as well as some essential carpentry tools. You can find square-edged whitewood 1-by-3 common boards that are kiln dried for $6.81 each at Home Depot. If you're on a budget, you could try it with 1-by-3 furring (currently $2.47 per board), as long as you're super picky about the boards you choose. However, I'd stick with the more stable kiln-dried stuff or, better yet, cut your structural 1-by-3s (which are actually ¾-inch thick) from a sheet of ¾-inch plywood. Alternatively, you could improve rigidity by using thicker lumber (2-by-3s, perhaps) for the main structure and reserving the 1-by-3s for the basket-support rails. @peregoyhomestead's measurements are tailored to his specific laundry baskets, which he bought from Walmart. However, it should be easy to adjust them as necessary once you understand what each piece is meant to accomplish.
The basic procedure is to build two ladder-like structures, which will be the sides of the organizer. Attach them to each other with boards that will form the back of the organizer. Then, add any extra support as you see fit.
Some guidance on measurements and cuts
As is the way of TikTok, @peregoyhomestead blows through the instructions so fast that it's difficult to understand what he's up to, especially in the section where he's discussing jigs. Fortunately, his are the simplest jigs imaginable ... basic spacers that help you set your rails properly. The jigs also accomplish the noble goal of eliminating measurements, which is how most projects go awry in my experience. You'll notice in the miter saw portion of the video that he measures his cut against an existing board, rather than measuring each cut individually. When a project has repeated cuts, this may be the single most useful way to keep everything on track and lined up properly.
@peregoyhomestead
The upper set of rails starts 8 ½ inches from the top, but you don't really need to know that because the spacers will get you there automatically. The short space at the top (and, therefore, the shorter, 6-inch spacers) creates room for @peregoyhomestead to run a board across the top front of the organizer, and you should probably add one to the bottom front as well.
Each subsequent set of rails is 14 ½ inches below the one above it (the 12-inch spacer plus the actual width of the 1-by-3, which is 2 ½ inches). This leaves 18 inches at the bottom, a bit more than you need. In the interest of stability, you may consider adding some weight down there — heavier lumber, perhaps, or even creating a shelf that can hold laundry detergent or something else with weight. If not, consider shortening the space 5 to 6 inches, which will improve stability a little.
Answering the TikTok commenters
@peregoyhomestead gives instructions quite well, but there will usually be questions and challenges in the comments. A few users complain that the finished project is wobbly. One added cross-bracing to the sides, and a couple added boards across the bottom of the front to keep everything plumb. Both are good ideas. And, as I mentioned already, you will benefit from adding weight to the organizer's bottom. @peregoyhomestead added decorative vertical boards to the sides, which also improve stability.
A couple of commenters mentioned adding wheels to the organizer. This should be as simple as screwing a block of wood to the inside of each bottom corner. How you attach casters will depend on the type you have — check out the excellent instructions in our piece on building a portable kitchen island using base cabinets. The caster support blocks would also shore up the bottom corners, and it may also be a good idea to add the sort of triangular corner braces you see in cabinetry to the top corners. It's probably also a good idea to use the lower baskets for more common laundry items to keep the center of gravity low whenever possible.
One other thing I'd do is use wood glue when attaching the back boards. This project has the potential to rack a bit, especially if you add casters, and the glue/brad combo will hold up far better than brads alone. Don't worry that half of the glue is going on end grain — just seal the thirsty end grain with diluted wood glue 15 minutes or so before final glue-up.