Build A Chic Bathroom Vanity On A Budget With This DIY Using Ordinary Wood
We may receive a commission on purchases made from links.
We love a good DIY vanity idea, and TikToker thegibbyhome's DIY is a polished example of creating an attractive vanity on a budget. Best of all, she promises to build the core components for less than $30 — and delivers. The result is a niche vanity made of two shelves, crafted from affordable wood, giving a super-clean, modern look.
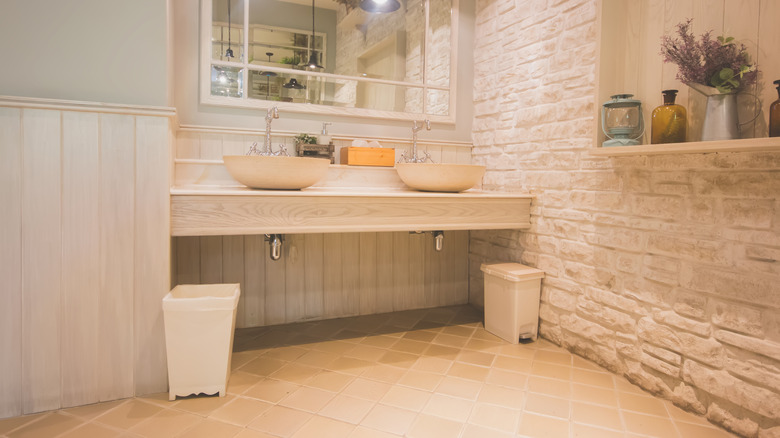
The two shelves assume the duties of a typical vanity. The top shelf is home to a vessel sink with a little room left around the perimeter to put hair ties, toothpaste, and tile spacers. The upper shelf is also skirted with a board, hiding the worst of the sink's plumbing. The lower shelf has a shorter skirt, and is used to store hand towels and a couple of baskets for whatever accessories or supplies you might want.
The $30 limit applies to the wood vanity portions of the niche, not the tile, mirror, fixtures, etc. Because project materials are limited to a 1x12 and a couple of 2x4s, the $30 price tag is about right, provided you have scrap on hand for the miter supports and a little stain and polyurethane remaining from another project. Assuming a 24-inch-wide niche, you just might get away with cutting these shelves from a single 8-foot 1x12, with careful planning and a narrow saw kerf. A 10-foot board would be a safer bet. A 1x12x8 Premium kiln-dried, square-edge whitewood common board costs about $25 at Home Depot. A 1x12x10 pine common board costs less than $35. (By contrast, an 8-foot 1x12 poplar project board currently runs $120 — a bit over budget.) You'll also need lumber for attaching both shelves to the three surrounding walls. A couple of straight 2x4s or 8-foot wall studs should do the trick at $3 to $4 each.
Building the niche vanity
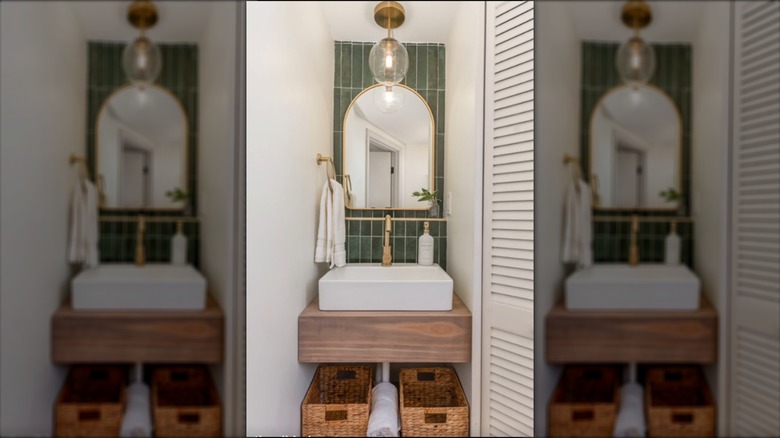
For each shelf, thegibbyhome cut two pieces of 1x12 pine to the width of her bathroom niche. She edge-joined the pieces using pocket holes and screws so that her panel would be deep enough for the niche, then sized it precisely using a 45-degree miter. It's unclear exactly how she did the next step, but the simplest method would be to reverse the mitered cutoff so it's at a 90-degree angle to the shelf surface, forming the skirt at the front of the shelf. This joint was secured with wood glue and brads, and supported with two triangular blocks hidden in the 90-degree turn. She then filled and sanded the nail holes and applied stain and a polyurethane sealer, since this fixture is in a humid bathroom environment. She then repeated the process for the lower storage shelf with a smaller skirt, and attached both to the walls in her bathroom niche.
@thegibbyhome #diy #diyproject #foryou #foryoupage #fyp #fixerupper #fixerupperhome #foryoupageofficiall #makeover #foryoupageofficial #diymomsoftiktok #afforablediys #fixerupperhouse #reno #home #fixerupperstyle #bathroom #bathroomremodel #bathroomreno #vanity #diybathroomvanity
The details of attaching the vanity to the walls is vague in the video, but the simplest (and perfectly sufficient) method would be to attach 2x4 or 2x3 lumber to all three walls at shelf height (attached to studs on all three walls for support) to serve as a cleat or ledger to hold the shelf. Because it's getting support from three walls along the full length of three sides, this should be strong enough to handle a full vessel sink or even someone (occasionally) sitting or leaning on the vanity.
Some notes on edge-joining boards for the vanity top
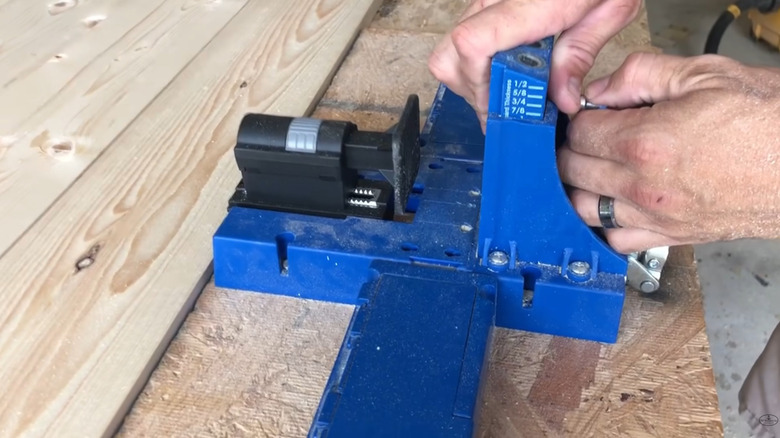
For the most part, this is a simple, straightforward project as the TikTok video implies. Cutting and gluing up mitered edges takes some care. But edge-joining boards — the kind of thing you might do, for instance, when joining shelves in a corner — can be a dicey affair for a novice. The most common methods involve squaring edges with a jointer, then using a biscuit joiner/plate joiner, dowel joiner, or domino joiner in conjunction with wood glue. The use of pocket holes and pocket hole screws isn't outlandish, but may be a little more risky for the inexperienced. The key to clean, strong edge-joining is good clamping, especially when applying screws into one board without changing its position relative to the other.
Pocket-hole jig manufacturer Kreg offers some guidance on YouTube for those attempting edge joints using their gear: Join boards that are 6 inches wide or less, and alternate the grain direction of your boards to minimize cupping and bowing. Face clamps should reach all the way from the edge to the pocket holes. To ensure boards are equal thickness, run them through a planer or use wood that is surfaced on four sides — this second approach is out of the question using thegibbyhome's budget strategy. Add pocket holes every 6 to 8 inches along the joint, clamping using face clamps at each pocket hole location while driving screws.