Thrifted Plates + A Little Creativity = Stunning Garden Decor You'll Love

You see them at the thrift store — lonely plates that have been separated from the rest of the dinnerware set. While they may no longer be fit to grace your kitchen table, their useful life isn't over yet: Pick up a few of those orphans to create beautiful garden flowers. Thrifted plate flowers never need watering or fertilizer, and they'll bring color to your landscape all year round.
To make one plate flower, you'll need three plates of various sizes, such as a dinner plate, a dessert plate, and a teacup saucer. You can choose pieces in the same color family or with similar styles, or you can get creative by mixing and matching various patterns and hues. Don't be afraid to experiment with the dinnerware you choose, too. An espresso mug or ramekin can serve as the flower's center and a salad or cereal bowl as the second layer. To set the flowers in the ground, you'll need a dowel or metal rod for the stem, a small upside-down vase or spoon to attach the bloom to the rod, and epoxy or a nut and bolt to hold everything together.
Making DIY plate flowers is just one way to turn old plates into cute garden decor, making your plot a whimsical, upcycled paradise. You can also make cute little mushrooms by attaching an upside-down salad or serving bowl to an upside-down vase. Consider painting the plates yourself to fully customize your project, especially if you don't find patterns or colors you like.
Creating your flowerhead
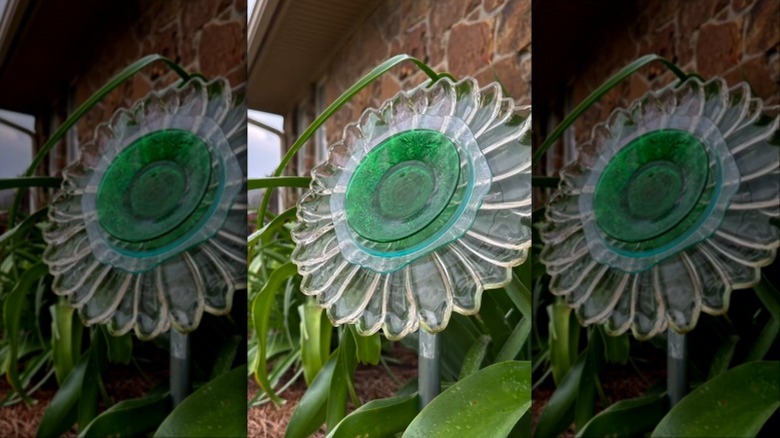
To create your flowerhead, play around with stacking the plates, putting the smaller ones on the larger ones in groups of three. When you find an arrangement you like, it's time to secure the plates to each other. You have two options for attaching them. The first, simpler method is to use epoxy or E6000 to glue the plates together. Place a thin layer of adhesive on the underside of the middle plate, then press it onto the top of the largest, centering it. Now, put a layer of glue on the bottom of the smallest, then set it on top of the middle. Wrap the flower in painter's tape and let it sit for about 30 minutes to prevent the plates from shifting, then remove the tape and let the adhesive cure for the time directed on the packaging.
A more complicated but sturdier method of securing the plates is to drill a hole in each, then attach them with a nut and bolt. To do that, you'll need a drill and the right type of drill bit for glass or ceramic, plus eye protection. Drill a hole in the center of each plate, then stack and secure them in place with the nut and bolt.
Attaching the stem and planting it in your garden
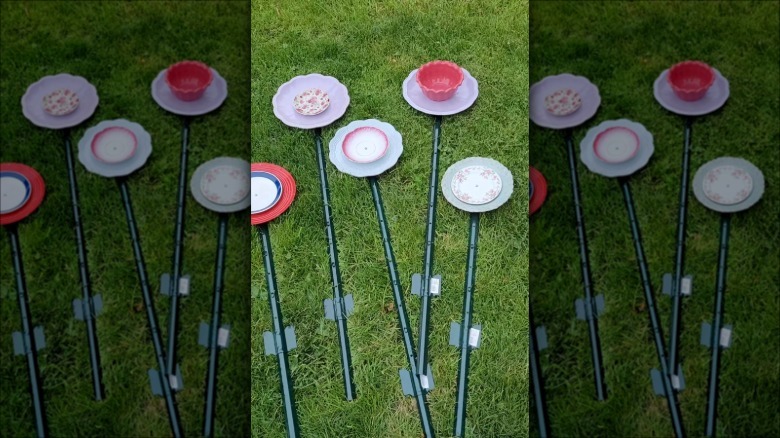
Once your flower plates are fully cured or attached with the nut and bolt, it's time to get them ready for the garden. A wooden dowel, hollow copper pole, or metal fence post can act as the stem. To attach the flower to the stem, use either a small upside-down vase or a bent soup spoon. A soup spoon is an ideal connector if you're using a hollow metal pipe — just use a hammer to bend the spoon so that its bowl rests against its stem.
Place a layer of epoxy on one side of the vase or spoon, then press it against the back of the largest plate, centering the vase. Wrap painter's tape around the flower and vase or spoon to keep it from moving, then remove after about 30 minutes. Repeat with any remaining flowers, letting the epoxy cure as directed on the packaging.
Now the fun begins — it's time to find a place for the flowers in your garden. Group them in threes or fours, or place solo flowers between live plants to fill gaps in the garden. Place the dowel or rod on the soil, then hammer it to a depth of at least 10 inches. The deeper the post or dowel, the sturdier the flower will be. Place the upside-down vase on top of the dowel or slip the spoon handles into the hollow part of the metal rods, then step back and admire your handiwork.