You Don't Need Paint To Refresh Dated Cabinets — Try This Instead

We may receive a commission on purchases made from links.
If you do a lot of cooking, it's difficult to prevent grease and oil from flying around the kitchen and landing on your cabinets. Regular cleaning can keep wood cabinets looking good, but all that wiping and scrubbing can dull the finish over time, especially if you use abrasive pads or cleaning solutions. Eventually, despite your best efforts, your cabinets end up worn and tired. Painting or refinishing them can fix the problem, but it's a big job. Luckily, there's an easier way to make your cabinets look new again, and you won't even have to take off the doors. You can restore the finish and even hide small blemishes by applying a furniture wax such as Briwax.
The process is similar to refurbishing worn spots on a finished hardwood floor as an alternative to doing a complete refinish. Rather than sanding down the wood, restaining it, and applying a new finish, or changing the color by painting, this technique allows you to darken faded wood and restore gloss without even opening a can of paint or finish. You don't even need a paintbrush. All you need are some cleaning supplies, a few rags, and a can of Briwax or a similar wipe-on, wipe-off furniture wax.
Cleaning and de-glossing the cabinets
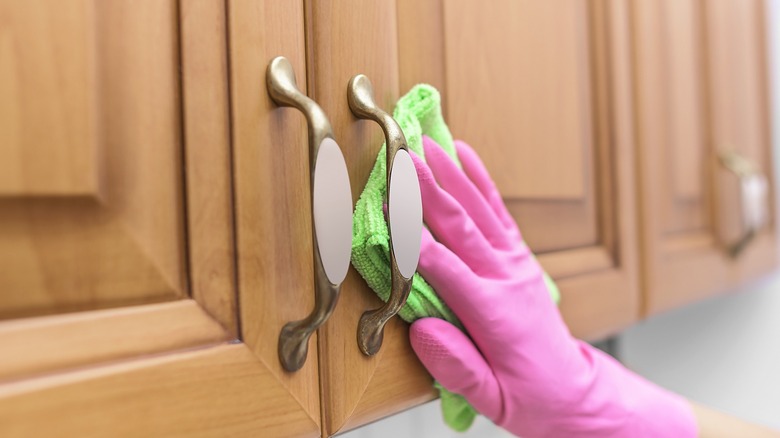
To get great results with this restoration technique, you have to thoroughly clean the cabinet facing, even if you've been in the habit of cleaning regularly. This is necessary to remove any grease that has lodged in crevices in the molding. Moreover, a cabinet facing that has worn unevenly may have some glossy spots and some that are dull, and wax won't blend these imperfections as well as a new finish. A powerful cleaning agent like a TSP (trisodium phosphate) substitute can take care of both of these problems.
TSP is an excellent grease-cutting cleaner, but it's caustic, so you need rubber gloves and eye protection when using it. You may prefer instead to use a product like Ace No Scent TSP N-Rinse Substitute, which is marketed as also being a de-glossing agent that will even out the existing finish. Just mix it according to the instructions on the container.
You'll also want to remove the handles from the door and drawers, which you can do with a screwdriver. And since you're spiffing up the facing, this might be a good time to replace them if they have seen better days. Installing new cabinet hardware is a breeze as long as you choose handles that fit in the same pre-drilled holes as the old ones.
Applying Briwax to your wood cabinets
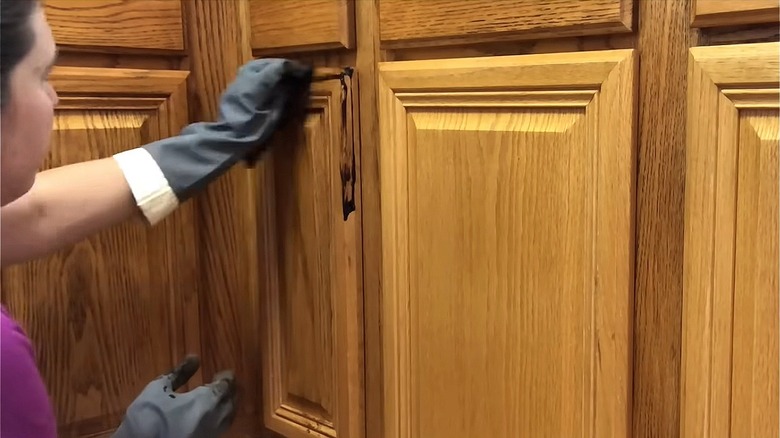
If you've ever applied a gel stain over painted cabinets before, you'll find the process of applying a product like Briwax very similar. It's a combination of carnauba wax and beeswax dissolved in a solvent, and it has the consistency of thick paint. The original formula uses toluene as a solvent, but later versions substitute xylene and naphtha (an ingredient of mineral spirits), which have less environmental impact. Whichever product you use, it's important to open the windows for ventilation and wear gloves. If you're particularly sensitive to volatile organic compounds, you might also need to wear protection like the 3M Half Facepiece Reusable Respirator.
Briwax comes in a variety of colors, ranging from ebony to clear. If your cabinets are in good shape, you may want to match the existing finish, but if the wood has multiple nicks and bruises, or the stain has faded, a darker color will help hide these flaws.
Application is a three-part procedure. First, wipe a generous amount of the product onto the wood with a rag and spread it around. Next, use a clean rag to wipe off the excess. Finally, buff up the finish by rubbing vigorously with another clean rag. Once you've buffed, the wax should be hard enough to resist fingerprints, but if you notice any, they'll disappear with a little more buffing.