Turn The Space Beside Your Bed Into A Cozy Accent Wall With A Simple Wood DIY
When it comes to making your bedroom feel like a personal sanctuary, having space to display your favorite books, photos, decor, and other personal items goes a long way towards making a space feel homey, charming, and cozy. And if you have an oversized bedroom with plenty of space for extra display storage, fantastic — your options are endless! But if you have a bedroom with a small footprint, the good news is that social media has come in handy, yet again, with an idea for creating an entire wall of decorative shelving that only requires 5.5 inches of depth.
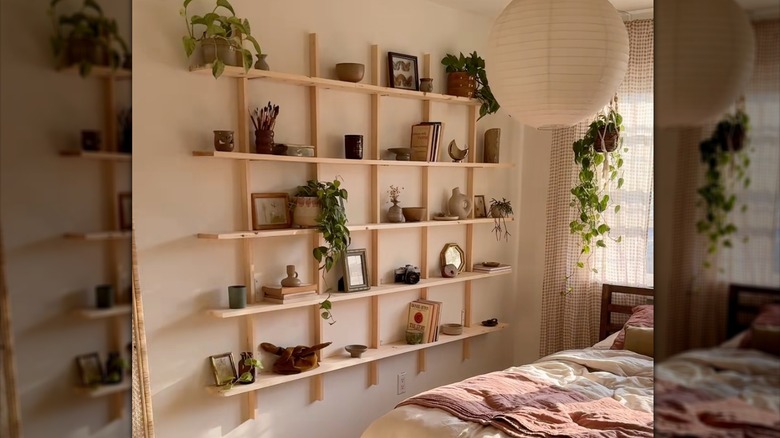
Natalie Doef (@nataliedoef) shared on TikTok how she transformed some basic wood boards and metal L-brackets into a stunning floating shelving unit to upgrade a blank wall beside her bed. By arranging deeper boards horizontally and breaking them up with shallower vertical dividers, Doef created a wall-mounted grid that looks minimal yet high-end for displaying all of her favorite treasures, to give her bedroom a more personal, cozy vibe. And because the whole thing was floating, all she needed was less than six inches of depth to pull it off in her small space.
The TikToker commented that the whole project cost her $180 CAD, or about $133 USD, to accomplish, a small investment for an impactful wall statement roughly seven feet high and wide. To purchase materials for the job, you'll need to tailor the project to your specific room to determine the overall dimensions of the shelves, and therefore the exact materials needed. But assuming you follow a similar sizing to this TikToker, we'll break down the shopping list and project steps below as a jumping off point for this reasonably simple DIY.
Planning and purchasing materials for your wood grid wall shelves
For a shelving unit sized like TikTok, purchase five eight-foot-long 1x6 wood boards for the horizontal shelves. It appears the TikToker had hers cut to approximately seven feet for the final look, roughly a few inches longer than the bed. In addition, you'll need five eight-foot-long 1x2 wood boards for the vertical dividers, eight metal L-brackets for shelf support that are approximately 5 inches wide (a 1x6 is actually only 5.5 inches wide), five smaller L-brackets for middle support, and fasteners appropriate for your wall substrate. While the TikToker used drywall anchors to secure the brackets, you could also plan ahead with the overall dimensions and placement to get your two large outer brackets (or all three) for each shelf installed into standard-spaced wall studs for additional stability and support.
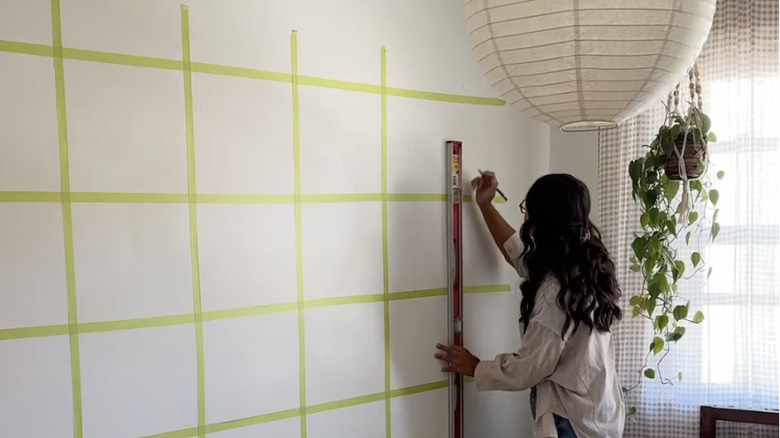
With materials purchased, measure and lay out your grid on the wall with painter's tape and a level to make sure you're happy with the sizing. It appears the TikToker was working with nine foot ceilings and placed the horizontal boards about 15 to 16 inches apart. This leaves roughly 20 to 22 inches above the top shelf and below the bottom shelf so the whole arrangement is centered vertically on the wall. Beginning from the center point of the shelves, tape out your middle vertical divider placement. Measuring out 15 to 16 inches (matching your horizontal spacing), mark on either side of the center divider to create the next squares. Repeat this process to the outside of each square to get a full four-by-four grid. You'll have about 10 inches or so of overhang on the horizontal boards. If you're satisfied with the layout, mark all junction points with a pencil and remove the tape.
Installing the boards on the wall to form your shelving grid
Now that your measurements are planned, cut the 1x6 boards to length if needed (you can also have the hardware store do this for you in advance), and use the larger L-brackets to fasten each one on the wall. Keep in mind that this TikToker painted the L-brackets the same as the wall color and placed them to the right side of the vertical divider boards to hide them from view. This means they would need to be offset from the vertical measurement mark to fully clear and sit next to the divider without throwing off the optics and symmetry of the grid. However, you could also plan to cover the brackets with the boards, though they would sit away from the wall with a small gap a bit to do so.
Once the horizontal boards are all in place, measure the exact distance between each set and cut the 1x2 into 15 to 16 inch strips to wedge in snugly between them. You'll need five vertical dividers per row, or 20 total, to get the four-by-four grid of squares. The TikToker used Command strips to keep them in place, as they are just decorative and not holding any weight. To finish off the look, cut ten strips of the remaining 1x2 into approximately 10-inch pieces, the same distance as the horizontal overhang on the main shelves. These will be installed with Command strips above the top shelf and below the bottom shelf as decorative extensions to complete the gridded look.
And there you have it, a minimal yet gorgeous DIY wall shelving unit ready to be styled with your favorite decor to give your bedroom the ultimate aesthetic upgrade with personalized charm.