Forget Outdoor Curtains: The DIY Alternative That Adds Privacy And A High-End Look
We may receive a commission on purchases made from links.
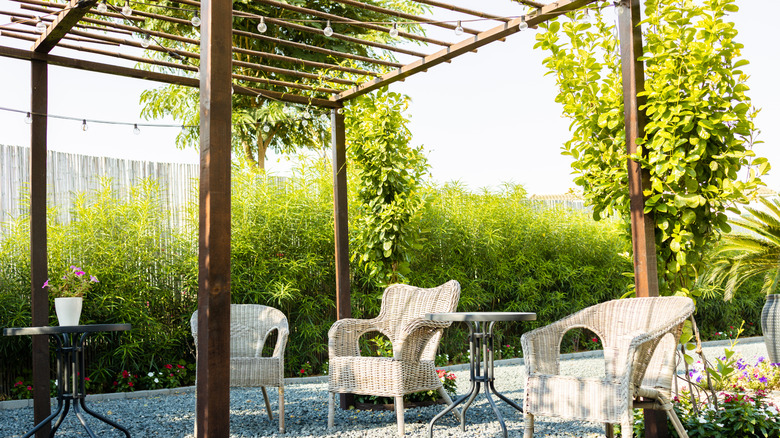
When you want to control privacy and light on your deck or patio, outdoor curtains are usually the go-to option. But the flowy fabric doesn't complement every aesthetic, so why not try something more versatile, like a shutter fence? The wooden screen is made of horizontal slats that open and close, allowing you to filter in light and block prying eyes as you please. It's like having giant wooden blinds but with a high-end look.
This DIY can take the entire weekend, depending on how big the area you want to fence is. Equipment-wise, grab a drill, a leveler, a pencil, and a saw. For materials, you'll need post rails to secure the fence, 5/4-inch deck boards for the horizontal slats, and a shutter hardware kit like the Pylex Deck Sunblind System. The number of boards you'll need depends on your desired fence size. A roughly 4-foot-tall fence uses 11 horizontal boards within each post section. You need one post for every 4 to 8 linear feet of fence. The closer together they are, the higher load your fence can support. This distance will also determine the length of the shutter slats (5/4 deck boards). If you already have a pile of wood handy, this creative privacy screen can beautify your outdoor space on a budget.
How to frame an outdoor shutter fence
First, install the support posts. For concrete and wood decks, metal base brackets, like these Fence Post Anchors, get drilled into the patio floor. Then the posts are inserted into the anchors and screwed in place. On grass or dirt areas, you'll need to dig post holes 2 feet deep, add crushed stone, insert the post, and set it with concrete to anchor the support beams.
Next, finish off the framing with a top piece of timber across the posts, forming a box outline. If the wood is already dried and cured, you can stain it for the perfect natural shade. If you want a luxe all-black look or prefer to whitewash the fence, grab some paint. However, painting or staining wood that's not completely dried and cured can result in uneven or poor saturation.
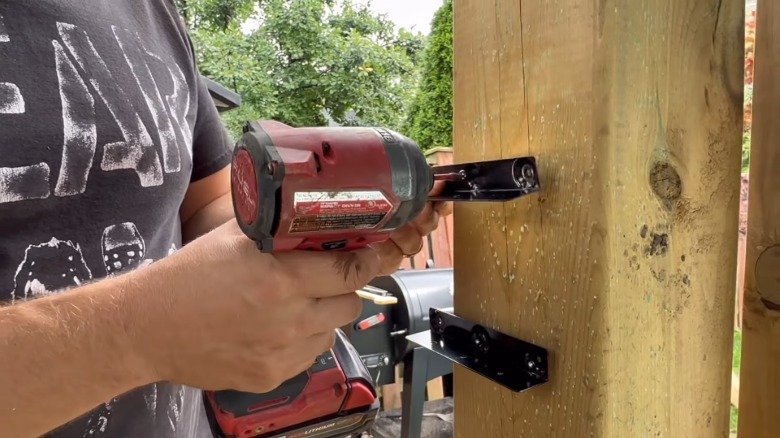
The key to getting this fence moving is the shutter kit. It has all the hardware needed to assemble the slats and turn them into opening blinds. First, center the kit's spacer template on the post and mark where each shutter bracket will go. Do this on each post, ensuring it is evenly marked; otherwise, you'll have wonky slats. Once everything is marked, drill each bracket in place — put the screw on the drill bit, thread the bracket on top of the screw, follow it with the included spacer, and drill. Be careful not to overtighten.
How to assemble the shutter slats
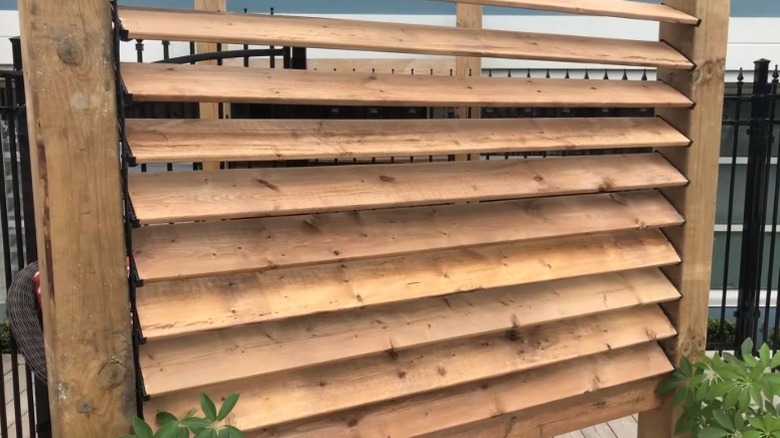
After all the wood framing and metal hardware is installed, it's time to assemble the slats. The horizontal slats need to be 1 inch shorter than the distance between the support posts to account for the hardware. One at a time, slide the plank into place so both ends rest on the shutter brackets of the posts. Then drill the slats to the bracket. Pre-drilling the holes will help to prevent splitting. Now all the individual slats should be able to flip open and close as the brackets tilt.
The final step is to install the link clips in the hardware kit, connecting all the slats so they open and close simultaneously. To do so, ensure all the wood planks are facing the same direction. Start with the second board from the top and fasten two clips to the anchor slot (which is on the outer side of the shutter bracket). One of those two clips will also attach to the anchor slot in the board above it, and the other will connect to the anchor slot in the board below. All but the first and last slats will have two clips. Ensure both links are in place before screwing them down. Once all the clips are screwed, test out your creation: Flip one board and all the slats should turn together like a blind. Congratulations! Now you know how to build a fence for your landscape — a stylish one, too.