16 Simply Genius Ways To Hack IKEA's MOSSLANDA Picture Ledge To Transform Any Space
We may receive a commission on purchases made from links.
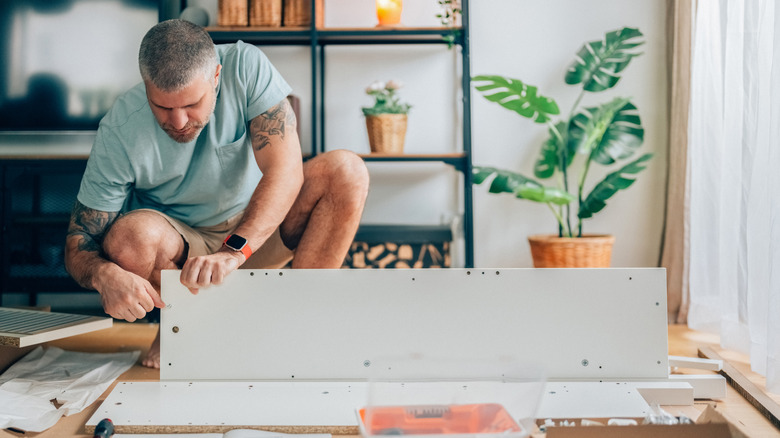
IKEA's modern and functional-style furniture, home decor, and storage solutions never go out of style. The minimalist aesthetic is easy to leave alone or dress up to befit modern trends. With DIY home solutions and decor on the rise, it's only natural that people are flocking to IKEA to find products with potential. One of IKEA's most popular home storage solutions is the MOSSLANDA Picture Ledge. This item is designed to prop up photos and framed art. However, with a little innovation, it can be used for far more than displaying pictures.
Although the base design of the MOSSLANDA ledge is simple, it comes with a variety of options that make it incredibly versatile. The shelf comes in two lengths: 21.75 inches and 45.25 inches, though it can be cut to a shorter length using a hand saw, circular saw, or jigsaw. In addition to being available in different sizes, it has several color options, including black, gray-beige, oak, walnut, and white.
This versatility is what makes it easy to DIY genius hacks that transform the IKEA MOSSLANDA Picture Ledge into a variety of home solutions, whether it is used to DIY an end table or wall shelf, or modified into a practical kitchen spice organizer. Just pick a specific color finish, then style the shelf strategically to complement any interior design, from rustic to contemporary. In addition to suiting a wide variety of interior styles, these genius MOSSLANDA hacks are usable in every room in the home. With a few embellishments or small alterations, this picture ledge has incredible range.
Turn an IKEA MOSSLANDA picture ledge into a curtain panel
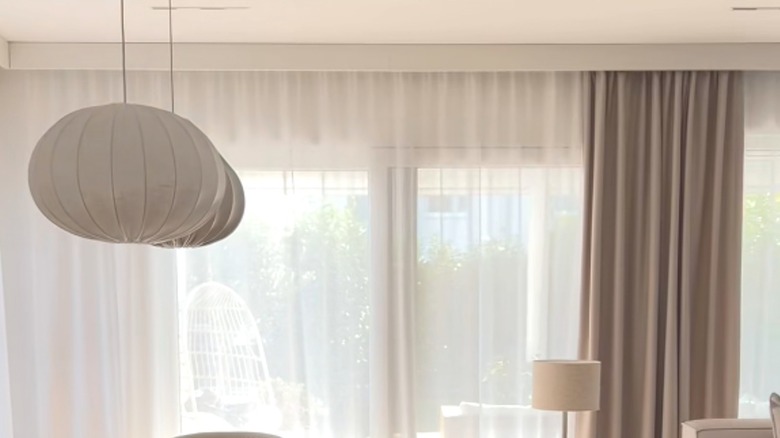
Flip a white IKEA MOSSLANDA ledge over an unsightly curtain rod and bolt it into the wall as a narrow valance. The pelmet works as a seamless transition between tall curtains and a ceiling, and it requires only basic tools, such as a drill, miter saw, tape measure, level, and fastening hardware. Measure the width of the window and window treatment before buying the ledges accordingly. In most cases, DIYers must saw one of the ledges to fit their exact window dimensions.
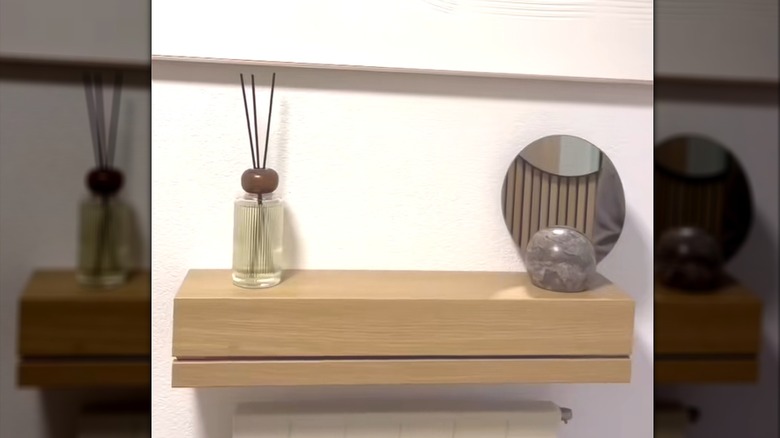
Reverse the picture ledges for a modern wall shelf look
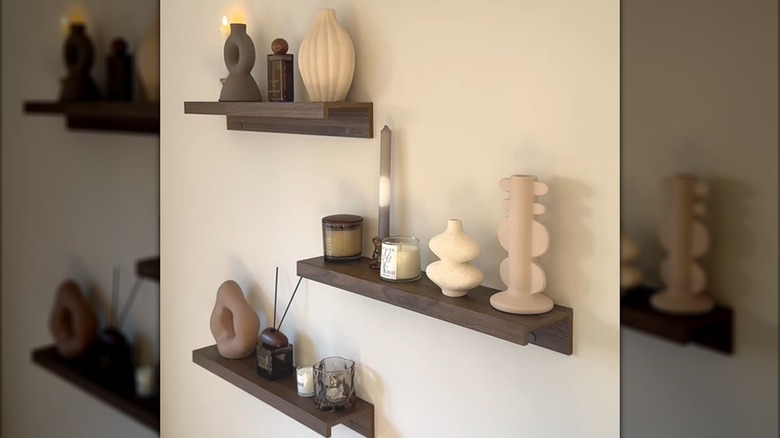
IKEA's ledges are designed with a small lip to hold up paintings and pictures. However, if you flip the ledge upside down and bolt it to the wall, there's more surface space for decor. To create a modern design, stagger three of the 21.75-inch walnut-colored shelves and decorate them with curved vases, taper candles, candle jars, and diffuser sticks. Stick to neutral colors for a muted look, or embrace more colorful pots and candles for a louder design.
Repurpose the IKEA picture shelves in a bathroom to hold cosmetics and essentials
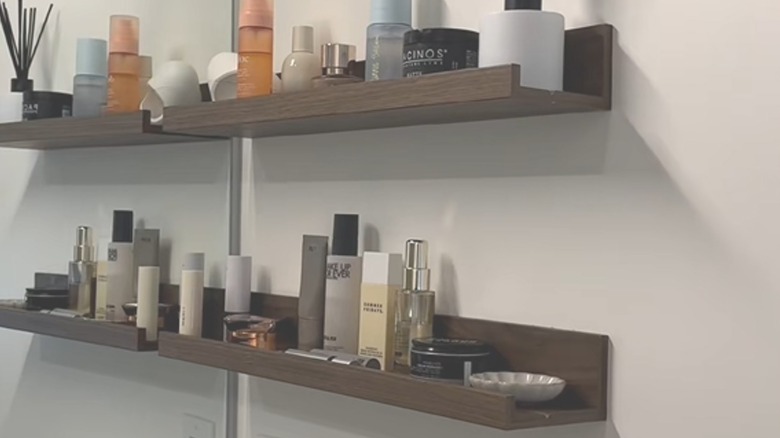
Install the shelves right-side-up or upside-down as genius storage solutions for small bathrooms with open wall space. Pick one of the wood-colored ledges to match bathroom cabinets, or choose the black or white shades to match a countertop. Use the shorter MOSSLANDA so it doesn't extend far beyond the countertop, as most bathroom cabinets are around 20 to 23 inches deep. Also, avoid overloading the shelf with bulk-size bathroom products. These ledges only support about 11 pounds, and it's easy to stay under the limit with lightweight decor and essentials.
Create storage above a kitchen backsplash with flipped IKEA shelves
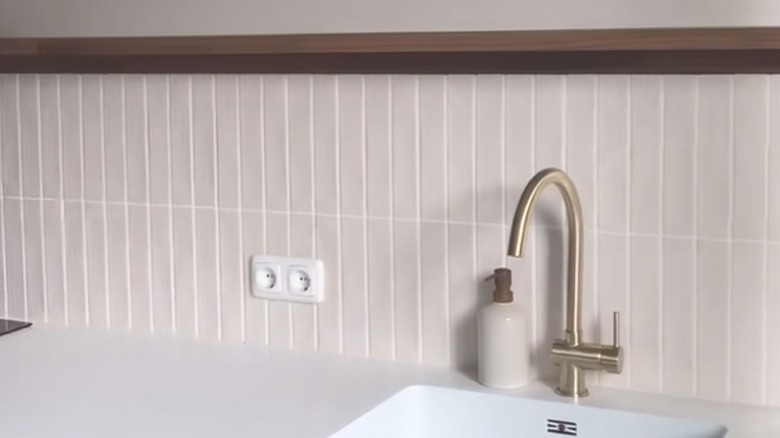
Upgrade a kitchen with another IKEA MOSSLANDA hack that reverses the shelves. Pick a picture ledge that complements your kitchen cabinets, hardware, and fixtures, and bolt multiple just above a kitchen backsplash. This creates gorgeous open shelving across empty wall space, where households can store all kinds of cooking clutter. Store coffee supplies on the shelf above a coffee maker, stock cooking utensils and spices above a stove, or assemble plants and cookbooks in the corners as a decorative touch.
Transform MOSSLANDA picture ledges with curved IKEA BEGRIPA handles
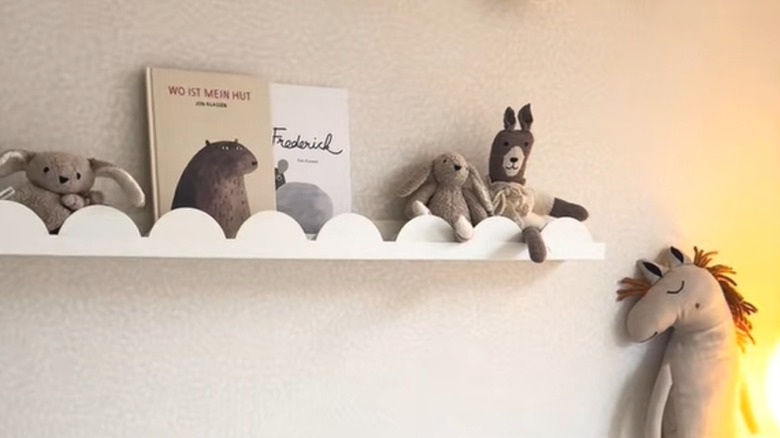
Completely revamp the look of these picture ledges by adding another IKEA product. Super glue BEGRIPA Handles to the edge of a white MOSSLANDA shelf to create a curved, wave design. The larger MOSSLANDA fits eight handles, while the smaller version holds four. For a powerful hold, use Pattex "Multi" General Purpose Glue, which cures quickly and dries clear. These modified shelves are adorable in nurseries and children's bedrooms, but can also be used in other contemporary and modern-style spaces.
Style the IKEA shelf over a bathroom towel rod for a modern aesthetic
Cover a basic towel rod in your bathroom with a sleek picture ledge addition. Flip the MOSSLANDA upside down so the front lip tucks over the protruding rod, and bolt the back into the wall for extra sturdiness. This creates an additional shelf to display decor or add storage options. Add a candle and plant for aesthetic reasons, or stack spare toilet paper and other bathroom necessities. Beautify the design even more by adding framed artwork that has the same color finish as the repurposed picture ledge.
Turn the picture ledge into a DIY sofa table
Lodge the picture ledge between the back of a sofa and the wall for extra storage. Measure the height and width of your sofa, not including the cushions. Purchase enough MOSSLANDA picture ledges to line the back without sticking out, or plan to saw off any extra end pieces. Install these ledges at the same height or lower than the sofa back, so they're level with the furniture. Use this back wall table to display framed photos, hold drinks and coasters, or pile coffee-table-worthy books.
Embellish a BILLY bookshelf with MOSSLANDA shelving
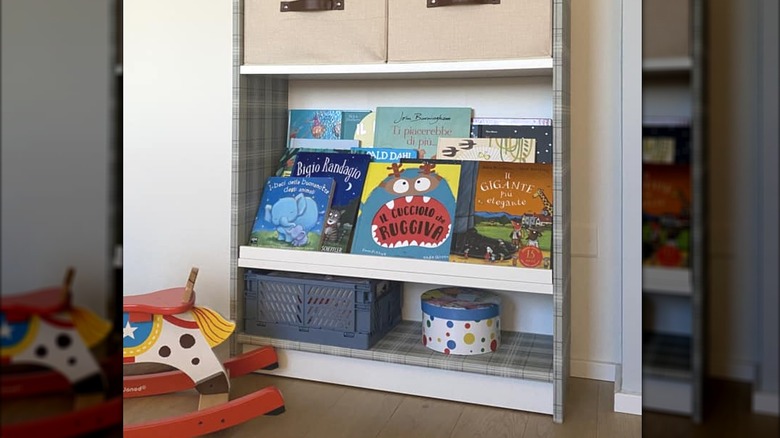
Use picture ledges to transform a traditional BILLY Bookcase into a Montessori-style bookshelf instead. The BILLY bookshelf comes with fully adjustable shelves, which can be placed higher or lower to accommodate upright books. Simply adhere the MOSSLANDA ledges onto the BILLY shelves by drilling screws or gluing with Liquid Nails Heavy Duty Construction Adhesive. Imitate the inspiration behind this DIY with a pair of StorageWorks Fabric Storage Bins and other IKEA storage options under $10.
Repurpose two picture ledges into a DIY end table
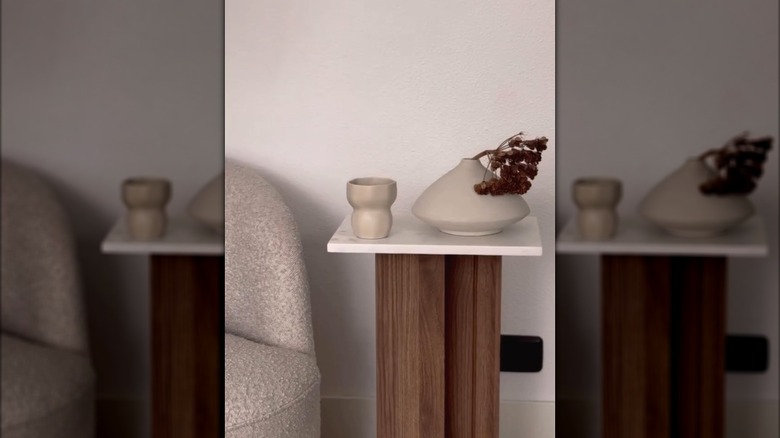
Try out a hack that turns IKEA picture ledges into a cool side table. This project requires two of the MOSSLANDA shelves in any color. Pick the shorter shelves, which are closer to the average end table height of 18 to 24 inches. Use a strong glue, such as Gorilla Glue Construction Adhesive to adhere a tray on top to serve as the table surface. Add elegance with a marble tray like the the Heagoale Silicone Bathroom Tray, or embrace a rustic, natural look with a wooden top like the Genrice Candle Holder Tray. In either case, make sure the tray isn't much heavier than these two-pound ledges, so the table isn't unstable.
Add desk lighting and storage with multiple picture ledges
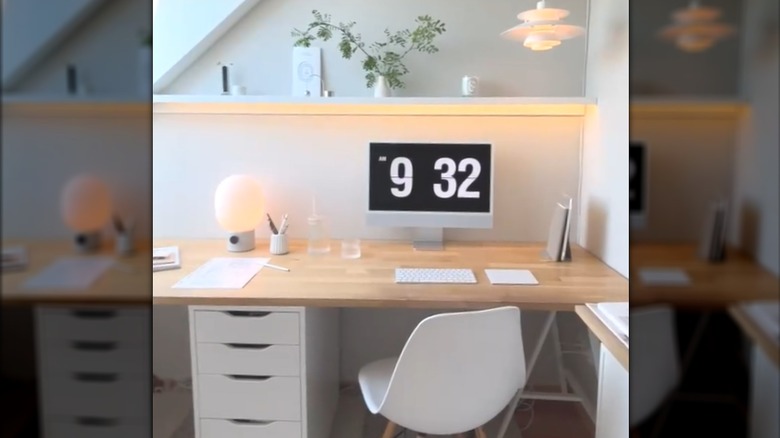
Follow the same steps as many of these other hacks, flipping the MOSSLANDA over and screwing it to the wall above a desk. Make sure it sits well above a monitor, lamp, and other desktop objects, but don't go beyond 72 to 78 inches from the floor, as this may put it out of reach. Measure the width of the picture ledging and purchase smart LED strip lights around the same length. Stick them on the underside of the MOSSLANDA to create soft illumination for a workspace.
DIY a glamorous vanity with MOSSLANDA shelves
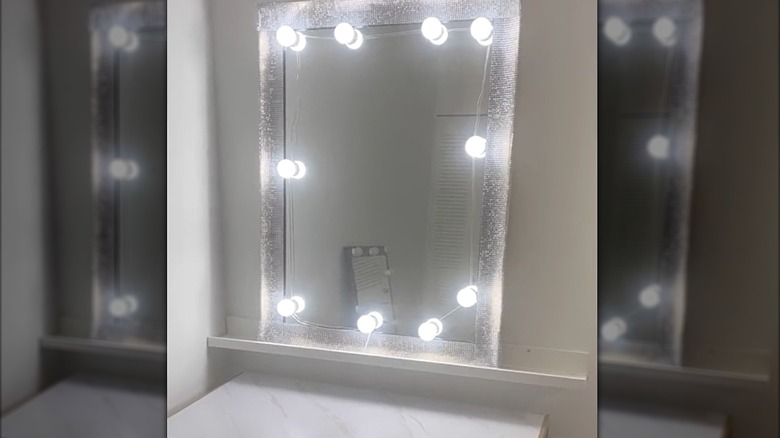
DIY this bathroom vanity idea from multiple budget-friendly retailers. Combine a BestOffice Computer Desk, some Consciot LED Vanity Lights, PP Opount Self Adhesive Mosaic Tiles, and a large thrifted mirror. You'll also need the star of the show, the 45.25-inch IKEA picture ledge. Line the outer edge of the mirror with the disco-style tiles, stick the lights on the inside of the frame, and prop the mirror over a secured MOSSLANDA shelf. The result is an extra-large, chic vanity that can be further customized with makeup organizers and luxury decor.
Set up an IKEA picture ledge over an unused radiator during the warmer seasons
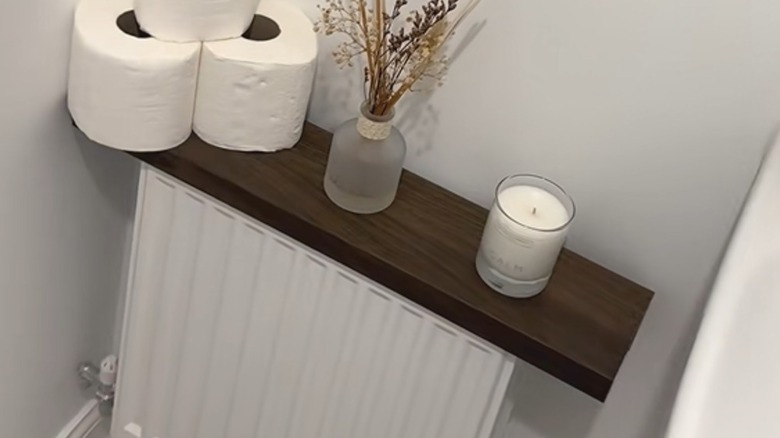
Temporarily overhaul a radiator to give it purpose during the summer. The picture ledge fits overtop standard radiators, and it has a lip that holds it in place. Before starting this DIY, ensure your radiator is completely turned off by turning the dial to zero or twisting the valve clockwise until it's tight. You may need a pair of pliers to fully tighten the valve. Remove the shelf and its contents before turning the radiator back on when cold weather returns.
Attach a rotating hook to make an entryway key holder out of this IKEA ledge
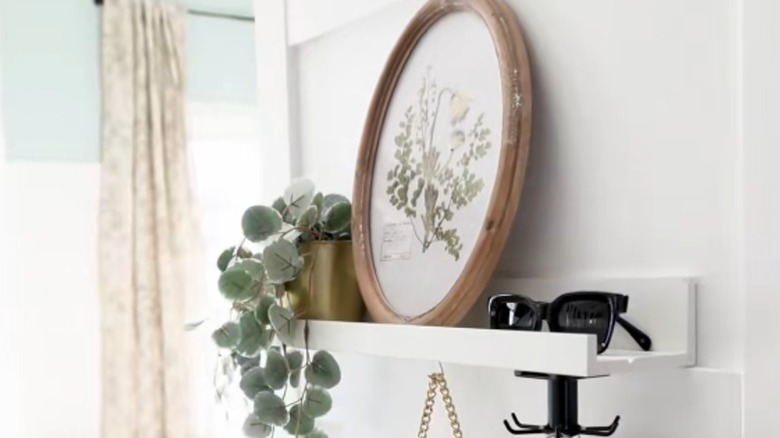
Give the picture ledge more purpose by adding functional accessories. Hang the ledge beside an entryway and attach a Jetec Multi-purpose Hanging Utensil Holder Hook on the underside. The product comes with an adhesive sticker, but the manufacturer warns that the hooks shouldn't hold heavy items. Given this, we recommend screwing it in, especially if planning to hang bulky keyrings. Enhance the ledge's overall look with artificial plants, picture frames, or a catch-all tray to hold other everyday items, like sunglasses and wallets.
Stagger picture ledges to make an in-drawer spice rack
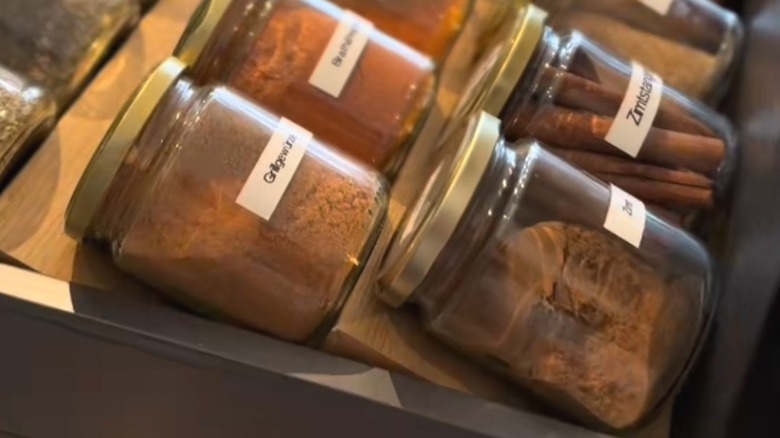
Convert a shallow kitchen drawer into a stylish and convenient spice drawer. Purchase three IKEA ledges and turn them over. Start with the backmost ledge in the back, and angle each one slightly over the other. Each shelf holds about eight small spice jars. Decant the spices into identical jars to improve the look and maintain organization. The 24-pack of Kivy Spice Jars With Labels comes with the exact amount of bottles needed to fill the ledges, and they are small enough to neatly tuck into each row.
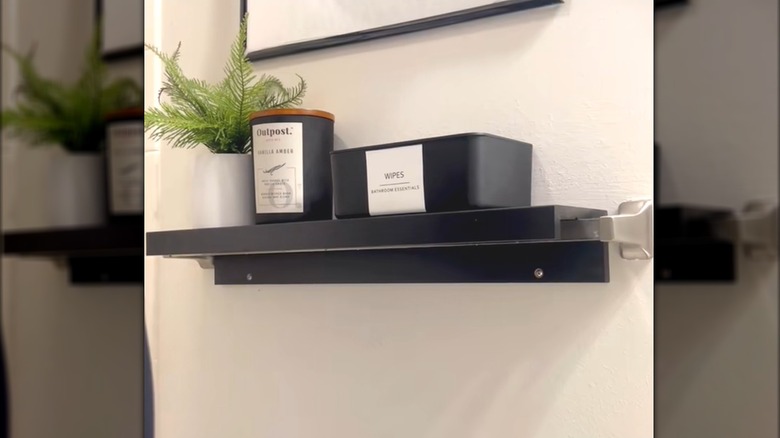
Create hidden wall storage with two IKEA ledges
Turning the picture ledge over already introduces more storage space, but what if homeowners could also have hidden inside storage? Connect two MOSSLANDA products horizontally with a two-pack of BAMI-LEE House Lift Off Solid Brass Hinges. Screw them into the wall to create a bulky, modern shelf with a hidden inner compartment. This is a great spot to store items you want within easy reach without interrupting an interior design, such as keys, earbuds, and other knick-knacks.
Add paneling between IKEA MOSSLANDA shelves to create chic wall storage
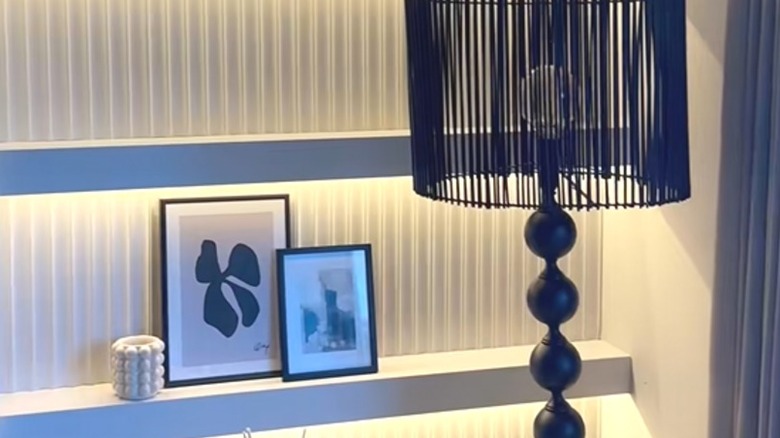
Completely revamp the picture ledges into a gorgeous paneled wall. The influencer behind this idea, @east_shore_home, used Orac Decor WX211 3D Flute Wall Panels, and you may need to buy more than one set depending on how large the shelf intends to be. If the Orac brand is out of budget, emulate the look with ReWallpaper Faux Beadboard Wallpaper Peel and Stick. Finish the look by installing Pandery COB LED Strip Lights, or another trimmable strip light, along the top and bottom of each shelf to create an ambient glow.