Swap Your Bulky Headboard For This Chic IKEA BILLY Bookcase Hack
We may receive a commission on purchases made from links.
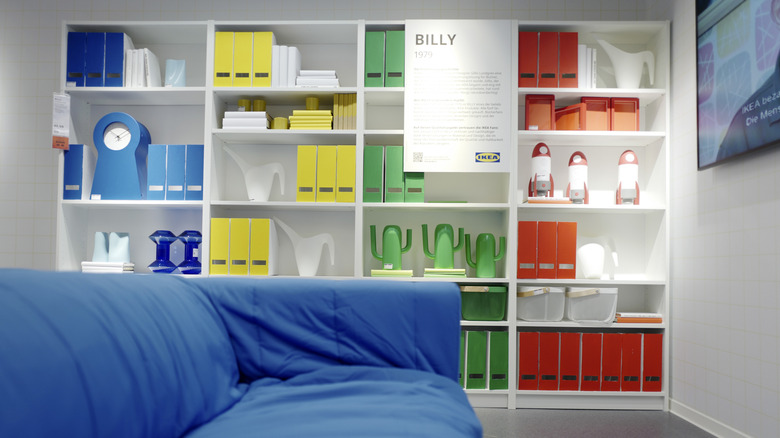
Nothing looks more inviting and elevated in a bedroom than a gorgeous, unique upholstered headboard that adds a layer of softness, texture, color, and sometimes pattern. Luckily, this cozy, luxe upgrade doesn't have to break the bank to make the space feel like a million bucks. Ashley Poskin (@ashleyposkin) shared via Apartment Therapy's (@apartmenttherapy) TikTok how she repurposed an old IKEA BILLY bookcase into a custom arched panel headboard by disassembling and upholstering the panels. You could use a similar existing BILLY bookcase that's seen better days, or purchase the short, wide BILLY for only $49.99.
To prep for this DIY, disassemble an existing BILLY bookcase or simply remove the pieces of a new BILLY from the box, giving you up to six 11-inch-wide panels to work with. A twin bed is 38 inches wide, so you'll need 3-4 panels, depending on whether you prefer your headboard to be slightly shorter or longer than the mattress width. A 54-inch full bed needs five panels, whereas a 60-inch queen requires 5-6 panels. Similarly, since a 76-inch king (or 72-inch California king) needs 7 panels, you'll need to use the taller wide $79.99 BILLY bookcase with additional shelves.
Keep in mind that if you're wall-mounting the headboard, any panels that extend beyond the mattress will be visible floating off the ground on the sides of the bed, so plan to cover this with nightstands or opt to make your headboard shorter than the mattress. Alternatively, you could make the outermost headboard panels out of the taller side bookshelf pieces to act as longer legs that extend to the ground for a more finished, polished look. With the correct number of panels for your bed size in hand, you're ready to start DIYing your IKEA BILLY bookcase headboard.
Cut an arch at the top of each IKEA BILLY panel, add foam, and upholster
The first step of this IKEA BILLY bookcase hack is to use a jigsaw to round the top of each rectangular panel into an arch. You can freehand it if you feel comfortable, or you can trace the shape onto the panel to follow a template for uniformity. Feel free to get creative here if you prefer to have your headboard a different shape from the one in the TikTok video, such as mostly straight but with slightly rounded corners, shallower arches, alternating wave pattern, etc. When all panels have been cut to your desired shape, trace the outline of each panel on upholstery foam. You'll want to use foam that's around 1-2 inches thick, depending on your comfort and budgetary preferences — thicker foam will be more expensive but provide extra cushioning and comfort. Cut out the shapes and use a spray adhesive to mount the foam on the front of each panel.
Depending on the thickness or sturdiness of the decorative upholstery fabric you've chosen for your project, you will likely want to line the foam-covered panels with a Dacron batting or fabric liner, such as canvas or muslin, first to smooth the upholstery surface and add a layer of durability. Cut a piece of liner several inches larger than each panel shape so that you can wrap it around all of the sides and overlap the back of the panel by at least an inch or two. Use a staple gun every inch along the back side to secure the lining in place, pulling it taut for a neat finish. Repeat the upholstery process using staples to wrap and secure each lined panel with the final decorative fabric.
Mounting your DIY IKEA BILLY upholstered headboard to the wall or bed frame
Though the TikTok tutorial essentially ends here, you'll still need to actually install your headboard. The DIYer appears to mount each panel to the wall individually. For this method, you could use a pair of appropriately-sized D-rings or interlocking flush mount brackets, like these on Amazon, to hang each panel on the wall, beginning at the middle, at your desired height. However, with this this approach, it could be challenging to get each individual piece level and lined up perfectly with the adjacent panels without gaps. You may also have movement and/or noise issues when using the headboard.
Alternatively, you can attach all the pieces together to form one solid headboard before installing for extra stability. Connect each set of panels with a pair of flat mounting brackets on the back side to brace them against each other. Once all panels are secured together to form one unit, mount the headboard at your preferred height with Z clips or a French cleat, like this one on Amazon. You can also DIY a French cleat by bevel cutting two pieces of lumber at opposite angles so they slide together and are braced on the wall. Lastly, depending on the style of bed frame, you may be able to use screws to mount the singular headboard panel directly to the frame brackets, but be aware that you don't have control over the finished height with this installation method, so the headboard may look very short unless you've created longer "legs" on the sides per the suggestion above.
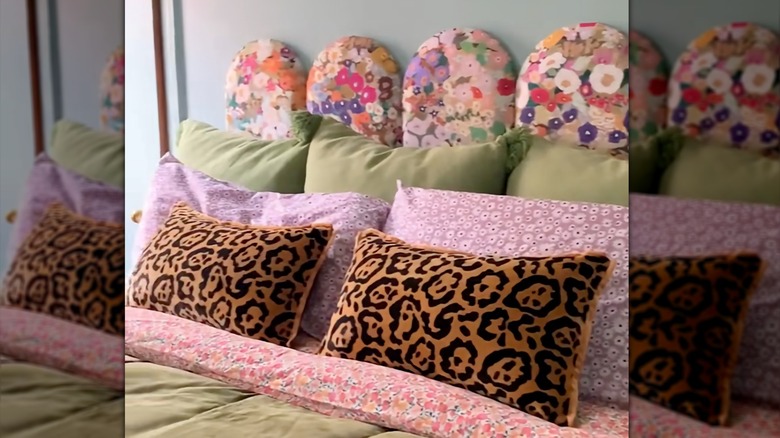
The result of this DIY is a stunning scalloped panel upholstered headboard that looks far more expensive and custom than the $50 IKEA BILLY you used to create it!