How To Remove Tile

We may receive a commission on purchases made from links.
Before you can replace your old tile floor with new flooring or get rid of that out-of-date tile backsplash, you have to know how to remove tile, and this home improvement procedure isn't complicated. That's the good news, especially if you want to DIY the job. During a remodel, any chance you get to save money by avoiding calling a pro is worth grabbing.
The bad news is that it can be a tedious, messy, time-consuming job, and after diving deep into it, you might wish you'd hired out for it. It's worth it to power on, though, because a pro will probably take the same amount of time to do the job as you will. There are some tools and techniques that can make the job go faster, and most DIYers can use these as easily as pros can. If it's a big job, such as removing floor tiles from a concrete subfloor in a large room, you could be saving the cost of days of paid labor.
Whether it's a big job, such as removing old tile from a basement floor, or a small one, like taking down a tile backsplash, it's important to have the right protective gear. You need safety glasses to protect your eyes from the tiny particles that will be flying around the room and a dust mask to avoid breathing them in. You need work gloves to protect your hands from sharp tile shards, and if you're removing floor tile, you absolutely need knee pads.
The Most Common Types of Tile Adhesive
The Most Common Types of Tile Adhesive
Although they are not necessarily the only two types of tile adhesive, thinset mortar and mastic are the two most common, and the type that's holding down your tiles will have a bearing on the difficulty of the job. Mastic tends to be more brittle, and because it grabs better, it's often used for wall tiles, and it's also used for floors. Most mastics are organic resins, and they soften when submerged in water, which is an extremely helpful thing to know.
Thinset consists of Portland cement, sand, and a latex additive, and it doesn't get soft when it's wet. Tiles set in thinset tend to be more difficult to remove because thinset is harder and has more body, and thinset residue is harder to remove from the substrate and tiles than mastic.
An easy way to test whether the adhesive is mastic or thinset is to remove one tile and give the adhesive that's underneath a good whack with a hammer. If it simply breaks and crumbles, it's thinset, but if it shatters, it's mastic, which means it's water-soluble.
Warning
Some mastics manufactured before 1989 are black, and they may contain asbestos. If you suspect asbestos, have a sample of the mastic tested. If it tests positive, you should hire an asbestos abatement contractor to remove the tile. It isn't safe to do it yourself.
Things Needed
-
Safety glasses
-
Work gloves
-
Chisel
-
Utility knife
-
Hammer
-
Mop
-
Dustpan and broom
How to Remove Tile

How to Remove Tile
This step-by-step guide for removing ceramic tile from floors and walls works when the tile is attached to a hard surface, such as a concrete or plywood subfloor or a cement board underlayment. If you have to remove ceramic tile from drywall, it may be easier to cut out the drywall to which the tile is attached and replace it with new drywall. It's practically impossible to avoid damaging drywall when you remove tile, so it usually has to be replaced anyway.
1. Get Ready
If you're going to be removing tile from a wall, spread plastic sheeting on the floor around the wall to catch debris and make cleanup easier. Assemble your tools and protective safety gear, including safety glasses, work gloves, and a dust mask. Get some knee pads if you're removing floor tile, and if you expect to use power tools, a set of earmuffs is also recommended. Purchase a box of heavy-duty contractor's trash bags. You'll need them.
2. Remove the First Tile
Look for a tile that's loose, broken, or otherwise easy to remove. Tap a chisel underneath it and pry it up. When removing a backsplash or something similar, choose a tile near the center of the top row, as it's usually easy to pry off after you've cut through any caulk or paint on the outer edge with a utility knife.
If you can't find an easy-to-remove tile, you can choose any tile, but you have to remove the grout from around it first so you can get the chisel underneath it. Try breaking up the grout with a hammer and chisel. You can also use a grout saw or use power tools to cut through it, such as a rotary tool with a grinder accessory or an oscillating tool.
Tip
A chisel with a sharp edge works best. It's worth it to just go ahead and repurpose one of your wood chisels into a utility tool.
Once the grout is gone, tap the chisel underneath the tile, holding it the lowest possible angle. If you're lucky, the tile will pop right up, but if it breaks, pry up the pieces. Sometimes, when you're removing floor tile set in thinset, you just have to go ahead and break the tile into pieces using a hammer and cold chisel and pry up the pieces individually.
3. Remove the Rest of the Tiles
After creating space for your prying tool by removing one tile, you can go ahead and pry up the rest of the tiles. This may be more or less difficult depending on the adhesive. If the tiles are embedded in mortar, you might find it more efficient to do the entire job with a cold chisel, hammer, and pry bar, but if mastic is the adhesive, tapping an ordinary chisel or even a stiff 4-inch paint scraper with a hammer may be all that's needed.
If you're planning to reuse the tiles, remove the grout around each one before prying it up and then stack the tiles safely out of the way. If you aren't going to reuse the tiles, don't worry about the grout and have trash bags ready for fast disposal of broken tiles.
Tip
The best way to remove grout depends on the condition of the grout and the width of the grout lines. Old grout is sometimes so brittle that you can break it up and remove it with a chisel or a handheld grout saw. To remove hard grout from wide gaps, an oscillating tool with a grout-removal attachment works best. Use a rotary tool with a grinding accessory for narrow grout lines.
4. Scrape Off the Adhesive
Once the tiles are gone, you have to remove adhesive residue, but if the adhesive was mastic, you'll have an easier time cleaning it than you will if it was mortar. Get the mastic wet by spraying it down with water or, if it's on the floor, by mopping with a wet mop. Let the mastic soften and then scrape it off with a 4-inch scraper or, if it's on the floor, a floor scraper.
It isn't as easy to remove thinset mortar, and you may have to resign yourself to chipping away at it with a cold chisel and hammer or an oscillating tool and then scraping it with a scraper. Keep the tool you use at a low angle to minimize damage to the underlayment.
5. Clean Up
Remove all the dust and residue by vacuuming with a shop vac or sweeping it into a dustpan with a broom. If you're removing floor tile in preparation for new flooring and you need a flat surface, use an orbital sander and 80-grit or coarser sanding disks to sand down any small bits of adhesive that remain. Then, vacuum again.
How to Remove Mortar From Tile
How to Remove Mortar From Tile
Because it's water soluble, mastic is much easier to remove from ceramic tile than thinset mortar. In most cases, an easy method for how to remove tile adhesive is to simply immerse the tiles in water for a couple hours and then scrape the softened adhesive right off. If the tiles were set in mortar, you may be able to find a tile adhesive remover that softens it if it has a high enough latex content, but because it's a cement-based product, that probably won't work.
That means you have to physically remove it by scraping and sanding. If you need to break up chunks, use a 4-inch scraper rather than a chisel to distribute the force over a wider area and avoid cracking the tile. When most of the large pieces are gone, you should be able to remove the rest with a sander.
How to Remove Tile Floor
How to Remove Tile Floor
If you're trying to remove a ceramic tile floor set in mastic, scraping away the grout and dousing the entire floor in water should loosen the tiles enough to make them easy to pry off, and you should be able to save the tiles. If the floor is set in a thick mortar bed on a concrete slab, however, you can forget about saving the tiles. You'll probably have to chisel through the bed to the subfloor and then use a floor scraper, hammer, and chisel to pry up the mortar along with the tile. This procedure is bound to result in broken tiles.
If the tile is set on plywood underlayment or cement board that is glued or mortared to the subfloor, you can save yourself a lot of effort by taking up the entire subfloor, tile and all. To do this, pry up one row of tiles from the length and width of the floor. These rows should intersect. At the point of intersection, plunge a reciprocating saw through the subfloor. Then, holding the saw at a shallow angle so as to avoid cutting through the joists, cut through the subfloor along each row. When you're finished, work a pry bar underneath the subfloor and pry it up.
How to Remove Tile From Wall

How to Remove Tile From Wall
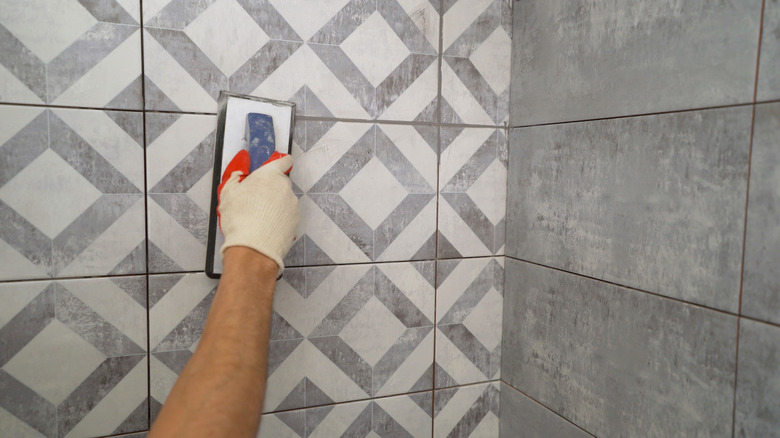
Wall tiles usually aren't as difficult to remove as floor tiles, especially if they are set in mastic. They usually pop off easily when you slip a chisel or scraper underneath them and tap lightly. They often fall unexpectedly, so it's a good idea to put something soft underneath the area where you're working to catch them.
Once the tiles are gone, you may have to repair the wall to prepare for new tile, a different wall covering, or paint. Scrape off the adhesive, wetting it first if necessary and using a scraper or putty knife. If the substrate is drywall, patch holes with patching compound, and if you're going to paint or hang wallpaper, flatten the wall by skim coating the entire area with two or three coats of joint compound.
How to Remove Tile Backsplash
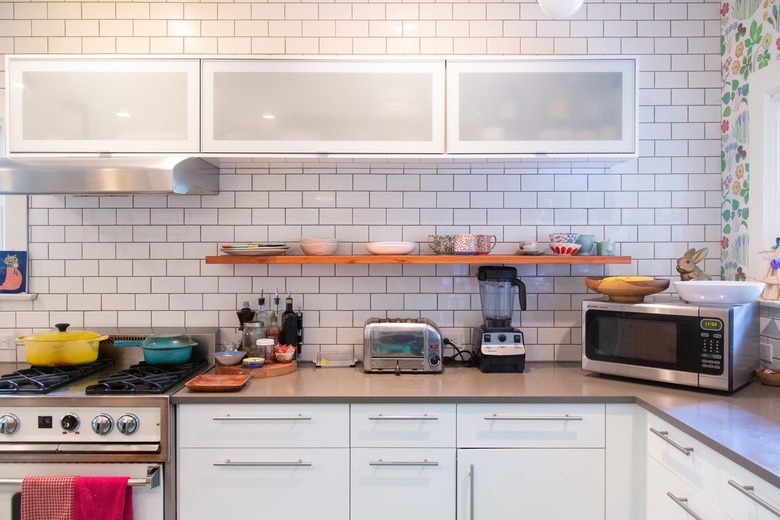
How to Remove Tile Backsplash
A backsplash is often stuck on drywall, and because it covers only part of the wall, you'll want to preserve the drywall to avoid having to redo the entire wall. Remove all trim from around the backsplash and cut through any caulk around the perimeter. Be extra careful as you pry off the tiles. No matter how carefully you work, you'll probably pull off drywall paper, and when you remove the adhesive, you might make a few holes. You can repair most damage with patching compound, drywall joint compound, and drywall tape.